(Continued) |
|
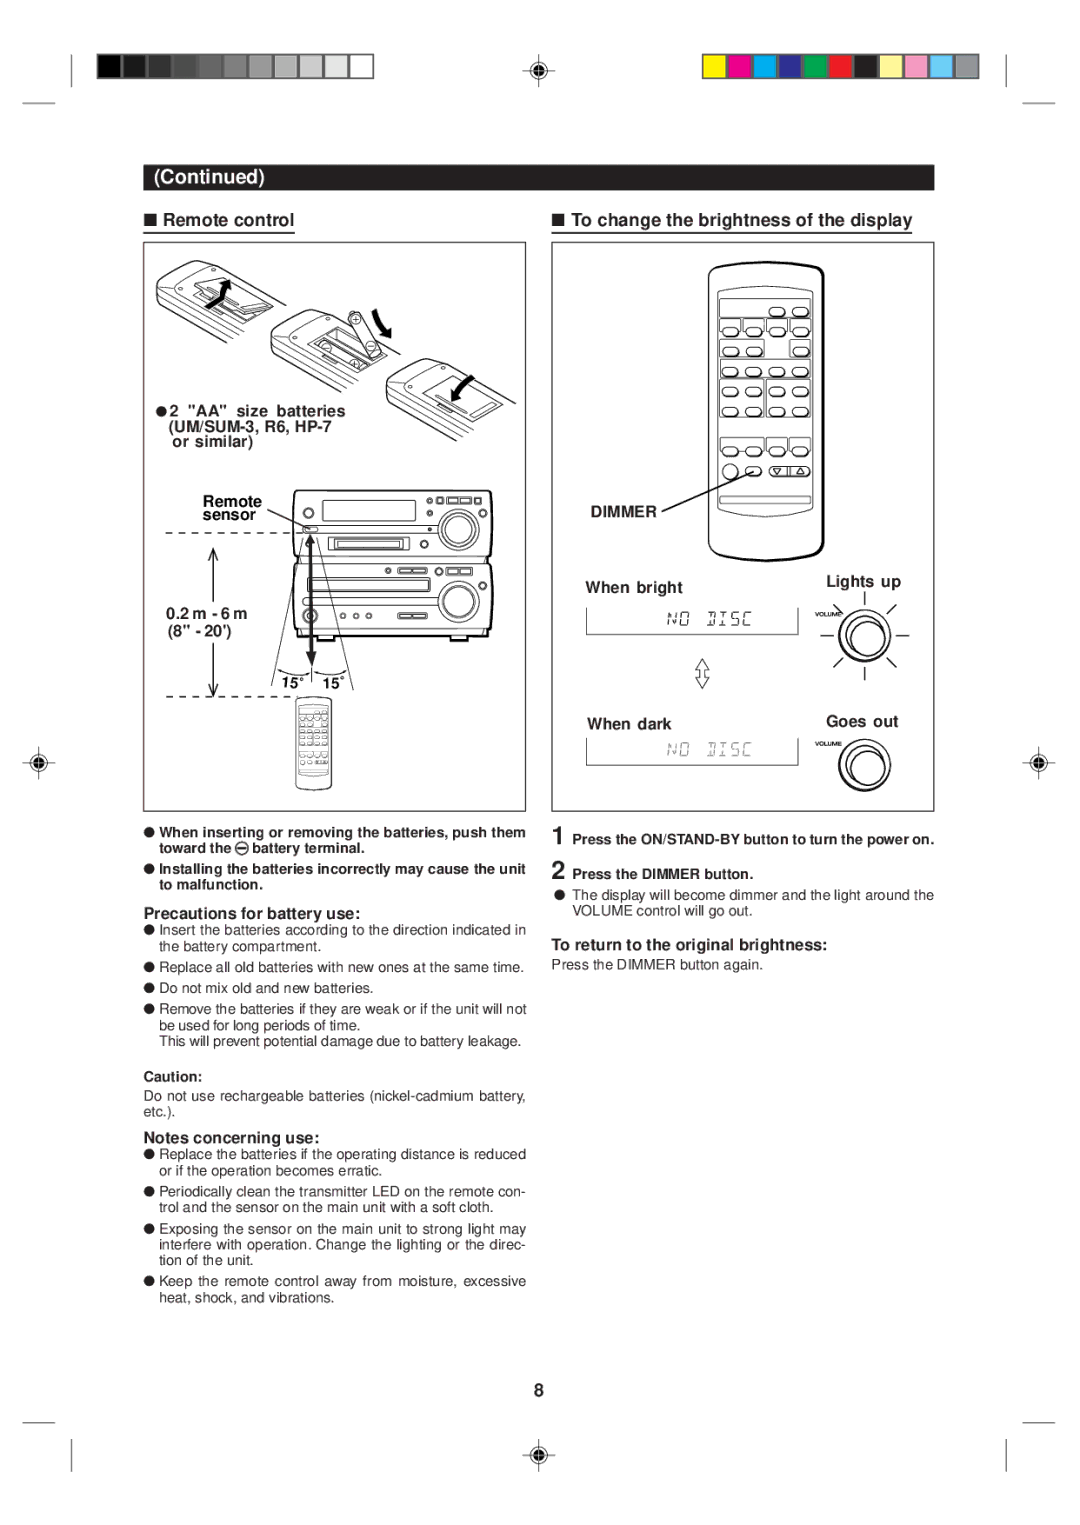
■ Remote control |
|
● 2 "AA" size batteries | |
or similar) |
|
Remote |
|
sensor |
|
0.2 m - 6 m |
|
(8" - 20') |
|
15 | 15 |
●When inserting or removing the batteries, push them
toward the | Ïbattery terminal. |
●Installing the batteries incorrectly may cause the unit to malfunction.
Precautions for battery use:
●Insert the batteries according to the direction indicated in the battery compartment.
●Replace all old batteries with new ones at the same time.
●Do not mix old and new batteries.
●Remove the batteries if they are weak or if the unit will not be used for long periods of time.
This will prevent potential damage due to battery leakage.
Caution:
Do not use rechargeable batteries
Notes concerning use:
● Replace the batteries if the operating distance is reduced or if the operation becomes erratic.
● Periodically clean the transmitter LED on the remote con- trol and the sensor on the main unit with a soft cloth.
● Exposing the sensor on the main unit to strong light may interfere with operation. Change the lighting or the direc- tion of the unit.
● Keep the remote control away from moisture, excessive heat, shock, and vibrations.
■To change the brightness of the display
DIMMER |
|
When bright | Lights up |
|
| When dark |
| Goes out |
|
|
|
|
|
|
|
|
1 Press the
2 Press the DIMMER button.
●The display will become dimmer and the light around the VOLUME control will go out.
To return to the original brightness:
Press the DIMMER button again.
8