Image Projection
Basic Procedure
Connect the required external equipment to the pro- jector before carrying out the following procedures.
 Info
Info
•The language preset at the factory is English. If you want to change the
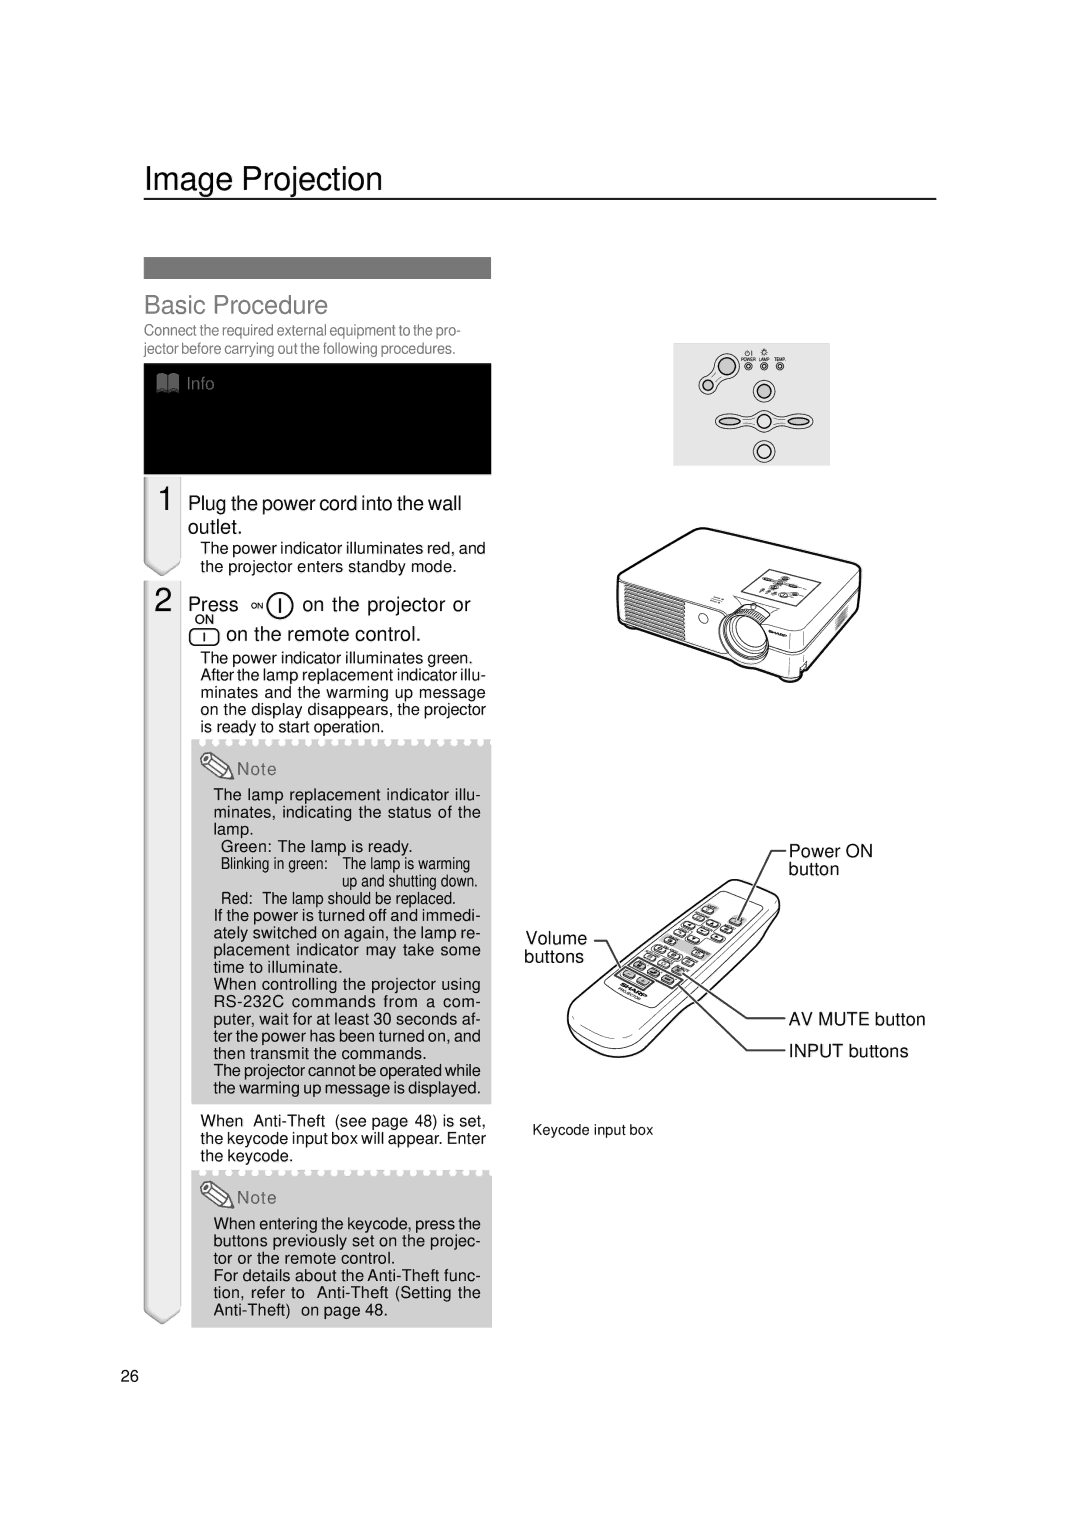
1 Plug the power cord into the wall outlet.
•The power indicator illuminates red, and the projector enters standby mode.
2 Press 
 on the projector or on the remote control.
•The power indicator illuminates green. After the lamp replacement indicator illu- minates and the warming up message on the display disappears, the projector is ready to start operation.
 Note
Note
•The lamp replacement indicator illu- minates, indicating the status of the lamp.
Green: The lamp is ready.
Blinking in green: The lamp is warming
up and shutting down.
Red: The lamp should be replaced.
•If the power is turned off and immedi- ately switched on again, the lamp re- placement indicator may take some time to illuminate.
•When controlling the projector using
•The projector cannot be operated while the warming up message is displayed.
•When
 Note
Note
•When entering the keycode, press the buttons previously set on the projec- tor or the remote control.
•For details about the
26
Lamp
Power replacement indicator indicator
Power ON button
Power OFF
button
INPUT button
 Volume buttons
▼Warming up message
Power ON button
Volume buttons
 AV MUTE button
INPUT buttons
▼Keycode input box
A10X_A10S#E_Print#p26_31.p65 | 26 | 03.2.4, 2:04 PM |