
R-430CS specifications
The Sharp R-430CS is a compact and efficient microwave oven designed for those who seek convenience without sacrificing performance. This model stands out in the crowded microwave market due to its user-friendly features, innovative technologies, and reliable build quality.One of the main highlights of the Sharp R-430CS is its 1.2 cubic feet capacity, which offers ample space for a variety of dishes, making it suitable for both small apartments and family kitchens. Despite its compact design, it is capable of accommodating large plates, casserole dishes, and even microwave-safe cookware, enhancing its versatility.
Equipped with a powerful 900 watts of cooking power, the R-430CS ensures quick and even heating of food, allowing users to prepare meals in a fraction of the time it would take using traditional cooking methods. The microwave also features 11 power levels, providing precise control over cooking, reheating, and defrosting tasks. This level of customization allows users to achieve optimal results based on the type of food being prepared.
The microwave is designed with an array of one-touch settings, including options for popcorn, frozen vegetables, pizza, and more. These pre-programmed functions simplify the cooking process, allowing users to achieve perfectly cooked meals with minimal effort. Additionally, the R-430CS includes a convenient timer feature, ensuring that you never overcook your food.
For added convenience, the Sharp R-430CS features a sleek, easy-to-use control panel with a digital display. The intuitive layout allows users to navigate through various settings with ease, making it accessible for individuals of all ages. The door opens wide, providing easy access to the interior, while the removable turntable ensures even cooking by rotating food during the heating process.
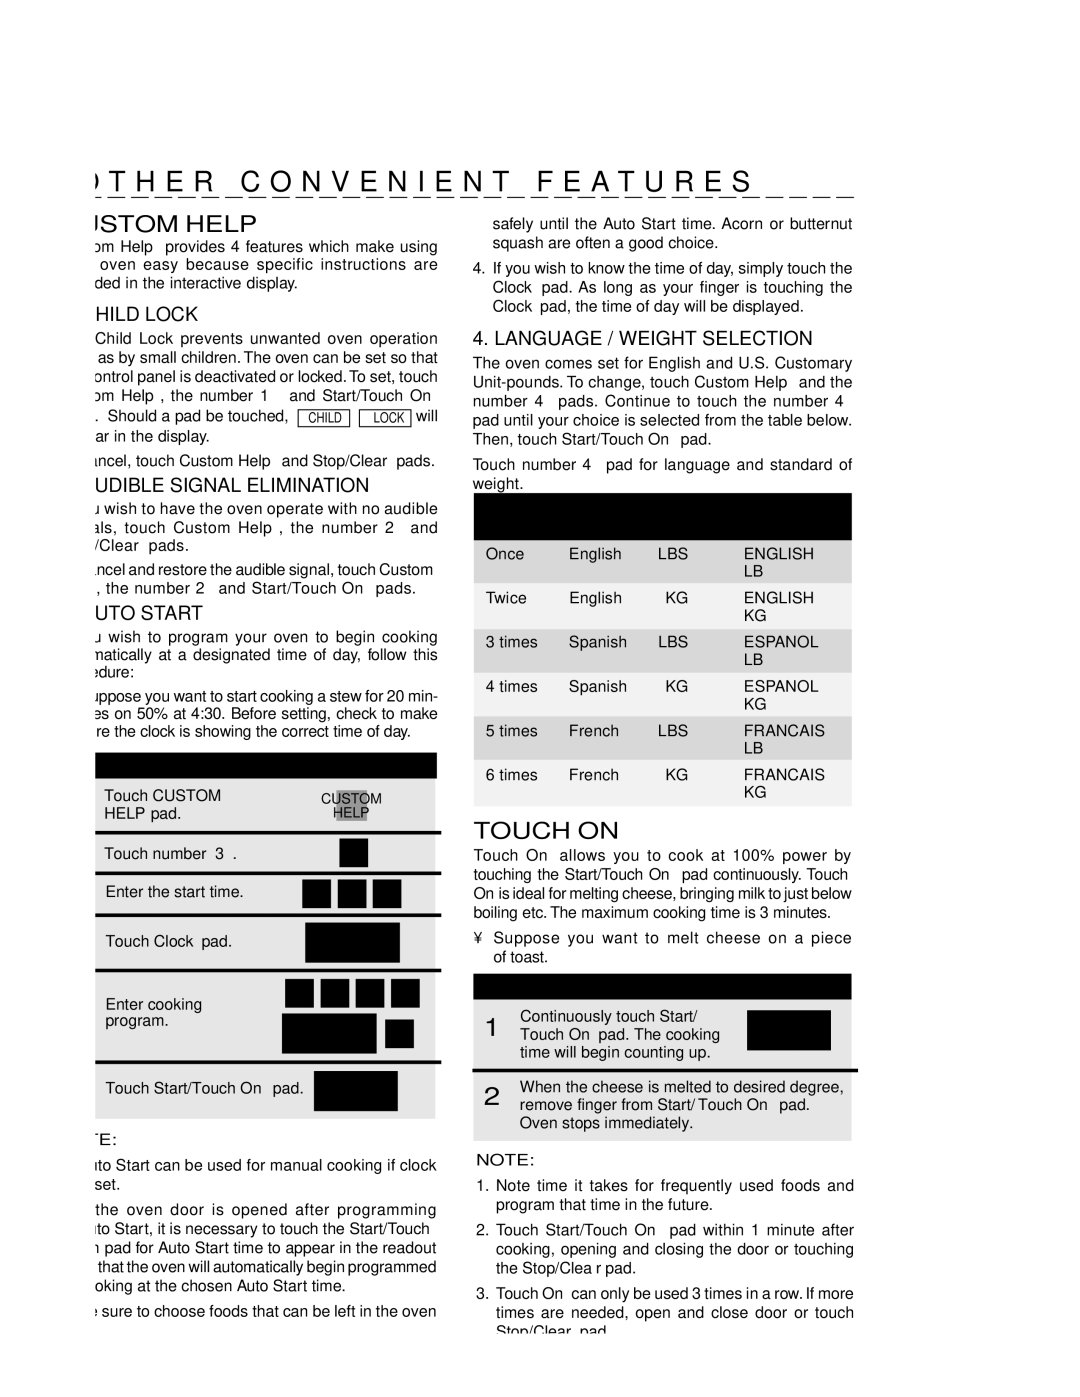
Safety is another key aspect of the Sharp R-430CS. The microwave is equipped with a child safety lock to prevent accidental operation, making it a family-friendly choice.
Overall, the Sharp R-430CS is a reliable and efficient microwave oven that combines modern technology with user-friendly features. Its robust performance, generous capacity, and thoughtful design make it a valuable addition to any kitchen, catering to the needs of busy households and culinary enthusiasts alike. Whether reheating leftovers or preparing a quick meal, the R-430CS delivers consistent results, making cooking a hassle-free experience.