Picture Adjustments
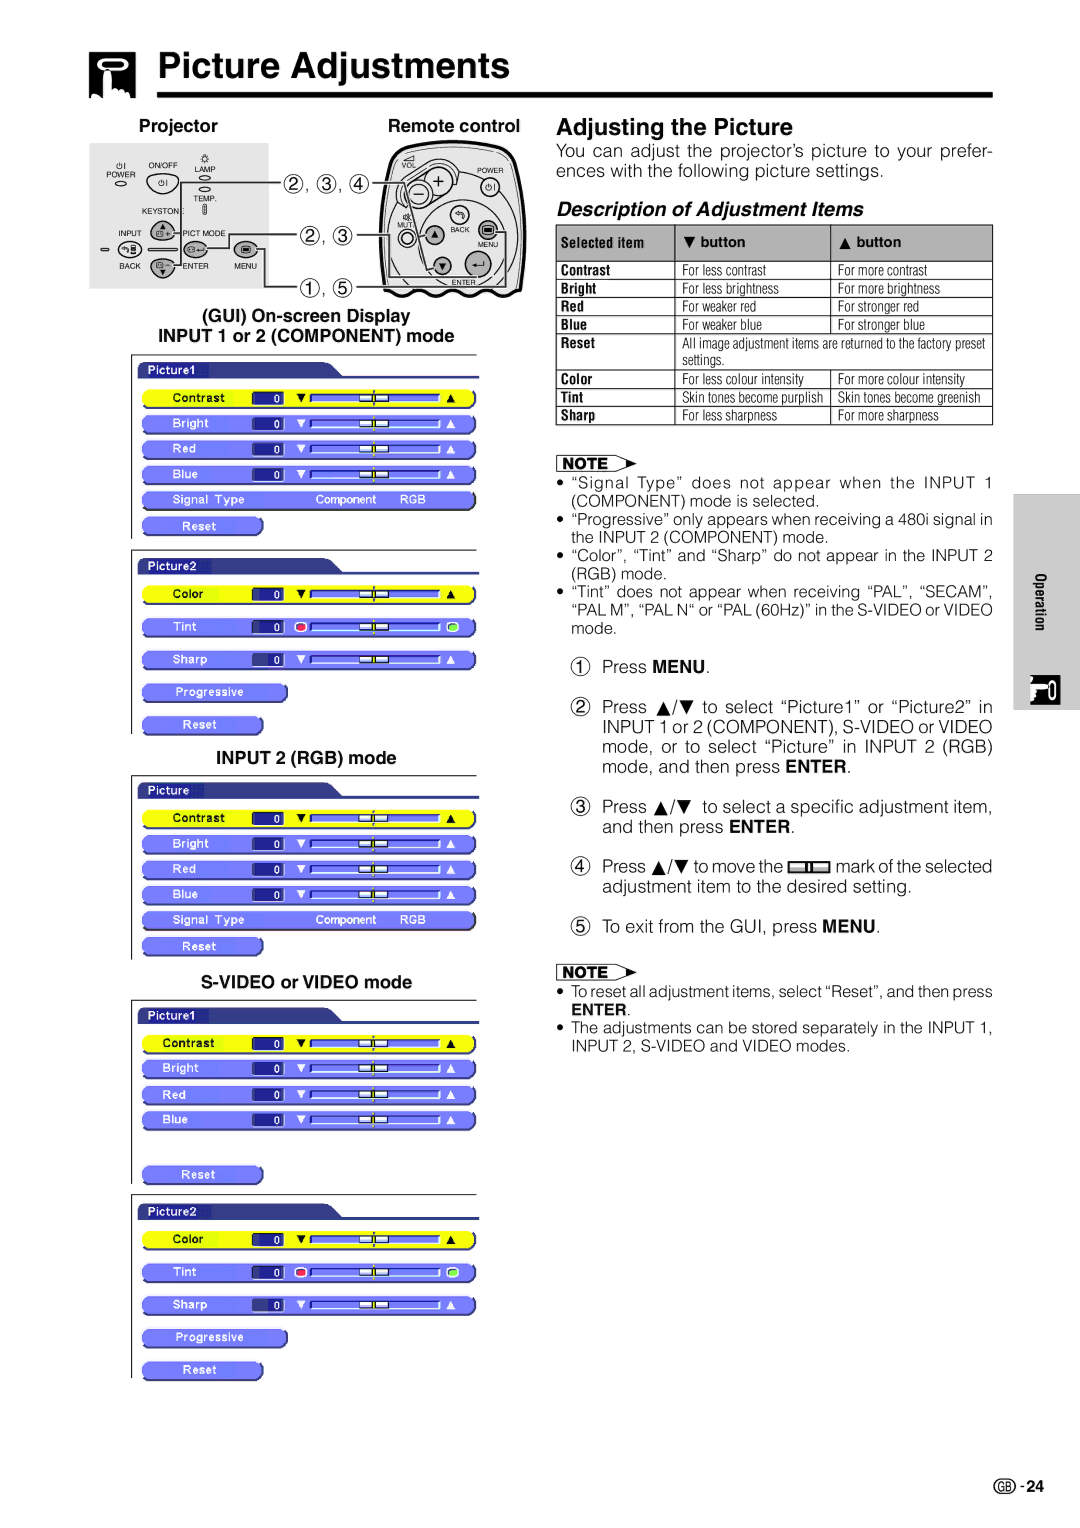
Projector | Remote control | |
ON/OFF | LAMP | VOL |
POWER | POWER | |
| 2, 3, 4 | |
|
| |
| TEMP. |
|
| |
| KEYSTONE |
|
| |
|
| 2, 3 | MUTE | |
INPUT | PICT MODE | BACK | ||
| ||||
|
| |||
|
|
| MENU | |
BACK | ENTER | MENU |
| |
|
| 1, 5 | ENTER |
(GUI)
INPUT 1 or 2 (COMPONENT) mode
INPUT 2 (RGB) mode
Adjusting the Picture
You can adjust the projector’s picture to your prefer- ences with the following picture settings.
Description of Adjustment Items
Selected item | ƒ button | ∂ button |
|
|
|
Contrast | For less contrast | For more contrast |
Bright | For less brightness | For more brightness |
Red | For weaker red | For stronger red |
Blue | For weaker blue | For stronger blue |
Reset | All image adjustment items are returned to the factory preset | |
| settings. |
|
Color | For less colour intensity | For more colour intensity |
Tint | Skin tones become purplish | Skin tones become greenish |
Sharp | For less sharpness | For more sharpness |
•“Signal Type” does not appear when the INPUT 1 (COMPONENT) mode is selected.
•“Progressive” only appears when receiving a 480i signal in the INPUT 2 (COMPONENT) mode.
•“Color”, “Tint” and “Sharp” do not appear in the INPUT 2 (RGB) mode.
•“Tint” does not appear when receiving “PAL”, “SECAM”, “PAL M”, “PAL N“ or “PAL (60Hz)” in the
1Press MENU.
2Press ∂/ƒ to select “Picture1” or “Picture2” in INPUT 1 or 2 (COMPONENT),
3Press ∂/ƒ to select a specific adjustment item, and then press ENTER.
4Press ∂/ƒ to move the ![]() mark of the selected adjustment item to the desired setting.
mark of the selected adjustment item to the desired setting.
5To exit from the GUI, press MENU.
•To reset all adjustment items, select “Reset”, and then press
ENTER.
•The adjustments can be stored separately in the INPUT 1, INPUT 2,
Operation
![]()
![]() 24
24