Setup Connections&
Connecting the Projector
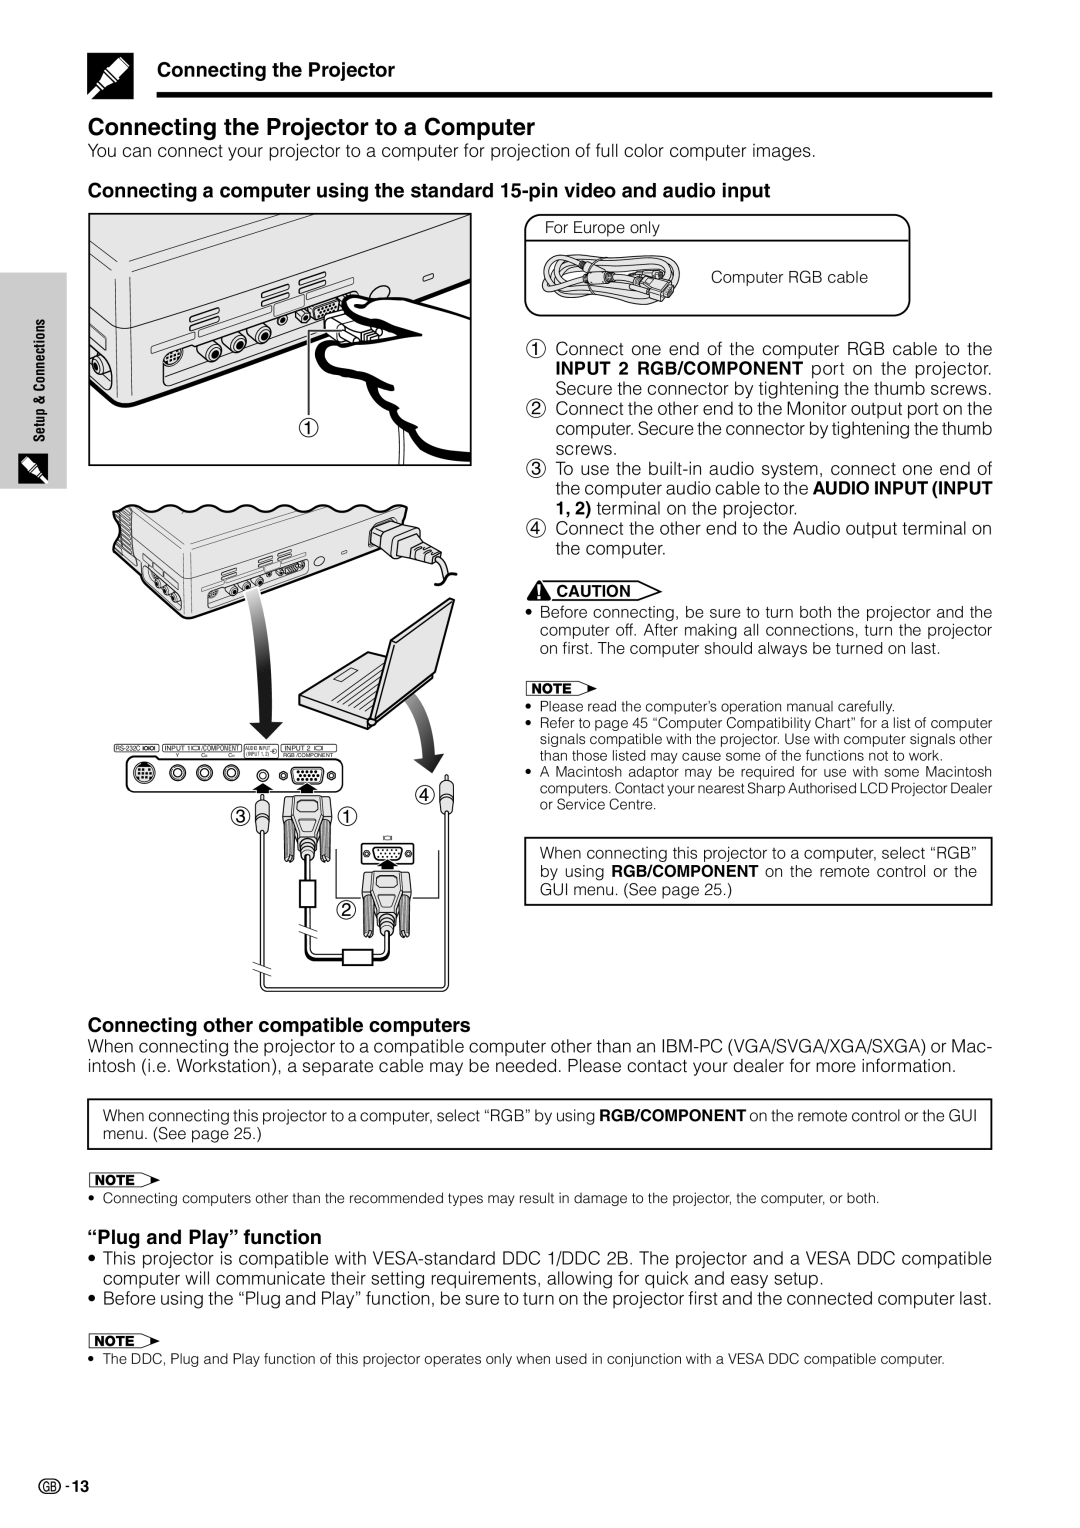
Connecting the Projector to a Computer
You can connect your projector to a computer for projection of full color computer images.
Connecting a computer using the standard
For Europe only
Computer RGB cable
1 Connect one end of the computer RGB cable to the INPUT 2 RGB/COMPONENT port on the projector. Secure the connector by tightening the thumb screws.
2Connect the other end to the Monitor output port on the
computer. Secure the connector by tightening the thumb screws.
3 To use the
4 Connect the other end to the Audio output terminal on the computer.
![]() CAUTION
CAUTION
•Before connecting, be sure to turn both the projector and the computer off. After making all connections, turn the projector on first. The computer should always be turned on last.
•Please read the computer’s operation manual carefully.
|
| • | Refer to page 45 “Computer Compatibility Chart” for a list of computer | |
/COMPONENT AUDIO INPUT | INPUT 2 | signals compatible with the projector. Use with computer signals other | ||
than those listed may cause some of the functions not to work. | ||||
Y | CBCR (INPUT 1, 2) | RGB /COMPONENT | ||
| ||||
|
| • | A Macintosh adaptor may be required for use with some Macintosh | |
|
|
| computers. Contact your nearest Sharp Authorised LCD Projector Dealer | |
|
|
| or Service Centre. |
When connecting this projector to a computer, select “RGB” by using RGB/COMPONENT on the remote control or the GUI menu. (See page 25.)
Connecting other compatible computers
When connecting the projector to a compatible computer other than an
When connecting this projector to a computer, select “RGB” by using RGB/COMPONENT on the remote control or the GUI menu. (See page 25.)
•Connecting computers other than the recommended types may result in damage to the projector, the computer, or both.
“Plug and Play” function
•This projector is compatible with
•Before using the “Plug and Play” function, be sure to turn on the projector first and the connected computer last.
•The DDC, Plug and Play function of this projector operates only when used in conjunction with a VESA DDC compatible computer.
![]()
![]() 13
13