HT5000
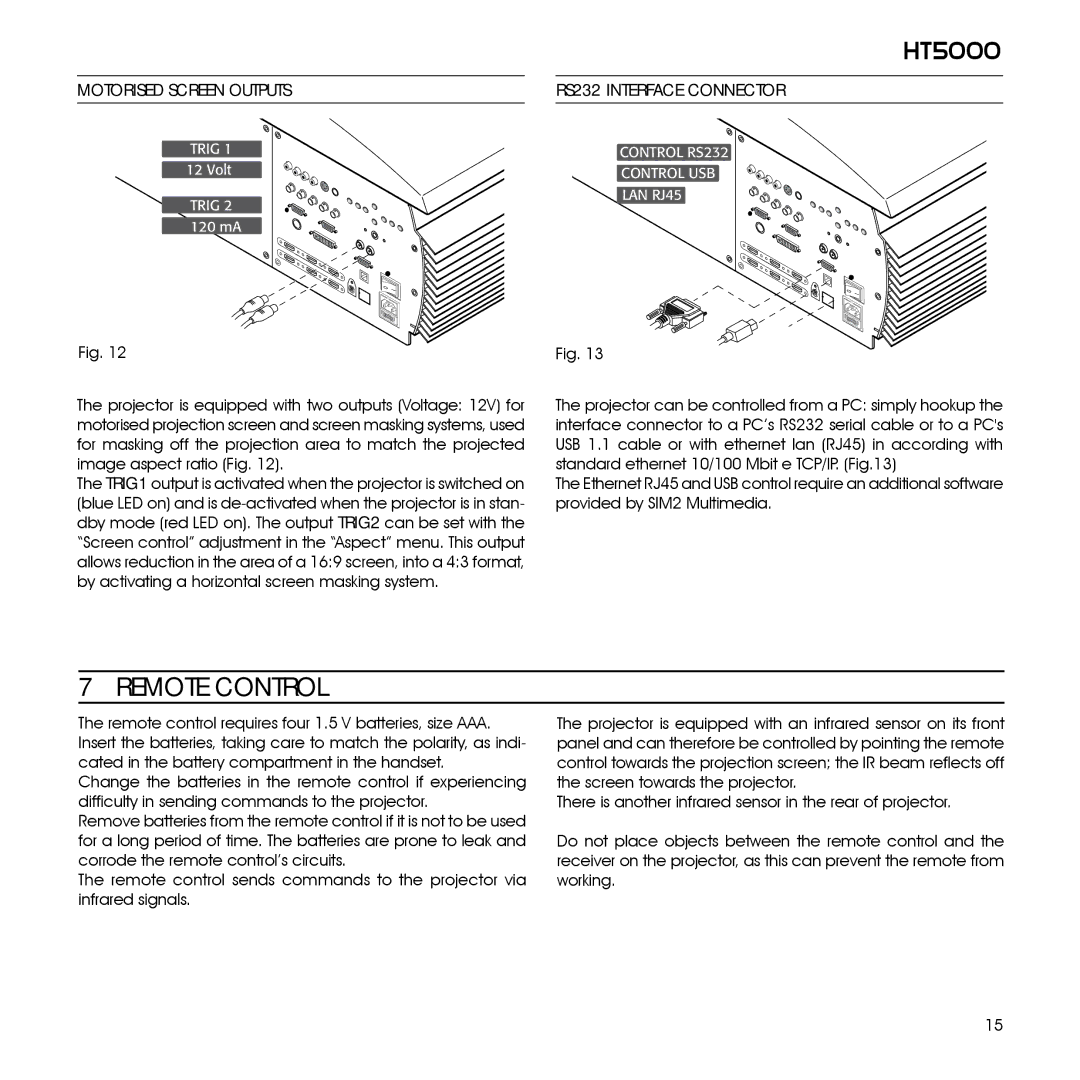
Motorised screen outputs | RS232 interface connector |
TRIG 1 12 Volt
TRIG 2 120 mA
CONTROL RS232
CONTROL USB LAN RJ45
I 0
I 0
Fig. 12 | Fig. 13 |
The projector is equipped with two outputs (Voltage: 12V) for motorised projection screen and screen masking systems, used for masking off the projection area to match the projected image aspect ratio (Fig. 12).
The TRIG1 output is activated when the projector is switched on (blue LED on) and is
The projector can be controlled from a PC: simply hookup the interface connector to a PC’s RS232 serial cable or to a PC's USB 1.1 cable or with ethernet lan (RJ45) in according with standard ethernet 10/100 Mbit e TCP/IP. (Fig.13)
The Ethernet RJ45 and USB control require an additional software provided by SIM2 Multimedia.
7 REMOTE CONTROL
The remote control requires four 1.5 V batteries, size AAA. Insert the batteries, taking care to match the polarity, as indi- cated in the battery compartment in the handset.
Change the batteries in the remote control if experiencing difficulty in sending commands to the projector.
Remove batteries from the remote control if it is not to be used for a long period of time. The batteries are prone to leak and corrode the remote control’s circuits.
The remote control sends commands to the projector via infrared signals.
The projector is equipped with an infrared sensor on its front panel and can therefore be controlled by pointing the remote control towards the projection screen; the IR beam reflects off the screen towards the projector.
There is another infrared sensor in the rear of projector.
Do not place objects between the remote control and the receiver on the projector, as this can prevent the remote from working.
15