Troubleshooting & Repair
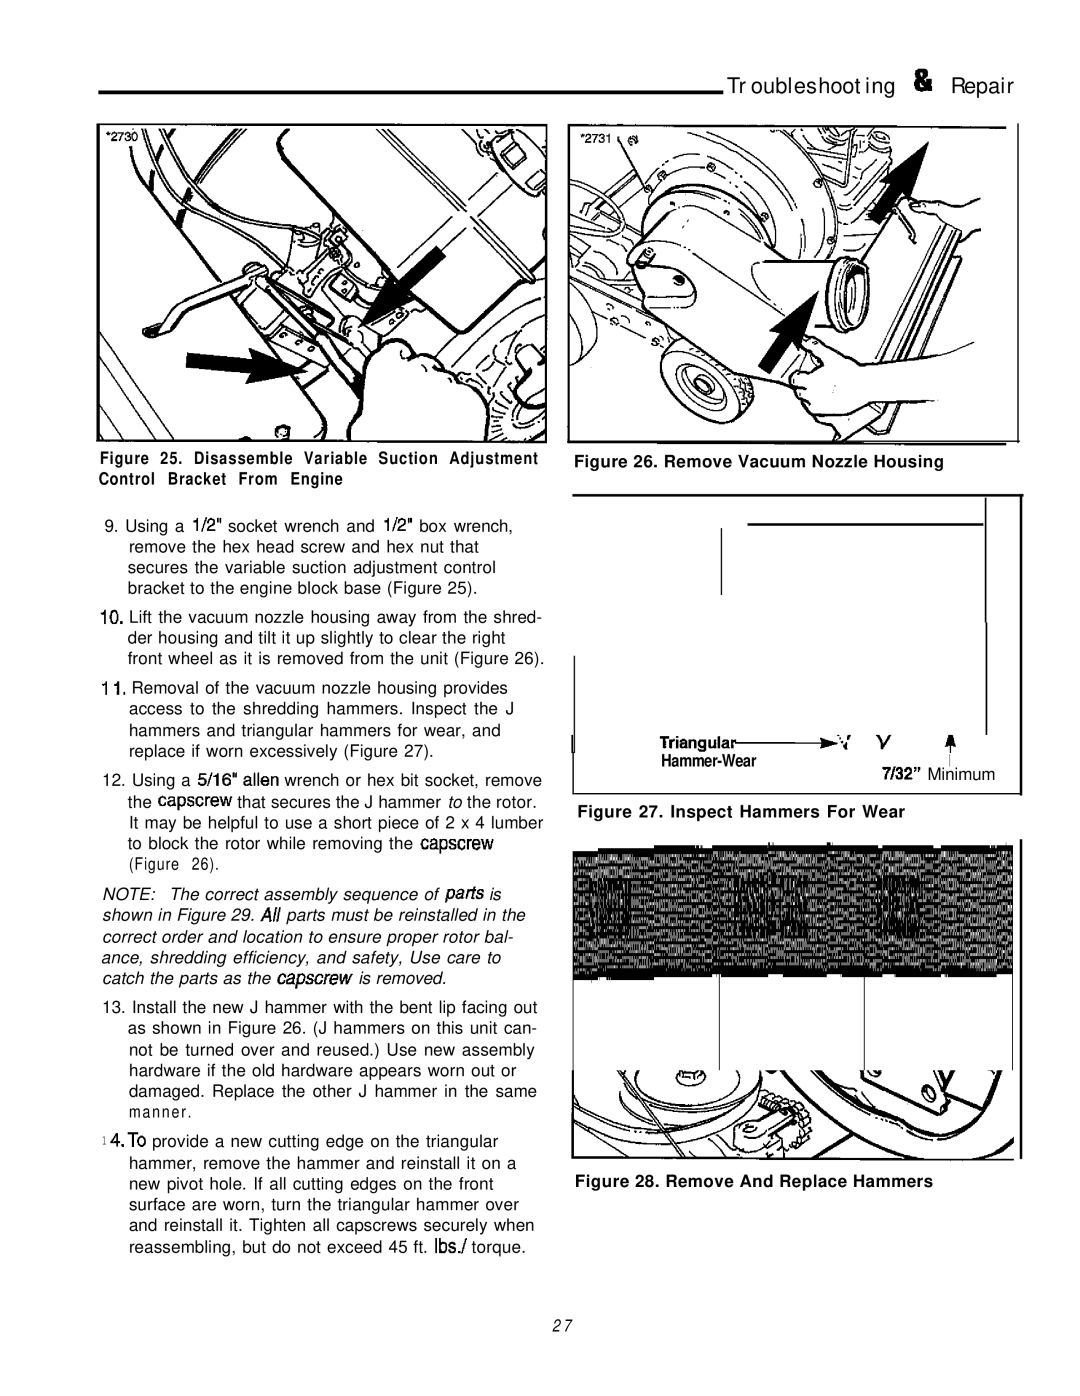
Figure 25. Disassemble Variable Suction Adjustment Figure 26. Remove Vacuum Nozzle Housing Control Bracket From Engine
9.Using a i/2” socket wrench and i/2” box wrench, remove the hex head screw and hex nut that secures the variable suction adjustment control bracket to the engine block base (Figure 25).
10.Lift the vacuum nozzle housing away from the shred- der housing and tilt it up slightly to clear the right front wheel as it is removed from the unit (Figure 26).
1I. Removal of the vacuum nozzle housing provides access to the shredding hammers. Inspect the J hammers and triangular hammers for wear, and replace if worn excessively (Figure 27).
12.Using a 5/16” allen wrench or hex bit socket, remove the capscrew that secures the J hammer to the rotor. It may be helpful to use a short piece of 2 x 4 lumber to block the rotor while removing the capscrew (Figure 26).
NOTE: The correct assembly sequence of pa& is shown in Figure 29. A// parts must be reinstalled in the correct order and location to ensure proper rotor bal- ance, shredding efficiency, and safety, Use care to catch the parts as the capscrew is removed.
13.Install the new J hammer with the bent lip facing out as shown in Figure 26. (J hammers on this unit can- not be turned over and reused.) Use new assembly hardware if the old hardware appears worn out or damaged. Replace the other J hammer in the same manner .
14.To provide a new cutting edge on the triangular hammer, remove the hammer and reinstall it on a new pivot hole. If all cutting edges on the front surface are worn, turn the triangular hammer over and reinstall it. Tighten all capscrews securely when reassembling, but do not exceed 45 ft. Ibs./ torque.
I | |
| X32” Minimum |
Figure 27. Inspect Hammers For Wear
Figure 28. Remove And Replace Hammers
2 7