Troubleshooting & Repair
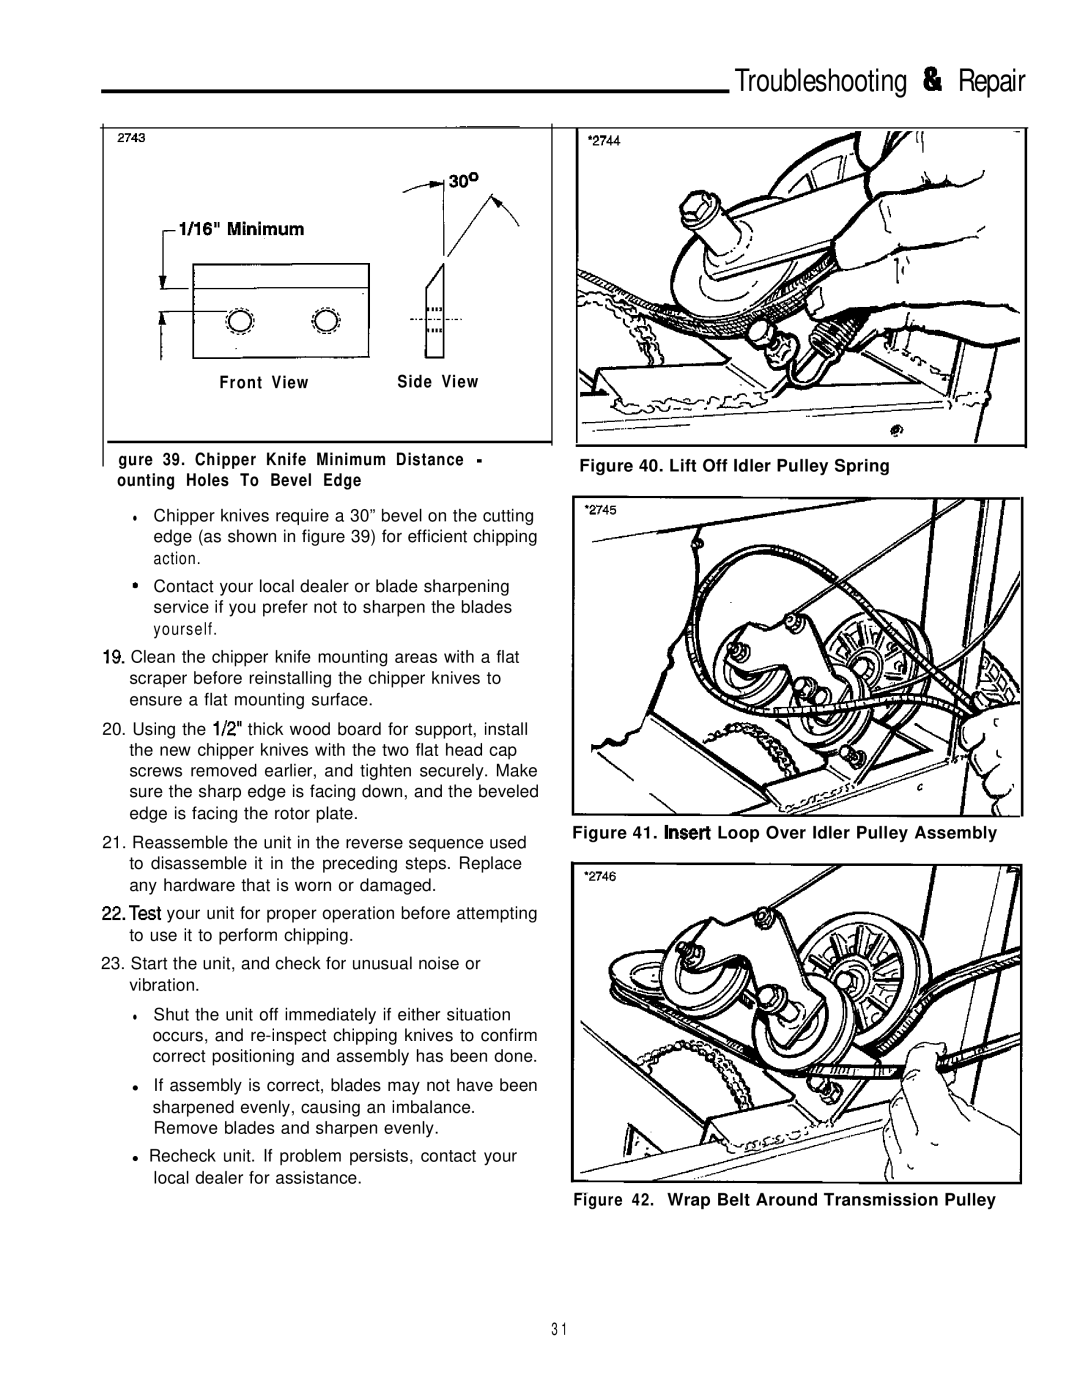
Front View | Side View |
gure 39. Chipper Knife Minimum Distance ![]()
•Chipper knives require a 30” bevel on the cutting edge (as shown in figure 39) for efficient chipping action.
*Contact your local dealer or blade sharpening service if you prefer not to sharpen the blades yourself.
19.Clean the chipper knife mounting areas with a flat scraper before reinstalling the chipper knives to ensure a flat mounting surface.
20.Using the i/2” thick wood board for support, install the new chipper knives with the two flat head cap screws removed earlier, and tighten securely. Make sure the sharp edge is facing down, and the beveled edge is facing the rotor plate.
21.Reassemble the unit in the reverse sequence used to disassemble it in the preceding steps. Replace any hardware that is worn or damaged.
22.Test your unit for proper operation before attempting to use it to perform chipping.
23.Start the unit, and check for unusual noise or vibration.
•Shut the unit off immediately if either situation occurs, and
•If assembly is correct, blades may not have been sharpened evenly, causing an imbalance. Remove blades and sharpen evenly.
•Recheck unit. If problem persists, contact your local dealer for assistance.
Figure 40. Lift Off Idler Pulley Spring
Figure 41. Insert Loop Over Idler Pulley Assembly
Figure 42. Wrap Belt Around Transmission Pulley
3 1