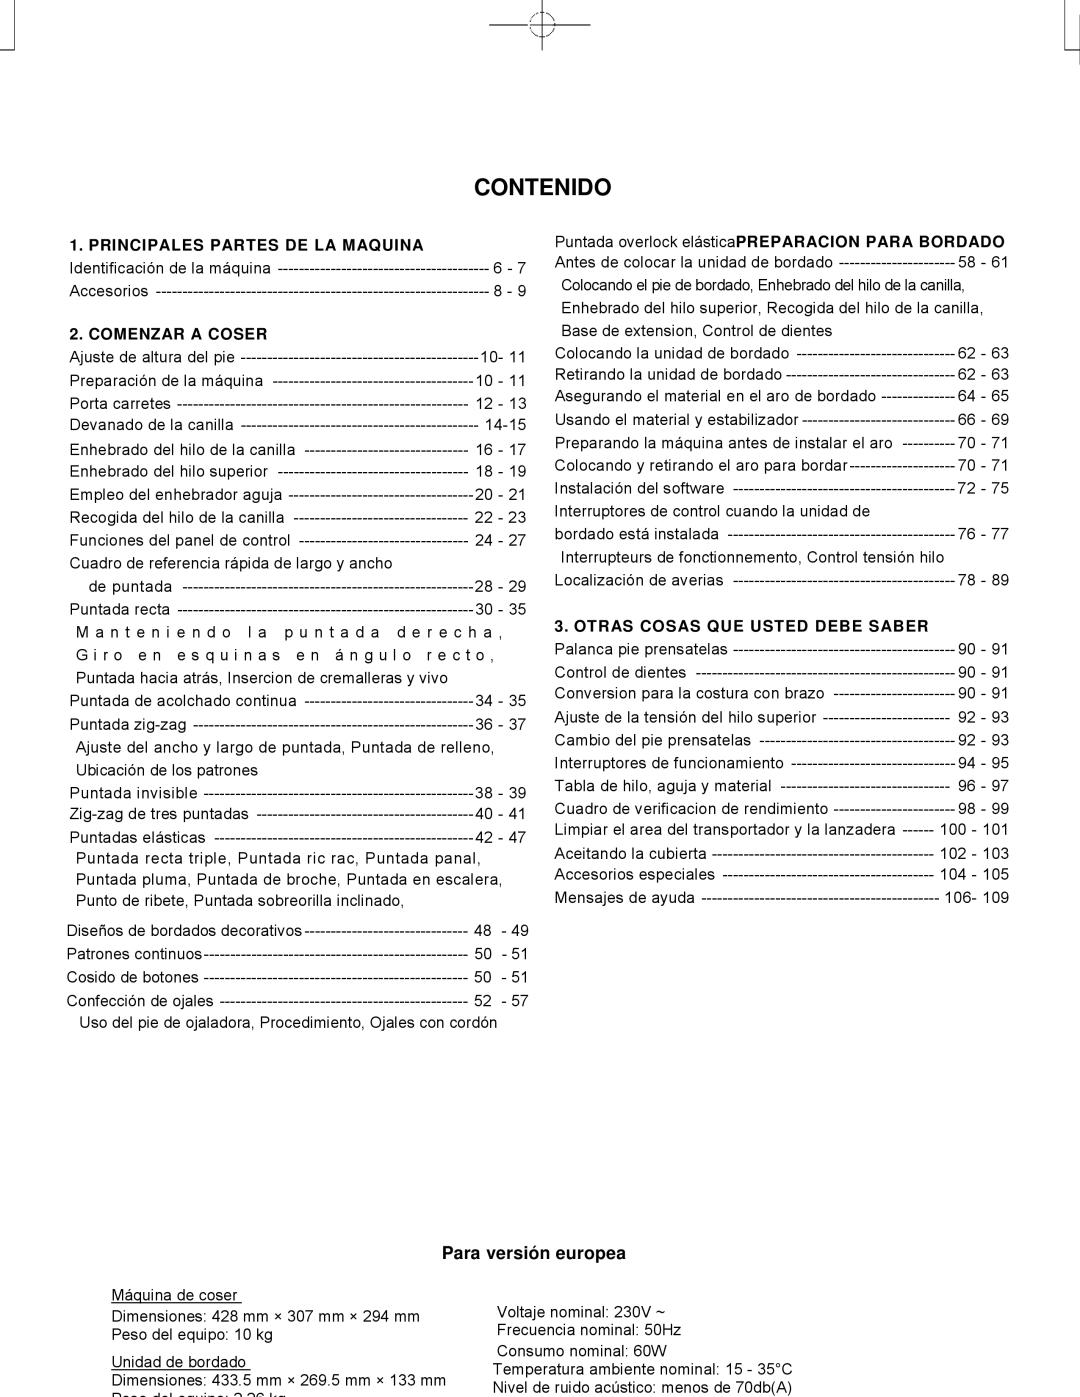
CONTENIDO

1. PRINCIPALES PARTES DE LA MAQUINA


Identificación de la máquina ----------------------------------------

6 - 7

Accesorios ---------------------------------------------------------------

8 - 9

2. COMENZAR A COSER


Ajuste de altura del pie ---------------------------------------------

10- 11

Preparación de la máquina --------------------------------------

10 - 11

Porta carretes -------------------------------------------------------

12 - 13

Devanado de la canilla ---------------------------------------------

14-15

Enhebrado del hilo de la canilla -------------------------------

16 - 17

Enhebrado del hilo superior ------------------------------------

18 - 19

Empleo del enhebrador aguja -----------------------------------

20 - 21

Recogida del hilo de la canilla ---------------------------------

22 - 23

Funciones del panel de control --------------------------------

24 - 27

Cuadro de referencia rápida de largo y ancho


de puntada -------------------------------------------------------

28 - 29

Puntada recta --------------------------------------------------------

30 - 35

M a n t e n i e n d o l a p u n t a d a d e r e c h a , G i r o e n e s q u i n a s e n á n g u l o r e c t o ,

Puntada hacia atrás, Insercion de cremalleras y vivo


Puntada de acolchado continua --------------------------------

34 - 35

Puntada zig-zag -----------------------------------------------------

36 - 37

Ajuste del ancho y largo de puntada, Puntada de relleno,


Ubicación de los patrones


Puntada invisible ---------------------------------------------------

38 - 39

Zig-zag de tres puntadas -----------------------------------------

40 - 41

Puntadas elásticas -------------------------------------------------

42 - 47

Puntada recta triple, Puntada ric rac, Puntada panal,


Puntada pluma, Puntada de broche, Puntada en escalera,

Punto de ribete, Puntada sobreorilla inclinado,


Diseños de bordados decorativos -------------------------------

48

- 49

Patrones continuos--------------------------------------------------

50

- 51

Cosido de botones --------------------------------------------------

50

- 51

Confección de ojales -----------------------------------------------

52

- 57

Uso del pie de ojaladora, Procedimiento, Ojales con cordón

Puntada overlock elásticaPREPARACION PARA BORDADO

Antes de colocar la unidad de bordado ----------------------

58 - 61

Colocando el pie de bordado, Enhebrado del hilo de la canilla, Enhebrado del hilo superior, Recogida del hilo de la canilla,

Base de extension, Control de dientes


Colocando la unidad de bordado ------------------------------

62 - 63

Retirando la unidad de bordado --------------------------------

62 - 63

Asegurando el material en el aro de bordado --------------

64 - 65

Usando el material y estabilizador -----------------------------

66 - 69

Preparando la máquina antes de instalar el aro ----------

70 - 71

Colocando y retirando el aro para bordar --------------------

70 - 71

Instalación del software ------------------------------------------

72 - 75

Interruptores de control cuando la unidad de


bordado está instalada -------------------------------------------

76 - 77

Interrupteurs de fonctionnemento, Control tensión hilo

Localización de averias ------------------------------------------

78 - 89

3. OTRAS COSAS QUE USTED DEBE SABER


Palanca pie prensatelas ------------------------------------------

90 - 91

Control de dientes -------------------------------------------------

90 - 91

Conversion para la costura con brazo -----------------------

90 - 91

Ajuste de la tensión del hilo superior ------------------------

92 - 93

Cambio del pie prensatelas -------------------------------------

92 - 93

Interruptores de funcionamiento -------------------------------

94 - 95

Tabla de hilo, aguja y material --------------------------------

96 - 97

Cuadro de verificacion de rendimiento -----------------------

98 - 99

Limpiar el area del transportador y la lanzadera ------

100 - 101

Aceitando la cubierta ------------------------------------------

102 - 103

Accesorios especiales ----------------------------------------

104 - 105

Mensajes de ayuda ---------------------------------------------

106- 109

Para versión europea

Máquina de coser

Dimensiones: 428 mm × 307 mm × 294 mm

Peso del equipo: 10 kg

Unidad de bordado

Dimensiones: 433.5 mm × 269.5 mm × 133 mm

Peso del equipo: 2 26 kg

Voltaje nominal: 230V ~

Frecuencia nominal: 50Hz

Consumo nominal: 60W

Temperatura ambiente nominal: 15 - 35°C

Nivel de ruido acústico: menos de 70db(A)

Page 8
Image 8
Singer CE-150 Contenido, Principales Partes DE LA Maquina, Comenzar a Coser, Otras Cosas QUE Usted Debe Saber

CE-150 specifications

The Singer CE-150 is a versatile and user-friendly sewing machine that caters to both beginner and experienced sewers. Renowned for its advanced features and ease of use, the CE-150 combines modern technology with classic Singer reliability, making it a popular choice for various sewing projects.

One of the standout features of the Singer CE-150 is its computerized design, which allows users to access a wide array of built-in stitch patterns. With over 150 stitch options, including utility, decorative, and quilting stitches, sewers can easily customize their projects for a professional finish. The machine also features a one-touch stitch selection button, enabling users to switch between stitches with ease.

Another notable characteristic of the CE-150 is its automatic needle threader. This convenient feature simplifies the threading process, allowing even novice sewers to get started quickly without the frustration of manually threading the needle. Additionally, the top drop-in bobbin system enhances user experience by ensuring easy bobbin insertion and monitoring of remaining thread.

The Singer CE-150 also boasts an LCD screen that displays stitch settings and selected options. This user-friendly interface provides clarity and makes it easy to adjust stitch length and width according to specific project requirements. It further allows for quick selection adjustments, ensuring a seamless sewing experience.

Another feature that sets the CE-150 apart is its sewing speed control. With a top speed of 750 stitches per minute, users can tackle large projects efficiently, while a speed limiter enables greater control for intricate tasks. This flexibility is especially beneficial for quilters and those working on detailed projects.

The machine also includes a variety of presser feet, enhancing its versatility for different sewing techniques. The assortment includes feet for zippers, buttonholes, and blind hems, catering to a wide range of creative sewing needs.

Durably constructed, the Singer CE-150 provides stability during operation while being lightweight enough for easy transport between sewing locations. Its compact design fits well in both dedicated sewing spaces and shared environments.

In summary, the Singer CE-150 is a well-rounded sewing machine that pairs advanced technology with practical features. Its diverse stitch options, easy threading, user-friendly interface, and accessory compatibility make it an ideal choice for anyone looking to unleash their creativity through sewing. Perfect for crafting, quilting, and alterations, the CE-150 stands as a testament to Singer's commitment to quality and innovation in the sewing machine market.