![]() SM 2610008289
SM 2610008289
Getting To Know Your
Table Saw
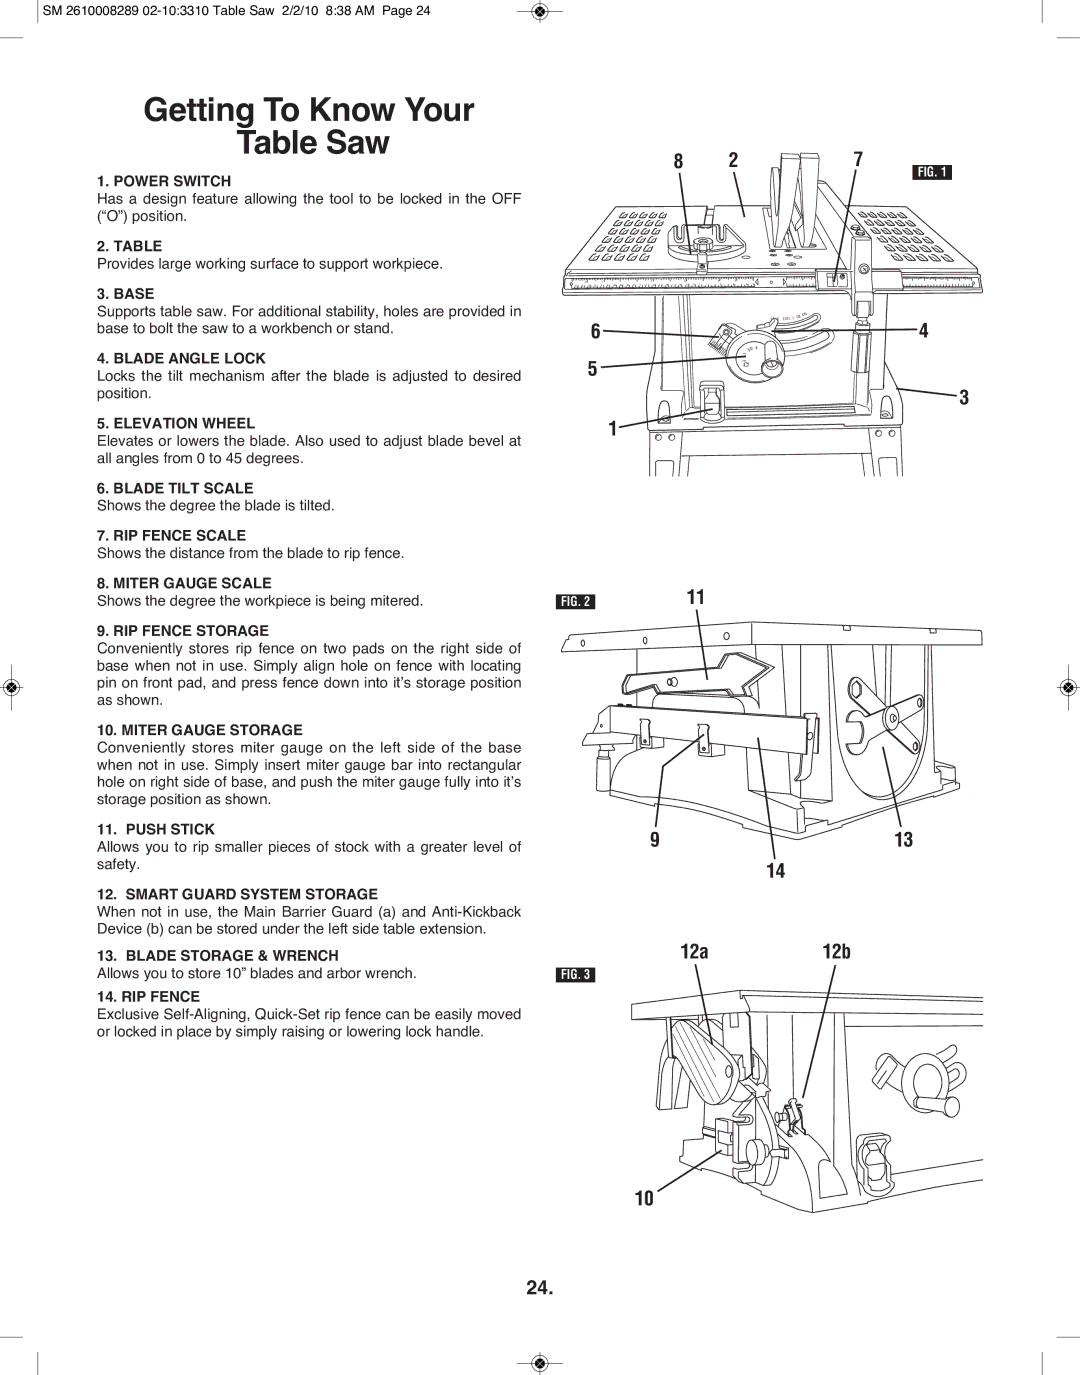
1. POWER SWITCH
Has a design feature allowing the tool to be locked in the OFF (“O”) position.
2. TABLE
Provides large working surface to support workpiece.
3. BASE
Supports table saw. For additional stability, holes are pro vided in base to bolt the saw to a workbench or stand.
4. BLADE ANGLE LOCK
Locks the tilt mechanism after the blade is adjusted to de sired position.
5. ELEVATION WHEEL
Elevates or lowers the blade. Also used to adjust blade bevel at all angles from 0 to 45 degrees.
6. BLADE TILT SCALE
Shows the degree the blade is tilted.
7. RIP FENCE SCALE
Shows the distance from the blade to rip fence.
8. MITER GAUGE SCALE
Shows the degree the workpiece is being mitered.
9. RIP FENCE STORAGE
Conveniently stores rip fence on two pads on the right side of base when not in use. Simply align hole on fence with locating pin on front pad, and press fence down into it’s storage position as shown.
10. MITER GAUGE STORAGE
Conveniently stores miter gauge on the left side of the base when not in use. Simply insert miter gauge bar into rectangular hole on right side of base, and push the miter gauge fully into it’s storage position as shown.
11. PUSH STICK
Allows you to rip smaller pieces of stock with a greater level of safety.
12. SMART GUARD SYSTEM STORAGE
When not in use, the Main Barrier Guard (a) and
13. BLADE STORAGE & WRENCH
Allows you to store 10” blades and arbor wrench.
14. RIP FENCE
Exclusive
8 | 2 | 7 |
|
| FIG. 1 |
6 ![]()
![]()
![]()
![]()
![]() 4
4
5 ![]()
![]()
![]()
![]() 3
3
1
| 11 |
FIG. 2 |
9 | 13 |
14
12a12b
FIG. 3
10
24.