![]() SM 2610008289
SM 2610008289
Assembly
Attaching Rip Fence
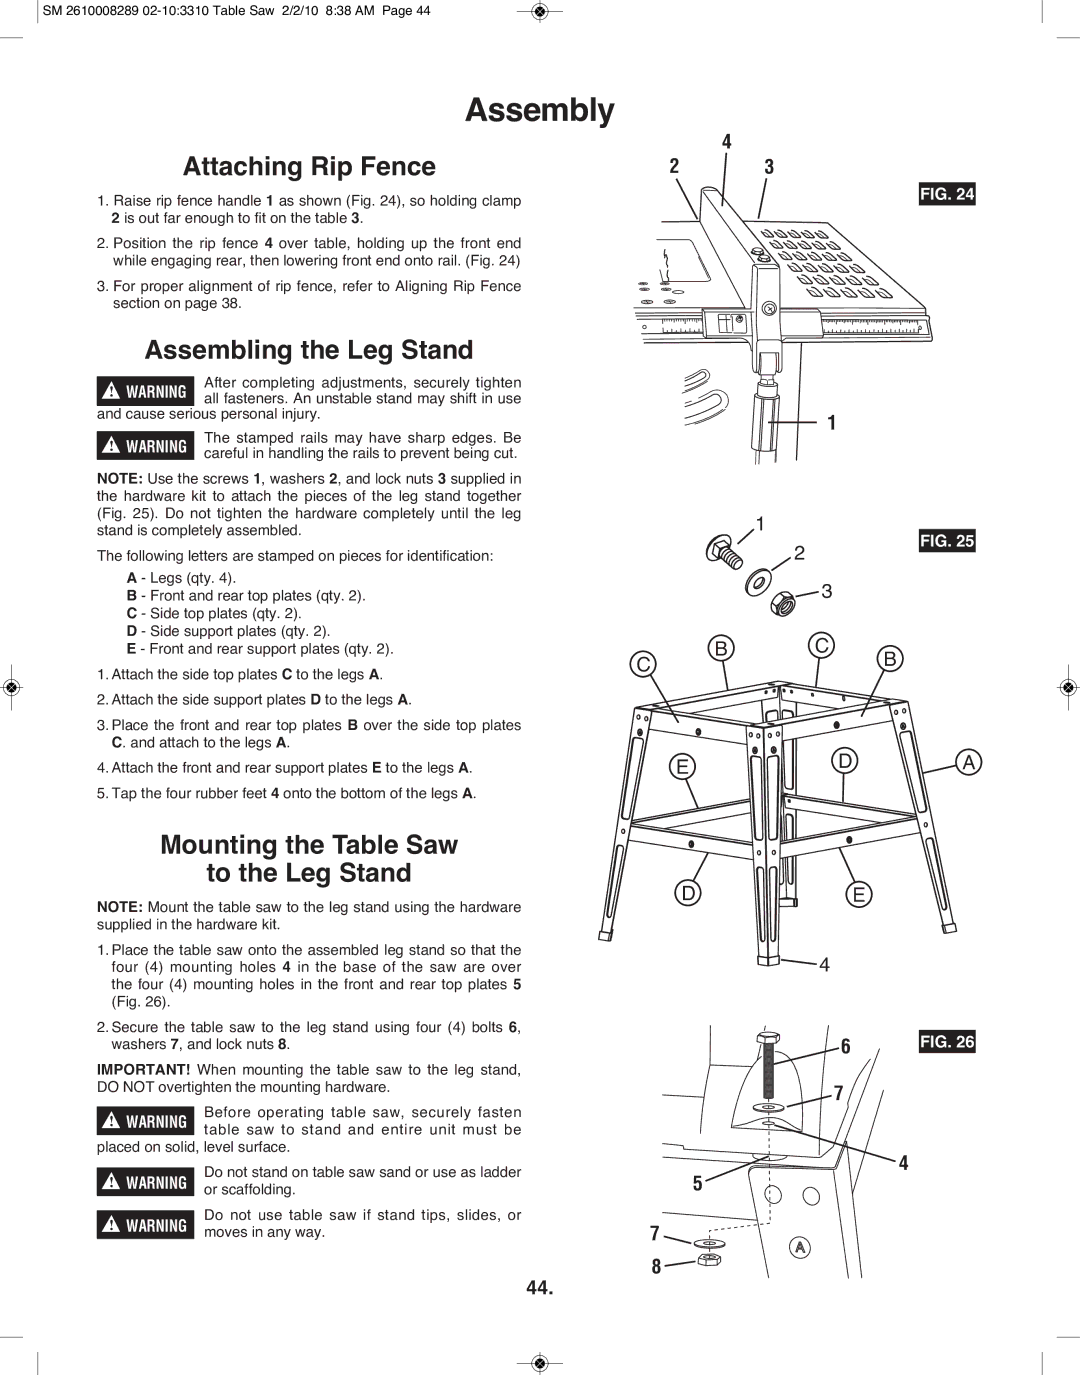
1.Raise rip fence handle 1 as shown (Fig. 24), so holding clamp 2 is out far enough to fit on the table 3.
2.Position the rip fence 4 over table, holding up the front end while engaging rear, then lowering front end onto rail. (Fig. 24)
3.For proper alignment of rip fence, refer to Aligning Rip Fence section on page 38.
Assembling the Leg Stand
After completing adjustments, securely tighten all fasteners. An unstable stand may shift in use
and cause serious personal injury.
! | WARNING | The stamped rails may have sharp edges. Be | |
careful in handling the rails to prevent being cut. | |||
|
|
4
2 3
FIG. 24
0 |
| 1 |
|
|
|
|
| 23 |
|
| 10 |
| 11 |
|
1 | 2 | 3 | 4 | 2 | 2 | 21 | 22 | 24 | 2 | 2 | 2 | 2 | 2 | 30 |
1
NOTE: Use the screws 1, washers 2, and lock nuts 3 supplied in the hardware kit to attach the pieces of the leg stand together (Fig. 25). Do not tighten the hardware completely until the leg stand is completely assembled.
The following letters are stamped on pieces for identification:
1
2
FIG. 25
A - Legs (qty. 4).
B - Front and rear top plates (qty. 2).
C - Side top plates (qty. 2).
D - Side support plates (qty. 2).
E - Front and rear support plates (qty. 2).
1.Attach the side top plates C to the legs A.
2.Attach the side support plates D to the legs A.
3.Place the front and rear top plates B over the side top plates
C. and attach to the legs A.
4.Attach the front and rear support plates E to the legs A.
5.Tap the four rubber feet 4 onto the bottom of the legs A.
Mounting the Table Saw
to the Leg Stand
NOTE: Mount the table saw to the leg stand using the hardware supplied in the hardware kit.
1.Place the table saw onto the assembled leg stand so that the four (4) mounting holes 4 in the base of the saw are over the four (4) mounting holes in the front and rear top plates 5 (Fig. 26).
2.Secure the table saw to the leg stand using four (4) bolts 6, washers 7, and lock nuts 8.
IMPORTANT! When mounting the table saw to the leg stand, DO NOT overtighten the mounting hardware.
Before operating table saw, securely fasten table saw to stand and entire unit must be
placed on solid, level surface.
|
| Do not stand on table saw sand or use as ladder | |
! | WARNING | ||
or scaffolding. | |||
|
| Do not use table saw if stand tips, slides, or | |
! | WARNING | ||
moves in any way. | |||
|
|
![]()
![]()
![]() 3
3
B C
C ![]()
![]() B
B
E ![]()
![]()
![]()
![]()
![]()
![]()
![]() D
D ![]() A
A
D ![]()
![]()
![]() E
E
![]()
![]()
![]() 4
4
6 | FIG. 26 |
|
7
4
5
7 ![]()
8 ![]()
![]()
44.