SONOS PLAYBAR | 7 |
Setting Up the PLAYBAR
The PLAYBAR is compatible with Sonos software versions 4.0 and later. If you are adding the PLAYBAR to an existing Sonos system, be sure to check for software updates before adding the PLAYBAR to your Sonos system.
1.Carefully unpack the package contents.
2.Choose a location for the PLAYBAR. Refer to "Selecting a Location" on page 6 for help with this step.
3.Remove the protective cap from each end of the optical audio cable.
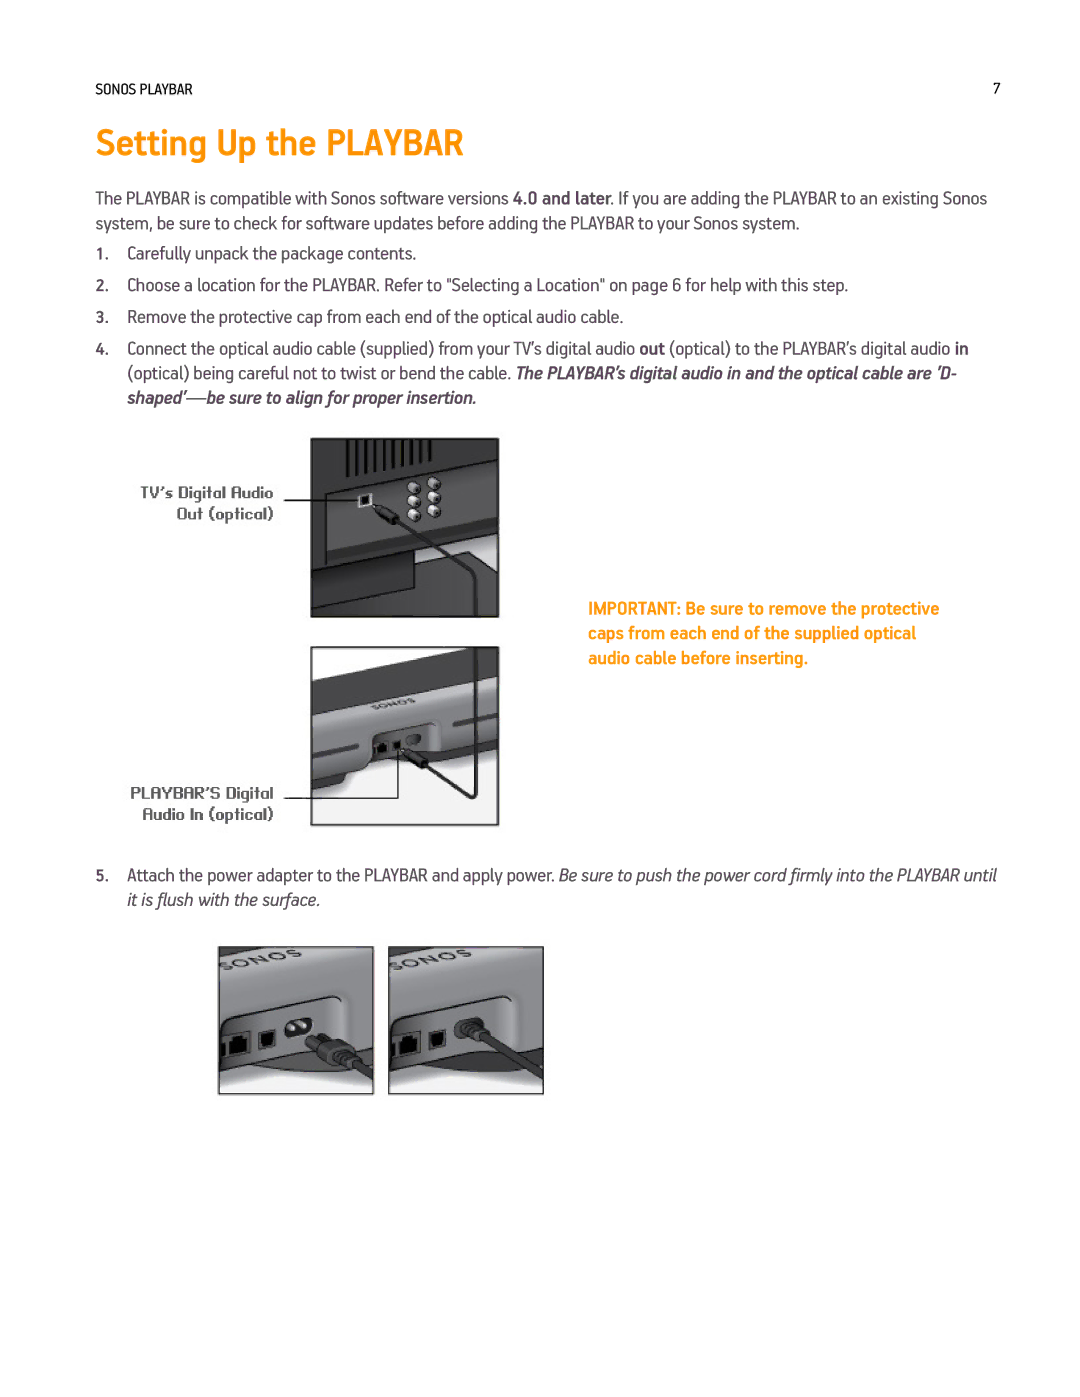
4.Connect the optical audio cable (supplied) from your TV’s digital audio out (optical) to the PLAYBAR’s digital audio in (optical) being careful not to twist or bend the cable. The PLAYBAR’s digital audio in and the optical cable are ’D-
IMPORTANT: Be sure to remove the protective caps from each end of the supplied optical audio cable before inserting.
5.Attach the power adapter to the PLAYBAR and apply power. Be sure to push the power cord firmly into the PLAYBAR until it is flush with the surface.