|
| Top page > Using with your computer > Connecting the camera to the computer > Connecting | ||
Operation Search |
|
| the camera to the computer | |
|
|
| ||
|
|
|
| |
Before Use |
| Connecting the camera to the computer | ||
|
| |||
Shooting | ||||
|
|
| ||
| 1. Insert a sufficiently charged battery pack into the camera, or connect the camera to a wall | |||
|
| |||
Viewing |
| |||
|
| outlet (wall socket) using the | ||
Using MENU items (Shooting) | ||||
| Cable for | |||
|
| |||
Using MENU items (Viewing) |
| Use a | ||
|
|
| ||
|
| 2. Turn on the computer, then press | (Playback) button. | |
Changing settings | ||||
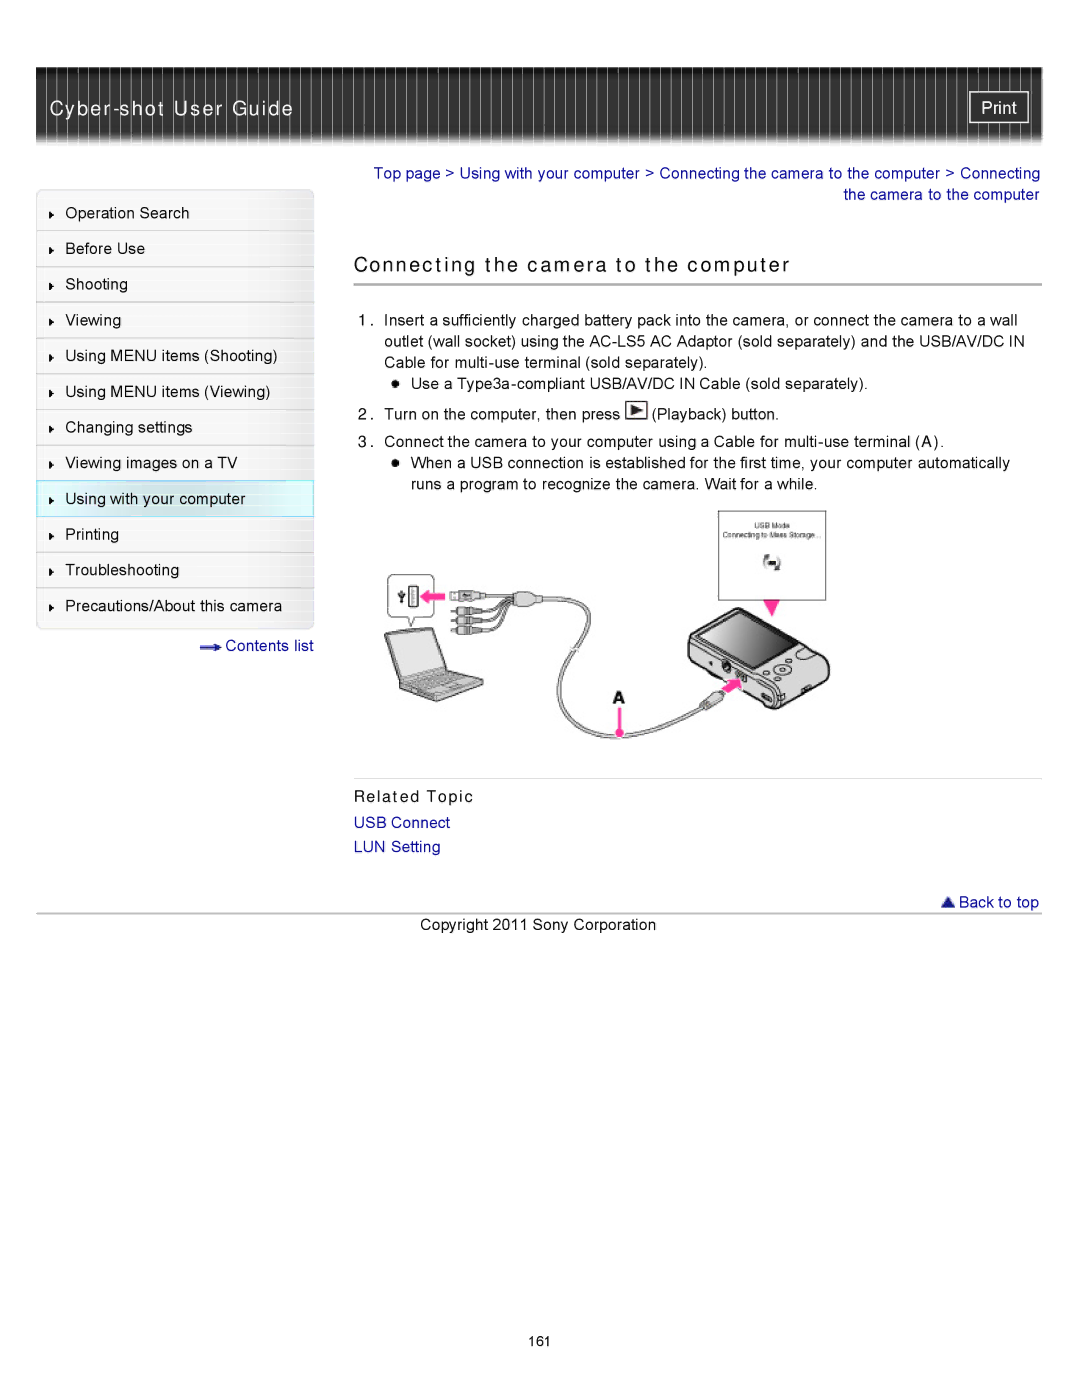
| 3. Connect the camera to your computer using a Cable for | |||
|
| |||
| ||||
Viewing images on a TV |
| When a USB connection is established for the first time, your computer automatically | ||
Using with your computer |
| runs a program to recognize the camera. Wait for a while. | ||
|
|
| ||
Printing
Troubleshooting
Precautions/About this camera
![]() Contents list
Contents list
Related Topic
USB Connect
LUN Setting
 Back to top
Copyright 2011 Sony Corporation
161
