Starting Up and Initial Settings
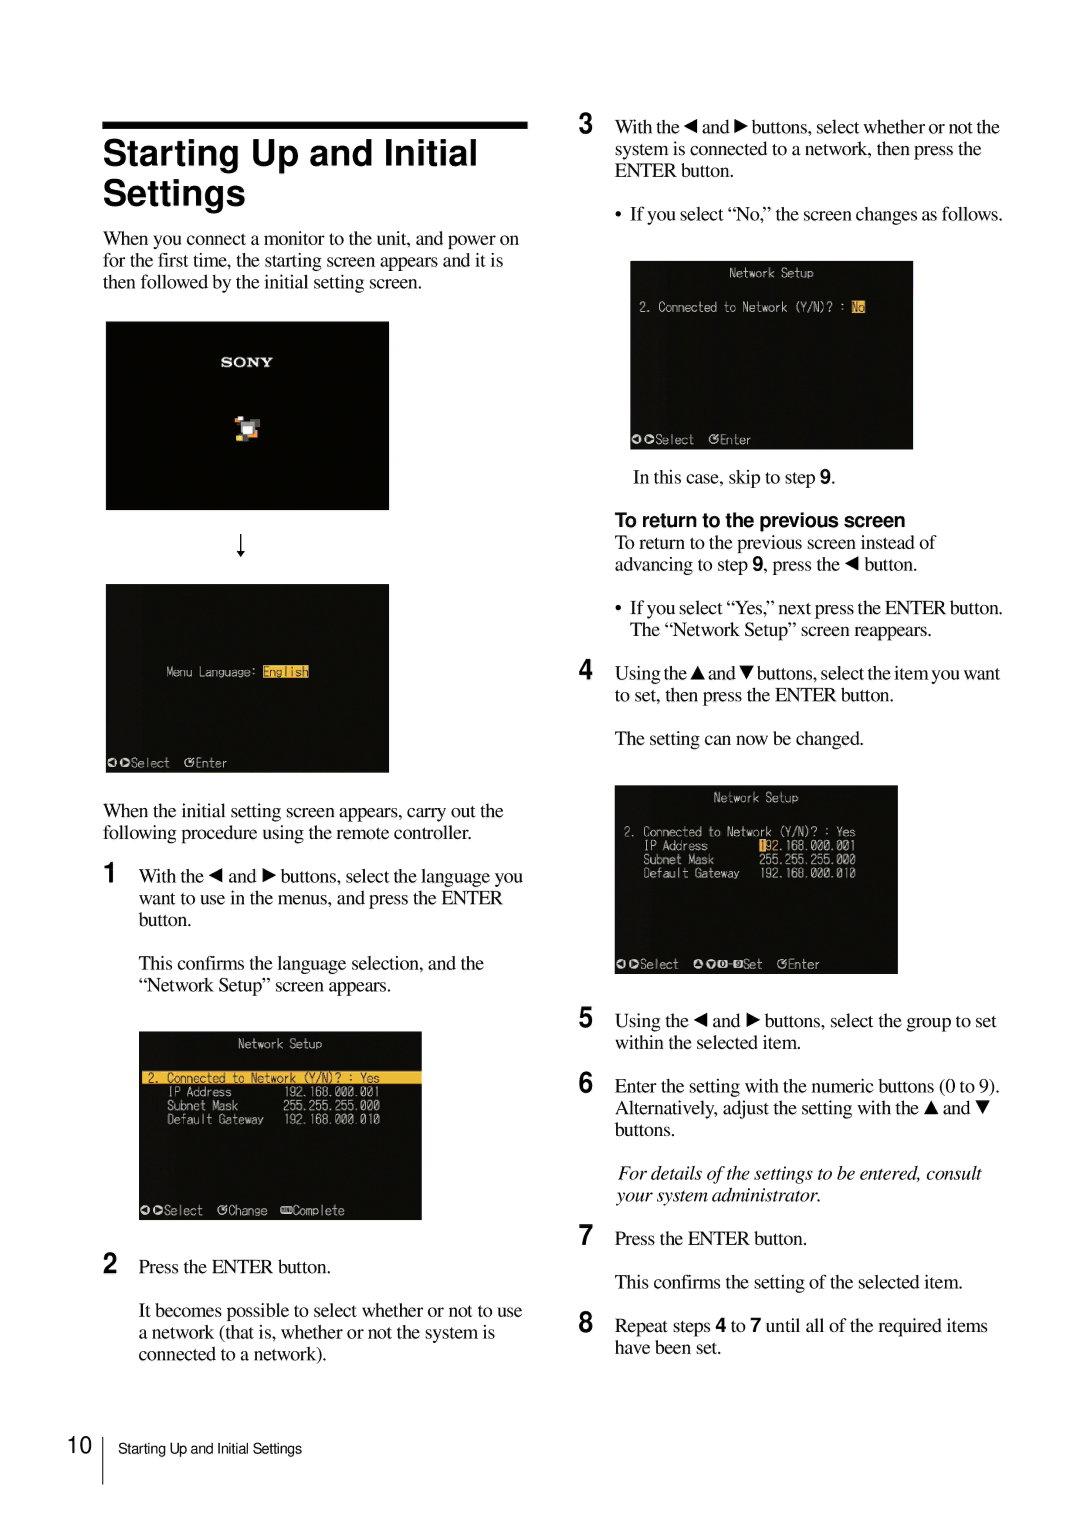
When you connect a monitor to the unit, and power on for the first time, the starting screen appears and it is then followed by the initial setting screen.
r
When the initial setting screen appears, carry out the following procedure using the remote controller.
1 With the b and B buttons, select the language you want to use in the menus, and press the ENTER button.
This confirms the language selection, and the “Network Setup” screen appears.
2 Press the ENTER button.
It becomes possible to select whether or not to use a network (that is, whether or not the system is connected to a network).
3 With the b and B buttons, select whether or not the system is connected to a network, then press the ENTER button.
• If you select “No,” the screen changes as follows.
In this case, skip to step 9.
To return to the previous screen
To return to the previous screen instead of advancing to step 9, press the b button.
•If you select “Yes,” next press the ENTER button. The “Network Setup” screen reappears.
4 Using the v and V buttons, select the item you want to set, then press the ENTER button.
The setting can now be changed.
5 Using the b and B buttons, select the group to set within the selected item.
6 Enter the setting with the numeric buttons (0 to 9). Alternatively, adjust the setting with the v and V buttons.
For details of the settings to be entered, consult your system administrator.
7 Press the ENTER button.
This confirms the setting of the selected item.
8 Repeat steps 4 to 7 until all of the required items have been set.
10
Starting Up and Initial Settings