The
To return to the “System Administrator Setup” screen
Carry out any of the following.
•Press numeric button 1, then press the ENTER button.
•Using the v and V buttons, select “1. Back to System Administrator Setup,” and press the ENTER button.
2 Carry out any of the following.
•Press numeric button 2, then press the ENTER button.
•Using the v and V buttons, select “2. Control,” and press the ENTER button.
The setting can now be changed.
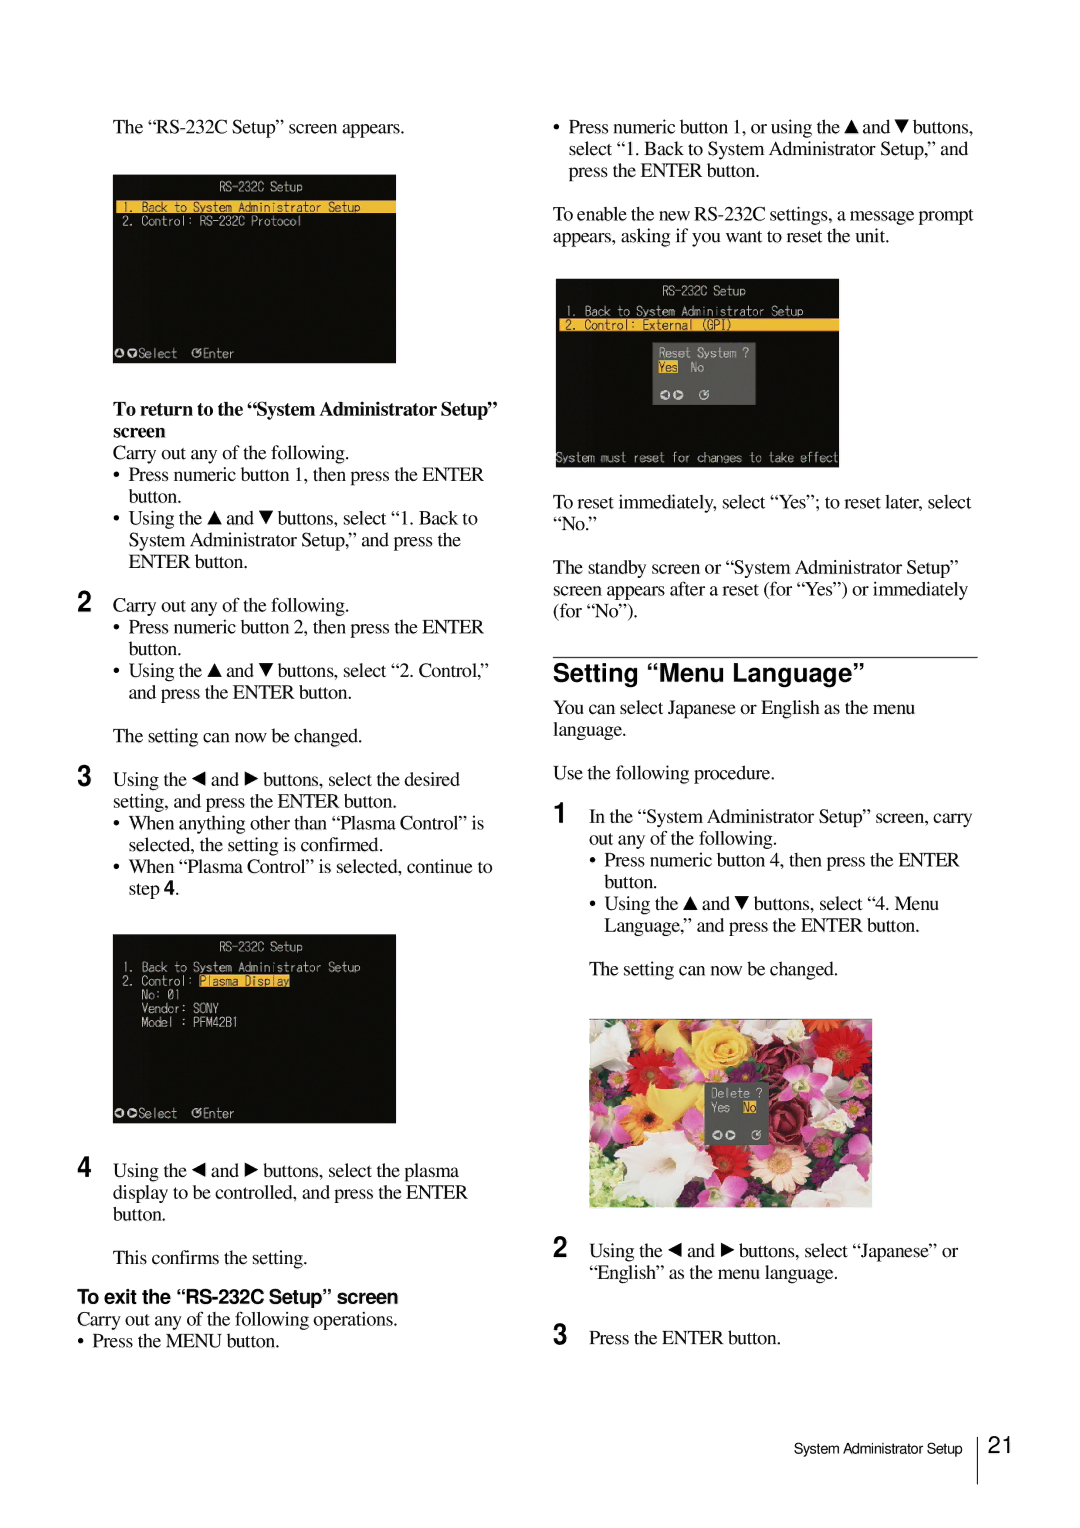
3 Using the b and B buttons, select the desired setting, and press the ENTER button.
•When anything other than “Plasma Control” is selected, the setting is confirmed.
•When “Plasma Control” is selected, continue to step 4.
•Press numeric button 1, or using the v and V buttons, select “1. Back to System Administrator Setup,” and press the ENTER button.
To enable the new
To reset immediately, select “Yes”; to reset later, select “No.”
The standby screen or “System Administrator Setup” screen appears after a reset (for “Yes”) or immediately (for “No”).
Setting “Menu Language”
You can select Japanese or English as the menu language.
Use the following procedure.
1 In the “System Administrator Setup” screen, carry out any of the following.
•Press numeric button 4, then press the ENTER button.
•Using the v and V buttons, select “4. Menu Language,” and press the ENTER button.
The setting can now be changed.
4 Using the b and B buttons, select the plasma display to be controlled, and press the ENTER button.
This confirms the setting.
To exit the
• Press the MENU button.
2
3
Using the b and B buttons, select “Japanese” or “English” as the menu language.
Press the ENTER button.
System Administrator Setup
21