NW-MS6
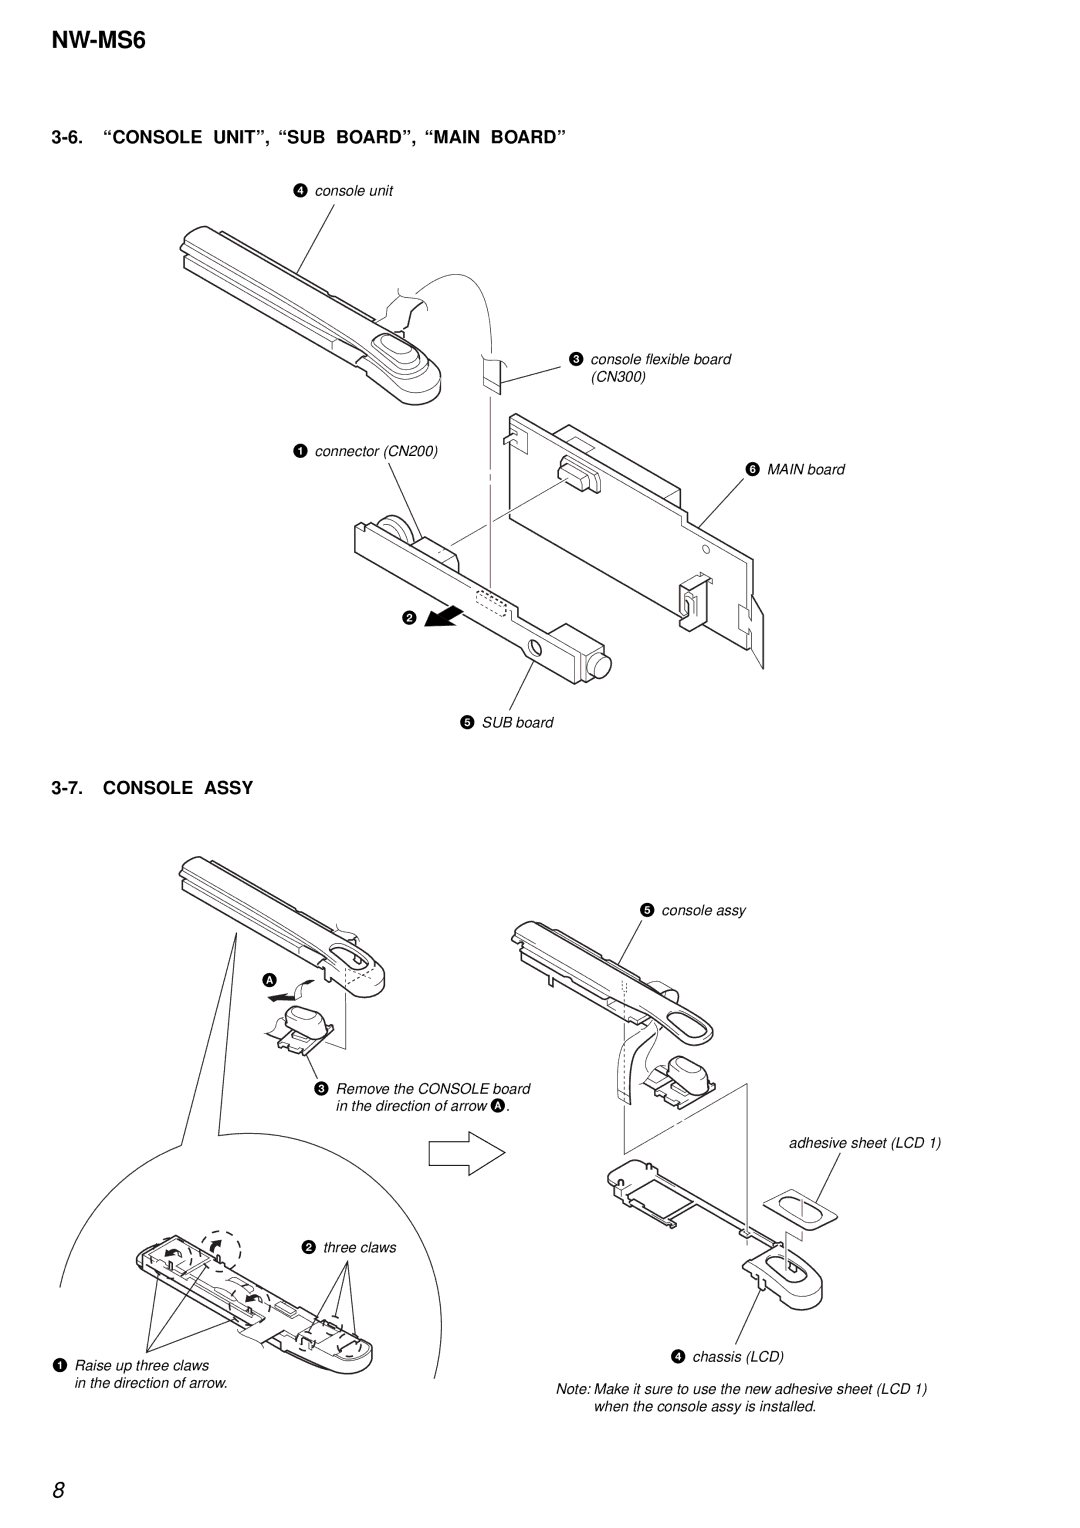
3-6. “CONSOLE UNIT”, “SUB BOARD”, “MAIN BOARD”
4console unit
3 console flexible board (CN300)
1 connector (CN200)
6 MAIN board
2 ![]()
![]()
5 SUB board
3-7. CONSOLE ASSY
1Raise up three claws
in the direction of arrow.
5 console assy
A
3 Remove the CONSOLE board in the direction of arrow A.
adhesive sheet (LCD 1)
2 three claws
4 chassis (LCD)
Note: Make it sure to use the new adhesive sheet (LCD 1) when the console assy is installed.
8