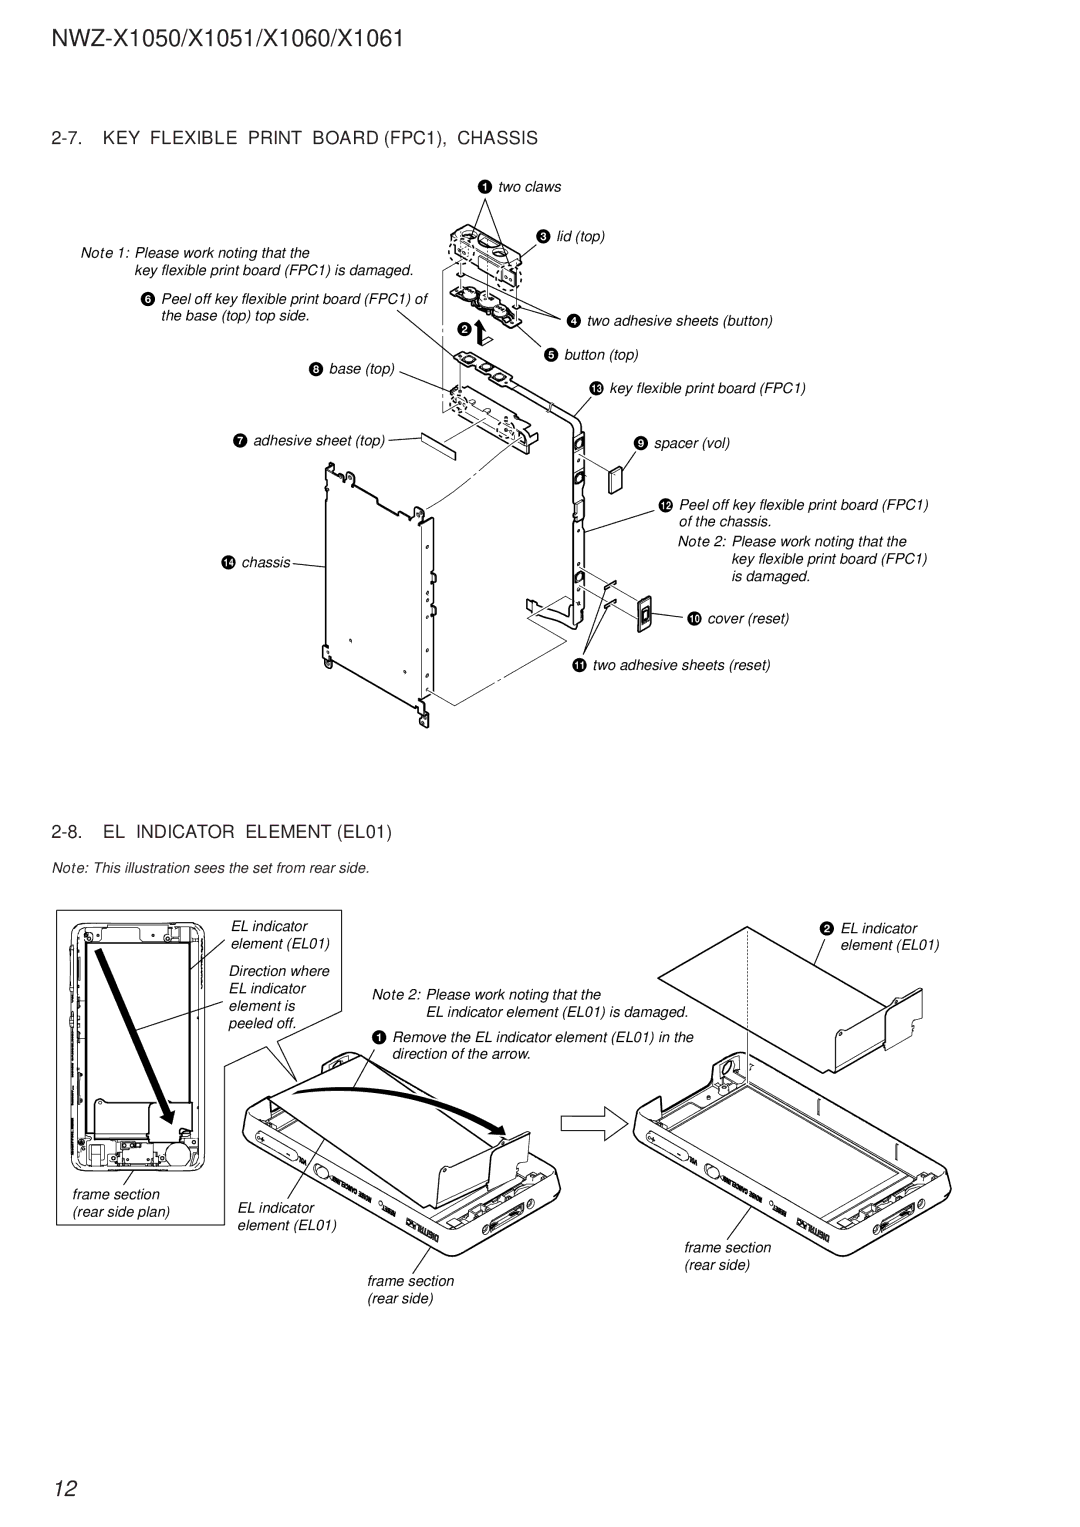
1 two claws
3 lid (top)
Note 1: Please work noting that the key flexible print board (FPC1) is damaged.
6 Peel off key flexible print board (FPC1) of the base (top) top side.
2 ![]()
8 base (top)
7adhesive sheet (top) 


qf chassis 
4two adhesive sheets (button)
5button (top)
qd key flexible print board (FPC1)
9 spacer (vol)
qs Peel off key flexible print board (FPC1)
of the chassis.
Note 2: Please work noting that the key flexible print board (FPC1) is damaged.
![]()
![]() q; cover (reset)
q; cover (reset)
qa two adhesive sheets (reset)
2-8. EL INDICATOR ELEMENT (EL01)
Note: This illustration sees the set from rear side.
frame section (rear side plan)
EL indicator element (EL01)
Direction where |
| |
EL indicator | Note 2: Please work noting that the | |
element is | ||
EL indicator element (EL01) is damaged. | ||
peeled off. | ||
1 Remove the EL indicator element (EL01) in the | ||
| ||
| direction of the arrow. |
EL indicator element (EL01)
frame section (rear side)
frame section (rear side)
2 EL indicator ![]() element (EL01)
element (EL01)
12