For Machines Mfg. Since 8/09 | O P E R A T I O N | Model SB1040/SB1041 |
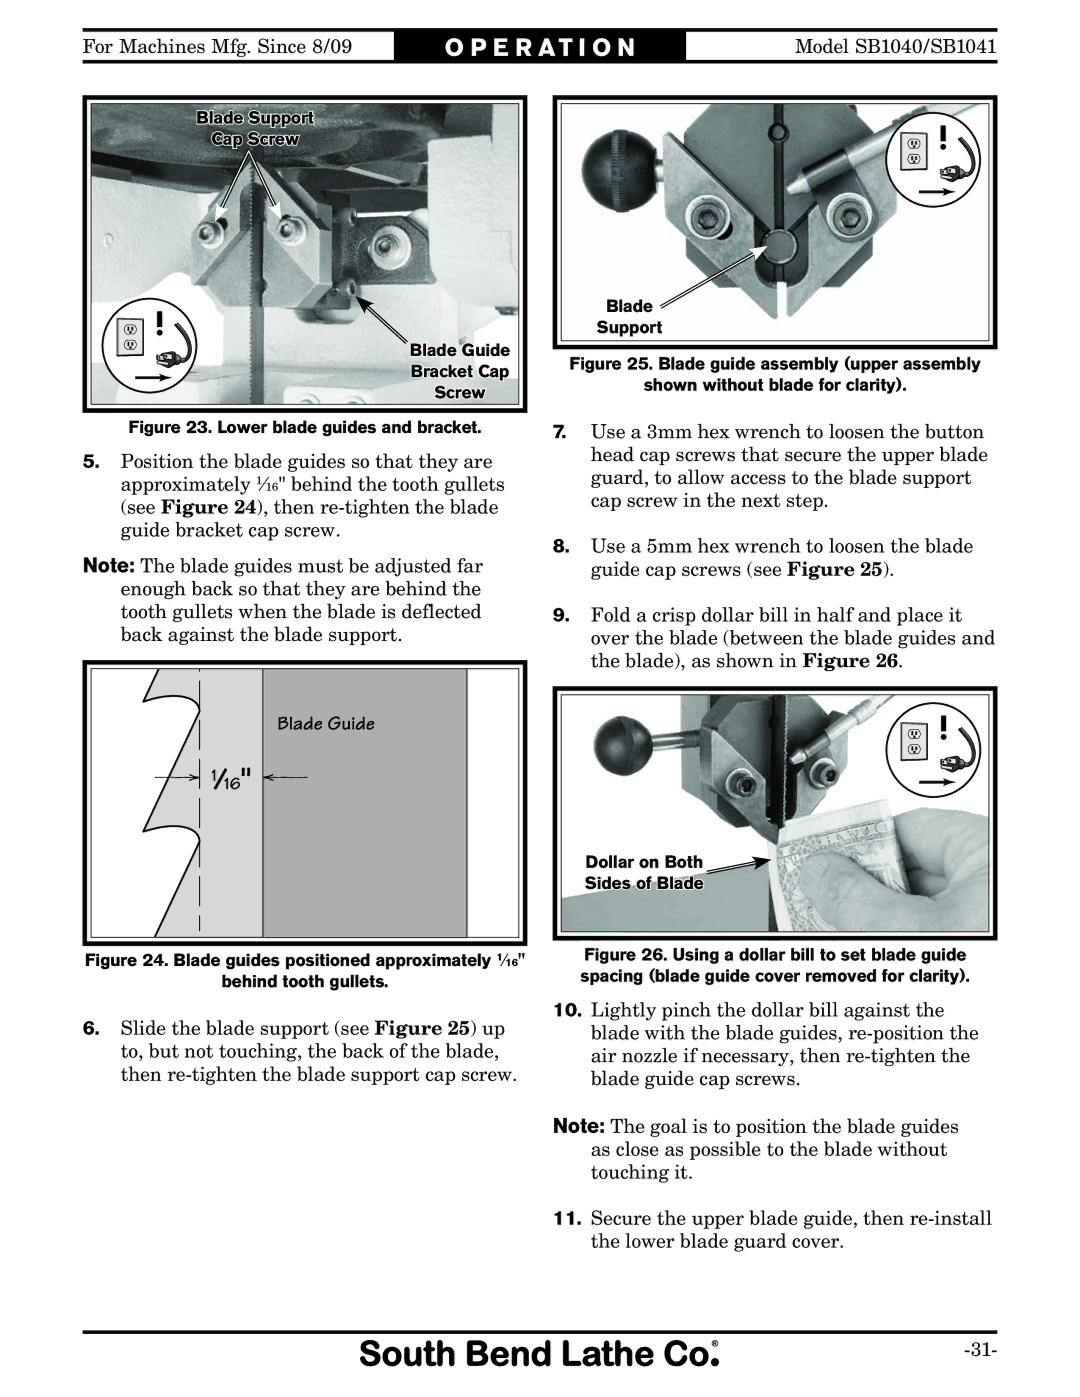
Blade Support
Cap Screw
![]() !
! ![]()
Blade Guide
Bracket Cap
Screw
Figure 23. Lower blade guides and bracket.
5.Position the blade guides so that they are approximately 1⁄16" behind the tooth gullets (see Figure 24), then
Note: The blade guides must be adjusted far enough back so that they are behind the tooth gullets when the blade is deflected back against the blade support.
Blade Guide |
1⁄16" |
Figure 24. Blade guides positioned approximately 1⁄16"
behind tooth gullets.
6.Slide the blade support (see Figure 25) up to, but not touching, the back of the blade, then
! |
Blade
Support
Figure 25. Blade guide assembly (upper assembly
shown without blade for clarity).
7.Use a 3mm hex wrench to loosen the button head cap screws that secure the upper blade guard, to allow access to the blade support cap screw in the next step.
8.Use a 5mm hex wrench to loosen the blade guide cap screws (see Figure 25).
9.Fold a crisp dollar bill in half and place it over the blade (between the blade guides and the blade), as shown in Figure 26.
! |
Dollar on Both ![]()
Sides of Blade
Figure 26. Using a dollar bill to set blade guide spacing (blade guide cover removed for clarity).
10. Lightly pinch the dollar bill against the blade with the blade guides,
Note: The goal is to position the blade guides as close as possible to the blade without touching it.
11.Secure the upper blade guide, then