S U B - Z E RO MODELS 315I A N D 315IP I N S TA L L AT I O N
INSTALLATION
9 0 - D E G R E E D O O R S TO P
Exercise caution when drilling holes for mounting hardware. This is especially critical with inset panels.
Install the door panel by engaging the tabbed bracket to the door first and then sliding the hinge side hardware over the positioning screws. You will have a 1/4" inch adjustment, up and down, side to side, with this hardware.
Once you have the door in place, attach the remaining #8 x 1/2" screws to the hinge side mounting bracket and install decorative caps.
Model 315I(P) has a
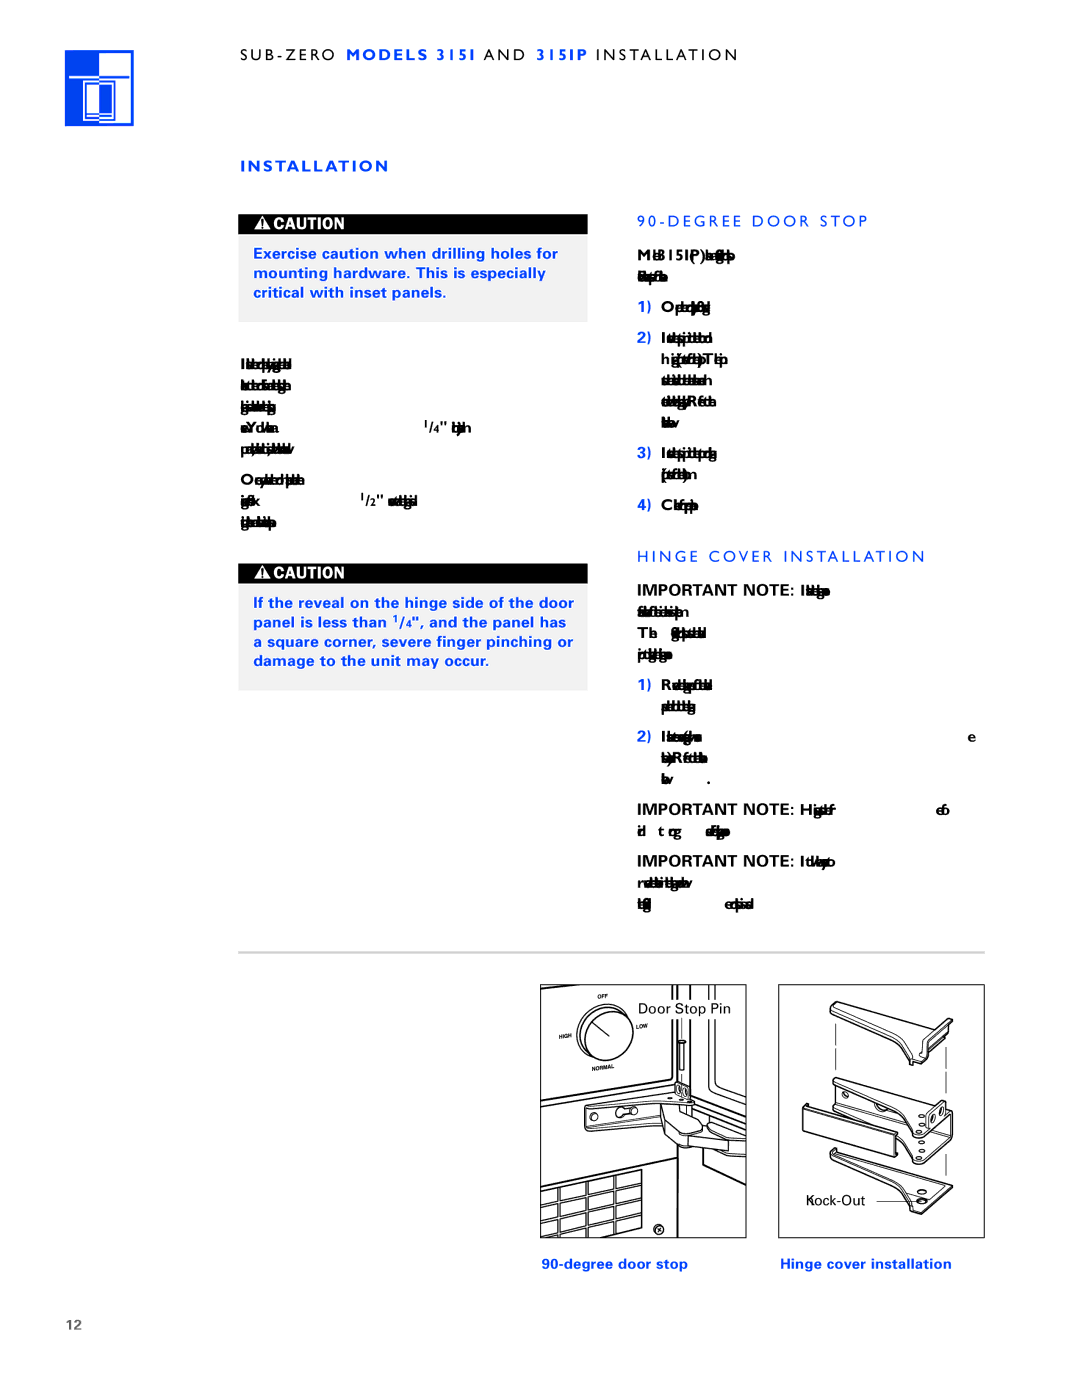
1)Open the door approximately 80 degrees.
2)Insert the stop pin into the bottom door hinge (pin enters from the top). The pin must be inserted until the head has made contact with the hinge body. Refer to the illustration below.
3)Insert the stop pin into the top door hinge (pin enters from the bottom).
4)Check for proper operation.
H I N G E C O V E R I N S TA L L AT I O N
If the reveal on the hinge side of the door panel is less than 1/4", and the panel has a square corner, severe finger pinching or damage to the unit may occur.
IMPORTANT NOTE: Install the hinge covers after installation of the ice maker is complete. The
1)Remove the backing paper of the adhesive pads and bond to the hinge.
2)Install center covers (magnets will secure these covers). Refer to the illustration below.
IMPORTANT NOTE: Hinges must be free of dirt or grease before applying covers.
IMPORTANT NOTE: It will be necessary to remove the
Door Stop Pin |
![]()
![]()
Hinge cover installation
12