S U B - Z E RO MODELS 315I A N D 315IP I N S TA L L AT I O N
INSTALLATION |
|
|
|
|
| |
IMPORTANT NOTE: Turn on the water supply | K I C K P L AT E / G R I L L E I N S TA L L AT I O N | |||||
and check all fittings for leaks. Make sure the | Once the ice maker is secured, you can install | |||||
electrical harness is attached to the solenoid. | ||||||
the kickplate/grille. As shown in the illustration | ||||||
Let your customer know that the ice maker will | ||||||
below, there is some adjustment to the | ||||||
not fill with water immediately and that the | mounting assembly so this decorative piece | |||||
first batch of ice produced should be | can fit flush with the surrounding area. | |||||
discarded. Allow 24 to 36 hours for proper ice |
|
|
|
|
| |
production. |
|
|
|
|
| |
|
|
|
|
| ||
|
|
|
|
|
| |
L E V E L I N G |
| DO NOT cover the kickplate/grille area. |
| |||
|
|
|
|
| ||
Level the Model 315I(P) by turning the leveling |
|
|
|
|
| |
|
|
|
|
| ||
legs counterclockwise to raise or clockwise to | The unit must be allowed to have ventilation | |||||
lower. | through these fins. The door panel may hang | |||||
To assist you in adjusting the front leveling | in front of the fins, but a decorative kickplate/ | |||||
grille must not cover the fins. | ||||||
legs up or down, use a standard screwdriver | ||||||
|
|
|
|
| ||
blade and place it in the front leveling leg to | The kickplate/grille can be painted another | |||||
turn. | color, if you choose. Follow these easy steps: | |||||
|
| Rough up surface to be painted with fine | ||||
|
| |||||
S E C U R E T H E I C E M A K E R |
| grit sandpaper. | ||||
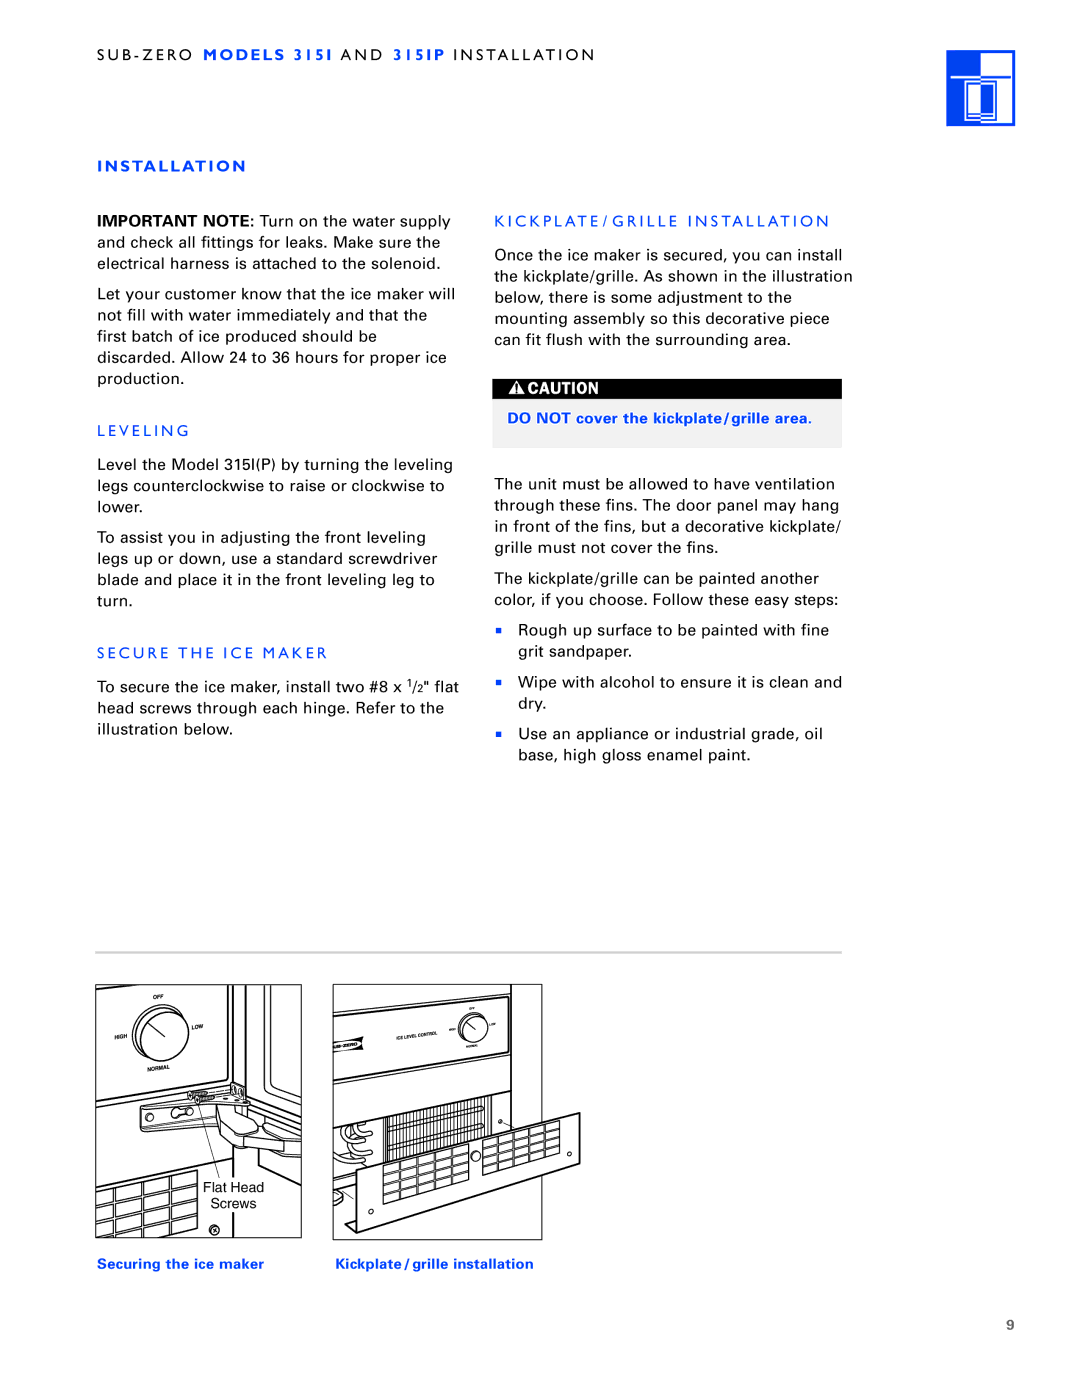
To secure the ice maker, install two #8 x 1/2" flat |
| Wipe with alcohol to ensure it is clean and | ||||
| ||||||
head screws through each hinge. Refer to the |
| dry. | ||||
illustration below. |
| Use an appliance or industrial grade, oil | ||||
|
| |||||
|
| base, high gloss enamel paint. | ||||
Flat Head |
Screws |
Securing the ice maker | Kickplate/grille installation |
9