Appendix C: ESB2 HostRAID Setup
Creating a RAID 5 Set (Parity)
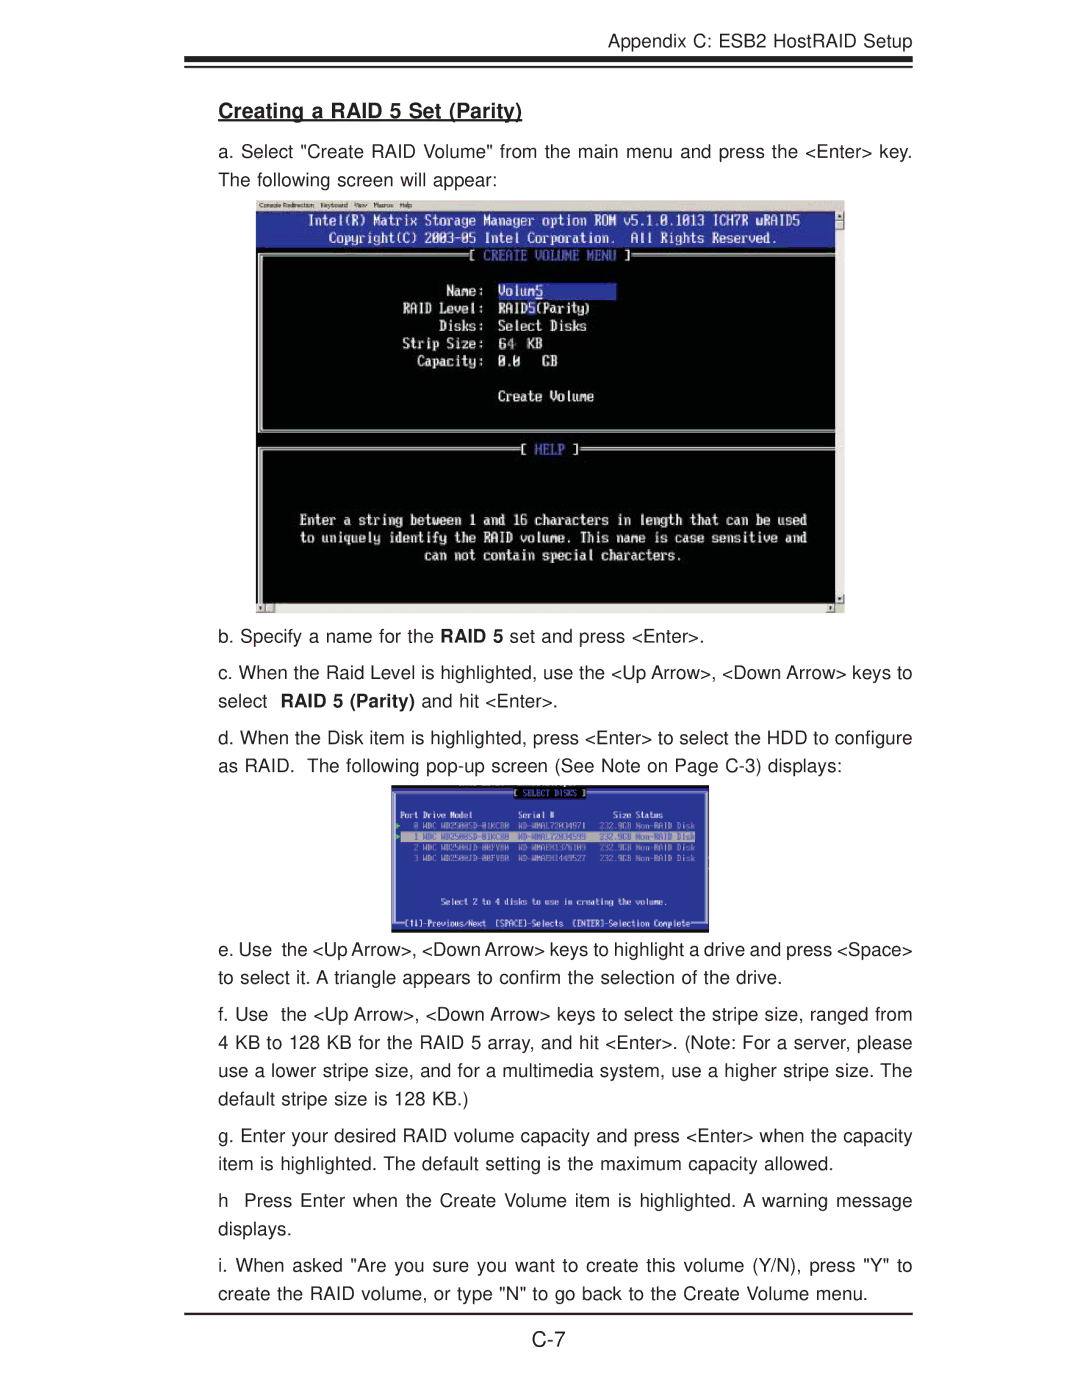
a. Select "Create RAID Volume" from the main menu and press the <Enter> key. The following screen will appear:
b. Specify a name for the RAID 5 set and press <Enter>.
c. When the Raid Level is highlighted, use the <Up Arrow>, <Down Arrow> keys to select RAID 5 (Parity) and hit <Enter>.
d. When the Disk item is highlighted, press <Enter> to select the HDD to configure as RAID. The following
e. Use the <Up Arrow>, <Down Arrow> keys to highlight a drive and press <Space> to select it. A triangle appears to confirm the selection of the drive.
f. Use the <Up Arrow>, <Down Arrow> keys to select the stripe size, ranged from 4 KB to 128 KB for the RAID 5 array, and hit <Enter>. (Note: For a server, please use a lower stripe size, and for a multimedia system, use a higher stripe size. The default stripe size is 128 KB.)
g. Enter your desired RAID volume capacity and press <Enter> when the capacity item is highlighted. The default setting is the maximum capacity allowed.
hPress Enter when the Create Volume item is highlighted. A warning message displays.
i. When asked "Are you sure you want to create this volume (Y/N), press "Y" to create the RAID volume, or type "N" to go back to the Create Volume menu.
