Chapter 1: Quick Installation Guide
Chapter 1
Quick Installation Guide
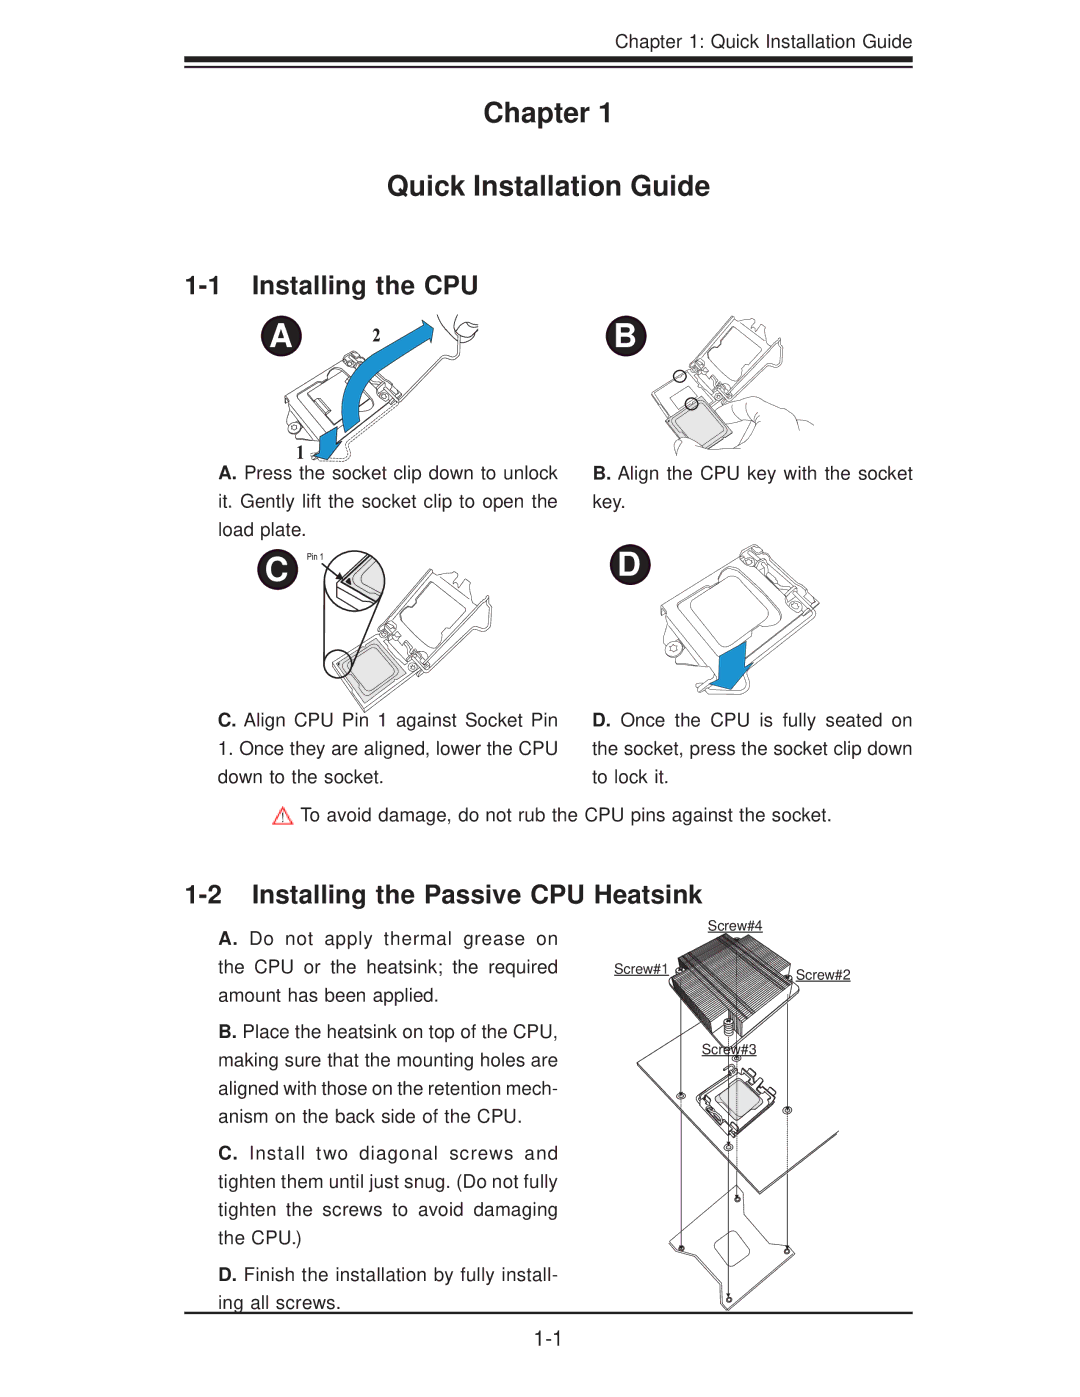
1-1 Installing the CPU
A ![]()

![]() B
B
A. Press the socket clip down to unlock | B. Align the CPU key with the socket |
it. Gently lift the socket clip to open the | key. |
load plate. |
|
C | D |
C. Align CPU Pin 1 against Socket Pin
1.Once they are aligned, lower the CPU down to the socket.
D. Once the CPU is fully seated on the socket, press the socket clip down to lock it.
![]() To avoid damage, do not rub the CPU pins against the socket.
To avoid damage, do not rub the CPU pins against the socket.
1-2 Installing the Passive CPU Heatsink
A. Do not apply thermal grease on the CPU or the heatsink; the required amount has been applied.
B. Place the heatsink on top of the CPU, making sure that the mounting holes are aligned with those on the retention mech- anism on the back side of the CPU.
C. Install two diagonal screws and tighten them until just snug. (Do not fully tighten the screws to avoid damaging the CPU.)
D. Finish the installation by fully install- ing all screws.
Screw#4
Screw#1 
![]() Screw#2
Screw#2
Screw#3