![]()
![]()
![]()
![]() X8STi/X8STi-F/X8STi-3F/X8STi-LN4
X8STi/X8STi-F/X8STi-3F/X8STi-LN4
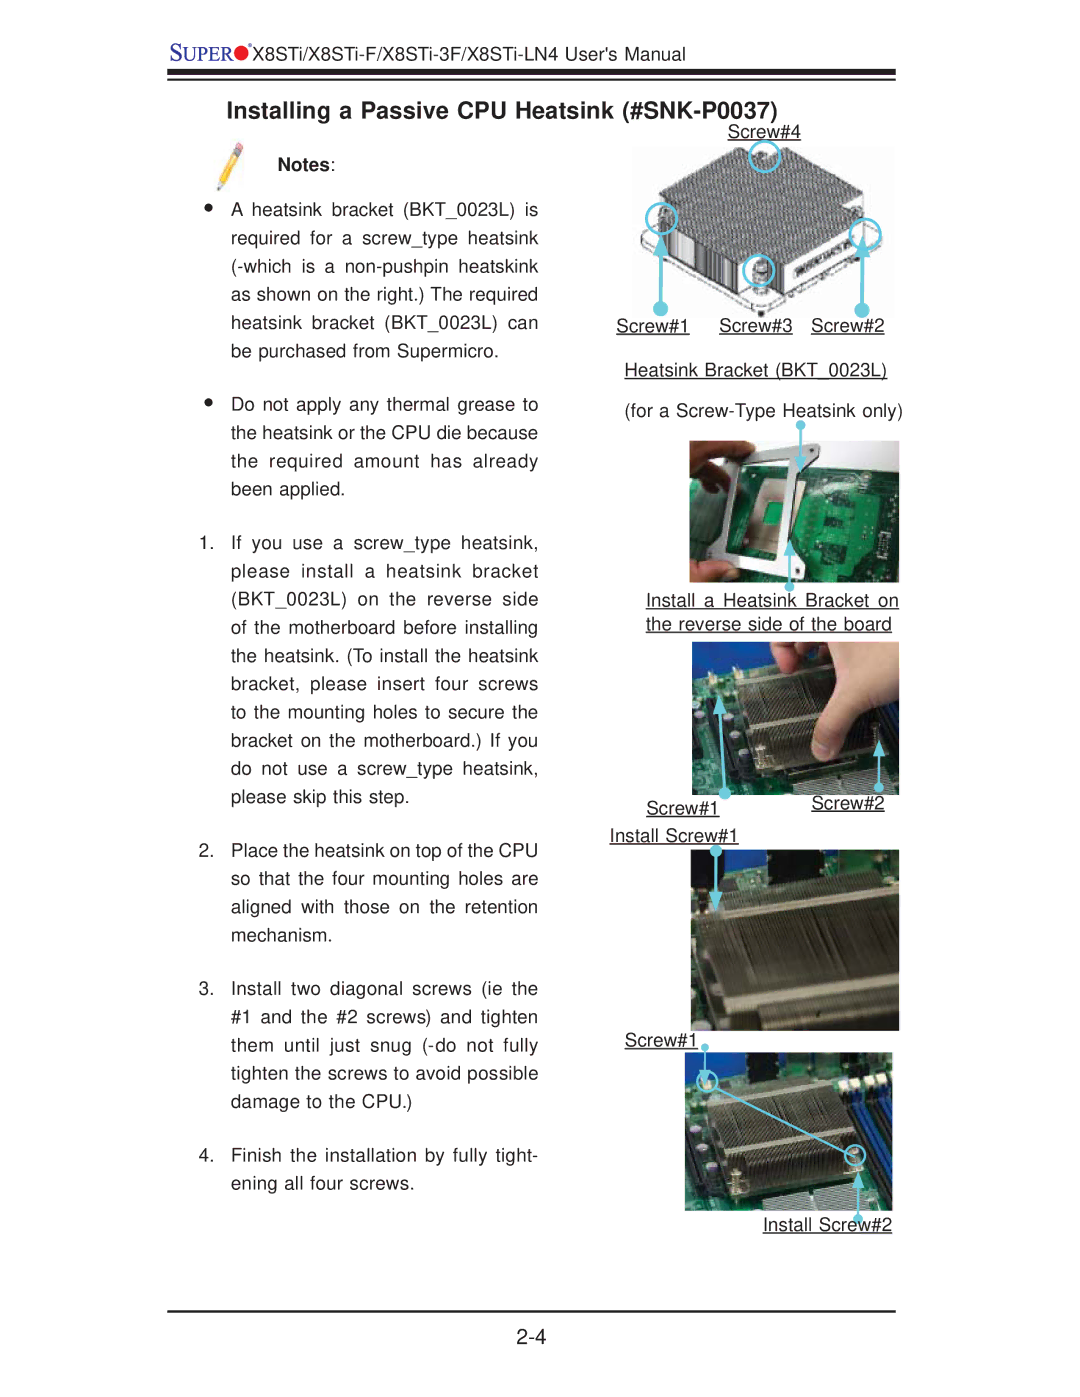
Installing a Passive CPU Heatsink (#SNK-P0037)
Screw#4
Notes:
•A heatsink bracket (BKT_0023L) is
required for a screw_type heatsink
as shown on the right.) The required
heatsink bracket (BKT_0023L) can Screw#1 Screw#3 Screw#2 be purchased from Supermicro.
• Do not apply any thermal grease to | Heatsink Bracket (BKT_0023L) | |
(for a | ||
the heatsink or the CPU die because |
|
|
the required amount has already |
|
|
been applied. |
|
|
1. If you use a screw_type heatsink, |
|
|
please install a heatsink bracket |
|
|
(BKT_0023L) on the reverse side | Install a Heatsink Bracket on | |
of the motherboard before installing | the reverse side of the board | |
the heatsink. (To install the heatsink |
|
|
bracket, please insert four screws |
|
|
to the mounting holes to secure the |
|
|
bracket on the motherboard.) If you |
|
|
do not use a screw_type heatsink, |
|
|
please skip this step. | Screw#1 | Screw#2 |
2. Place the heatsink on top of the CPU | Install Screw#1 |
|
|
| |
so that the four mounting holes are |
|
|
aligned with those on the retention |
|
|
mechanism. |
|
|
3.Install two diagonal screws (ie the #1 and the #2 screws) and tighten
them until just snug ![]() tighten the screws to avoid possible
tighten the screws to avoid possible
damage to the CPU.)
4. Finish the installation by fully tight- ening all four screws.
Install Screw#2