C O N N E C T I N G P H O N E S , F A X E S A N D D E V I C E S T O T A L K S W I T C H
3.4 Save Settings to TalkSwitch
New settings must be saved to the TalkSwitch phone system for them to take effect.
Choose ‘File’ then ‘Save to TalkSwitch’. A progress bar will show the data exchange to the TalkSwitch unit and should take only a few seconds to complete.
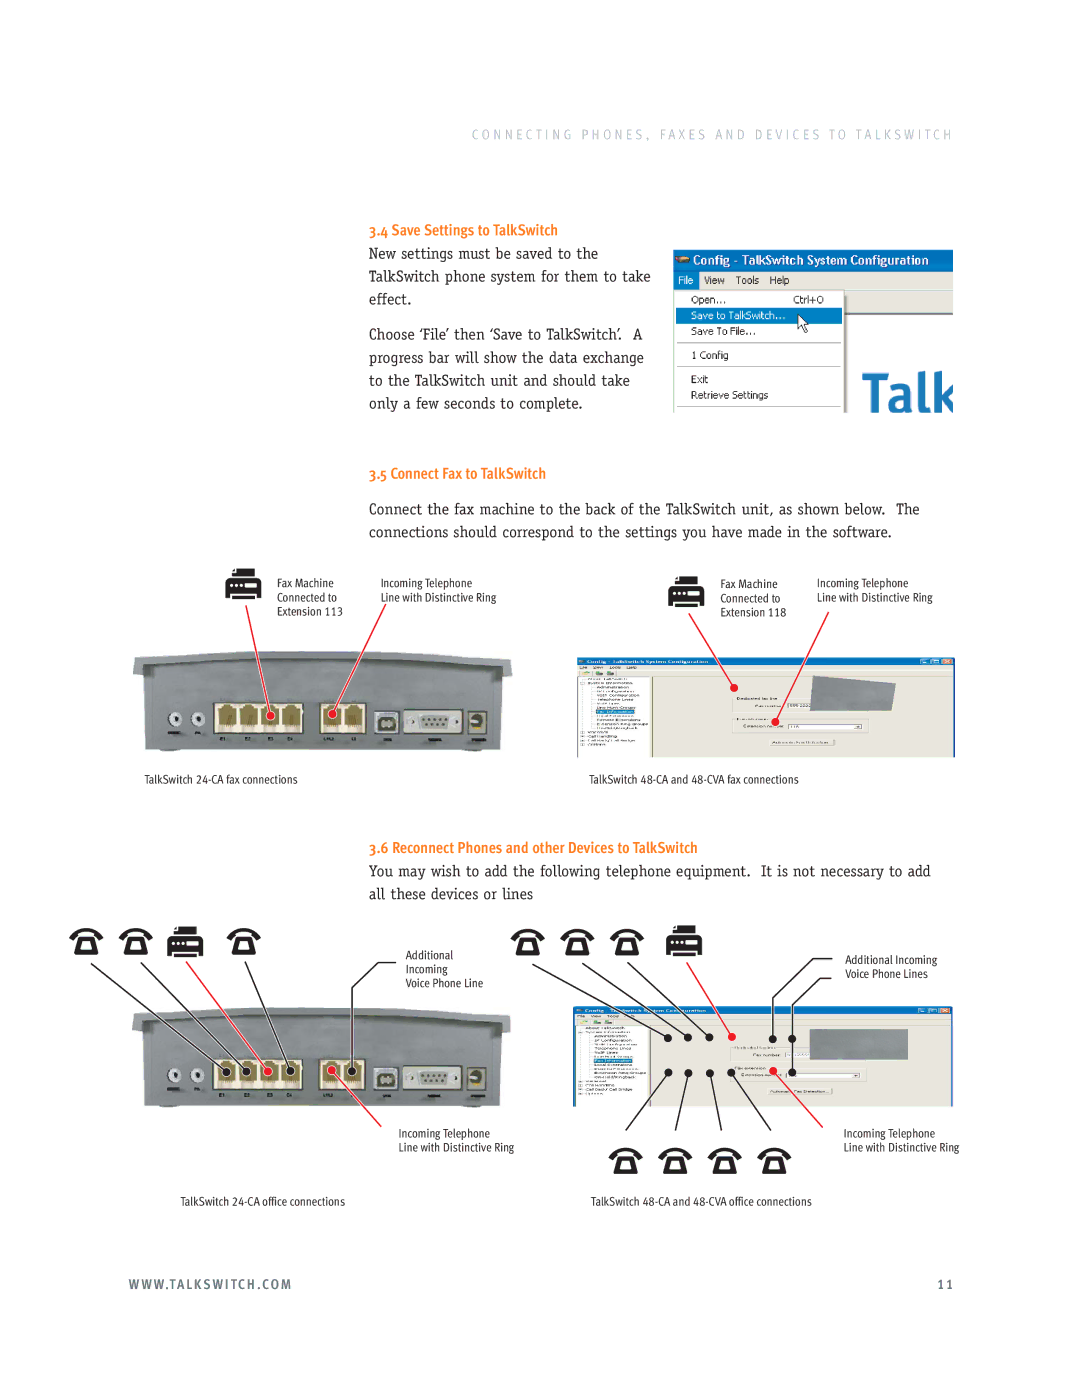
3.5 Connect Fax to TalkSwitch
Connect the fax machine to the back of the TalkSwitch unit, as shown below. The connections should correspond to the settings you have made in the software.
Fax Machine | Incoming Telephone |
| Fax Machine | Incoming Telephone |
Connected to | Line with Distinctive Ring |
| Connected to | Line with Distinctive Ring |
Extension 113 |
|
| Extension 118 |
|
TalkSwitch | TalkSwitch |
3.6 Reconnect Phones and other Devices to TalkSwitch
You may wish to add the following telephone equipment. It is not necessary to add
all these devices or lines
Additional |
| Additional Incoming |
| ||
Incoming |
| |
| Voice Phone Lines | |
Voice Phone Line |
| |
|
|
Incoming Telephone | Incoming Telephone | |
Line with Distinctive Ring | Line with Distinctive Ring | |
TalkSwitch |
|
|
TalkSwitch | ||
|
|
|
W W W.T A L K S W I T C H . C O M | 1 1 |