C O N N E C T I N G P H O N E S , F A X E S A N D D E V I C E S T O T A L K S W I T C H
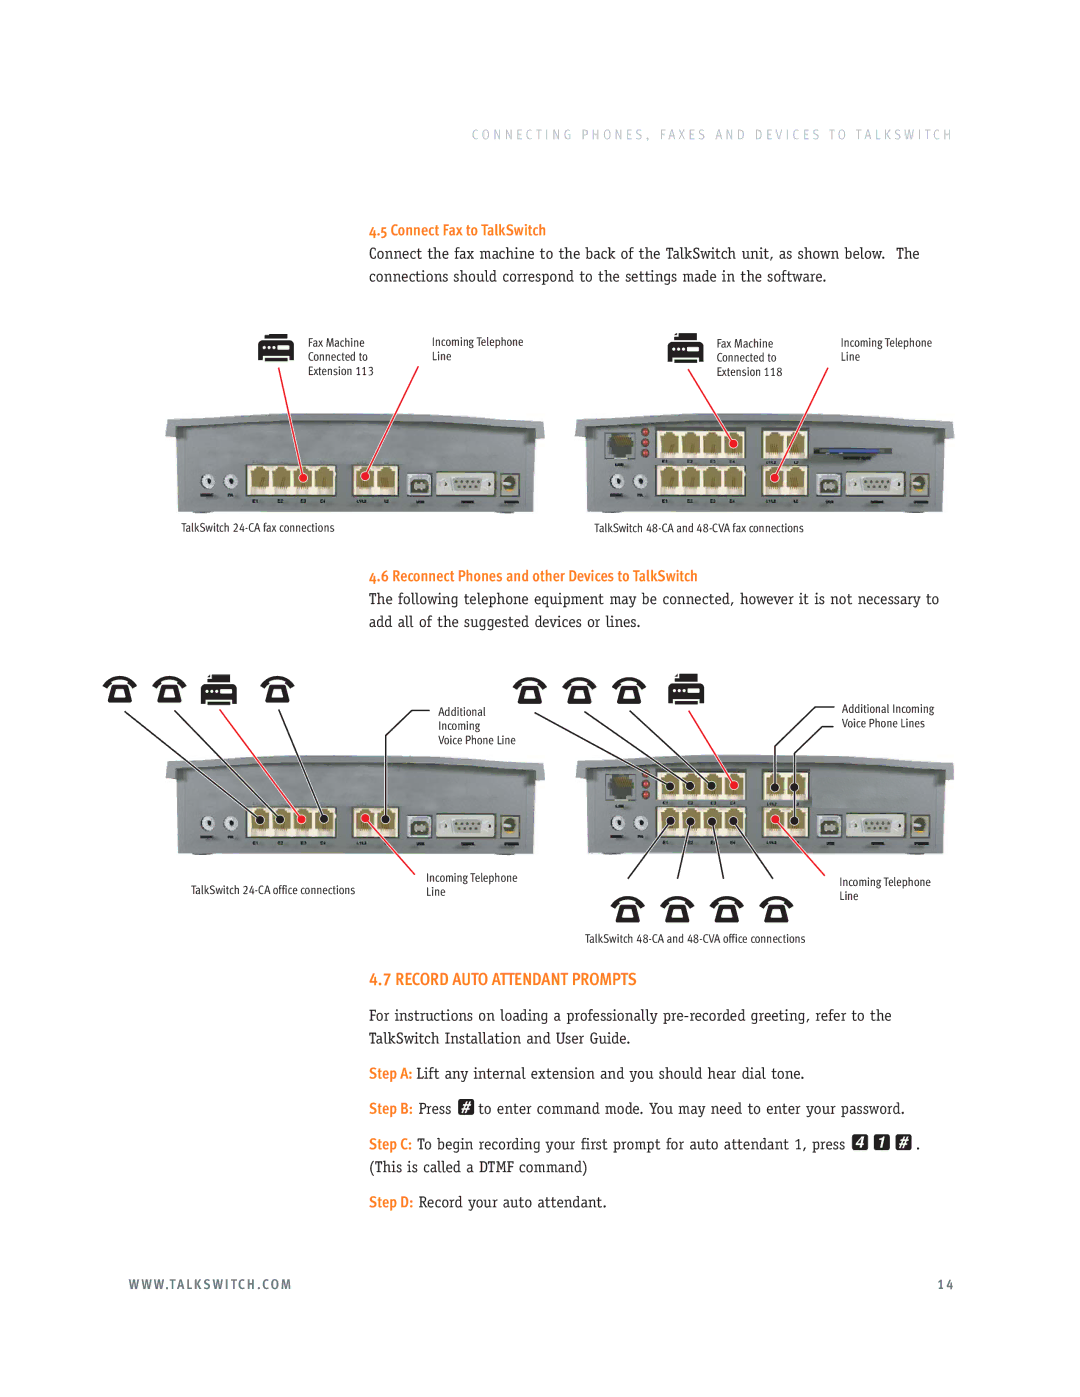
4.5 Connect Fax to TalkSwitch
Connect the fax machine to the back of the TalkSwitch unit, as shown below. The
connections should correspond to the settings made in the software.
Fax Machine | Incoming Telephone |
| Fax Machine | Incoming Telephone |
Connected to | Line |
| Connected to | Line |
| ||||
Extension 113 |
|
| Extension 118 |
|
TalkSwitch | TalkSwitch |
4.6 Reconnect Phones and other Devices to TalkSwitch
The following telephone equipment may be connected, however it is not necessary to
add all of the suggested devices or lines.
Additional |
| Additional Incoming |
Incoming |
| Voice Phone Lines |
Voice Phone Line |
|
|
TalkSwitch | Incoming Telephone | Incoming Telephone | |
Line | |||
Line | |||
|
| ||
|
| TalkSwitch |
4.7 RECORD AUTO ATTENDANT PROMPTS
For instructions on loading a professionally
TalkSwitch Installation and User Guide.
Step A: Lift any internal extension and you should hear dial tone.
Step B: Press # to enter command mode. You may need to enter your password.
Step C: To begin recording your first prompt for auto attendant 1, press 4 1 # . (This is called a DTMF command)
Step D: Record your auto attendant.
W W W.T A L K S W I T C H . C O M | 1 4 |