C O N N E C T I N G P H O N E S , F A X E S A N D D E V I C E S T O T A L K S W I T C H
4. Automatic Detection via the Auto Attendant
This setting may change the way incoming calls are handled. All calls must be answered by the auto attendant. The auto attendant will then route calls to their des- tination.
4.1 Connect TalkSwitch to the PC, then Open the TalkSwitch Software
Connect TalkSwitch to your PC directly and open the TalkSwitch Configuration Software. For details refer to the “TalkSwitch Installation and User Guide”.
4.2 Configure the Auto Attendant
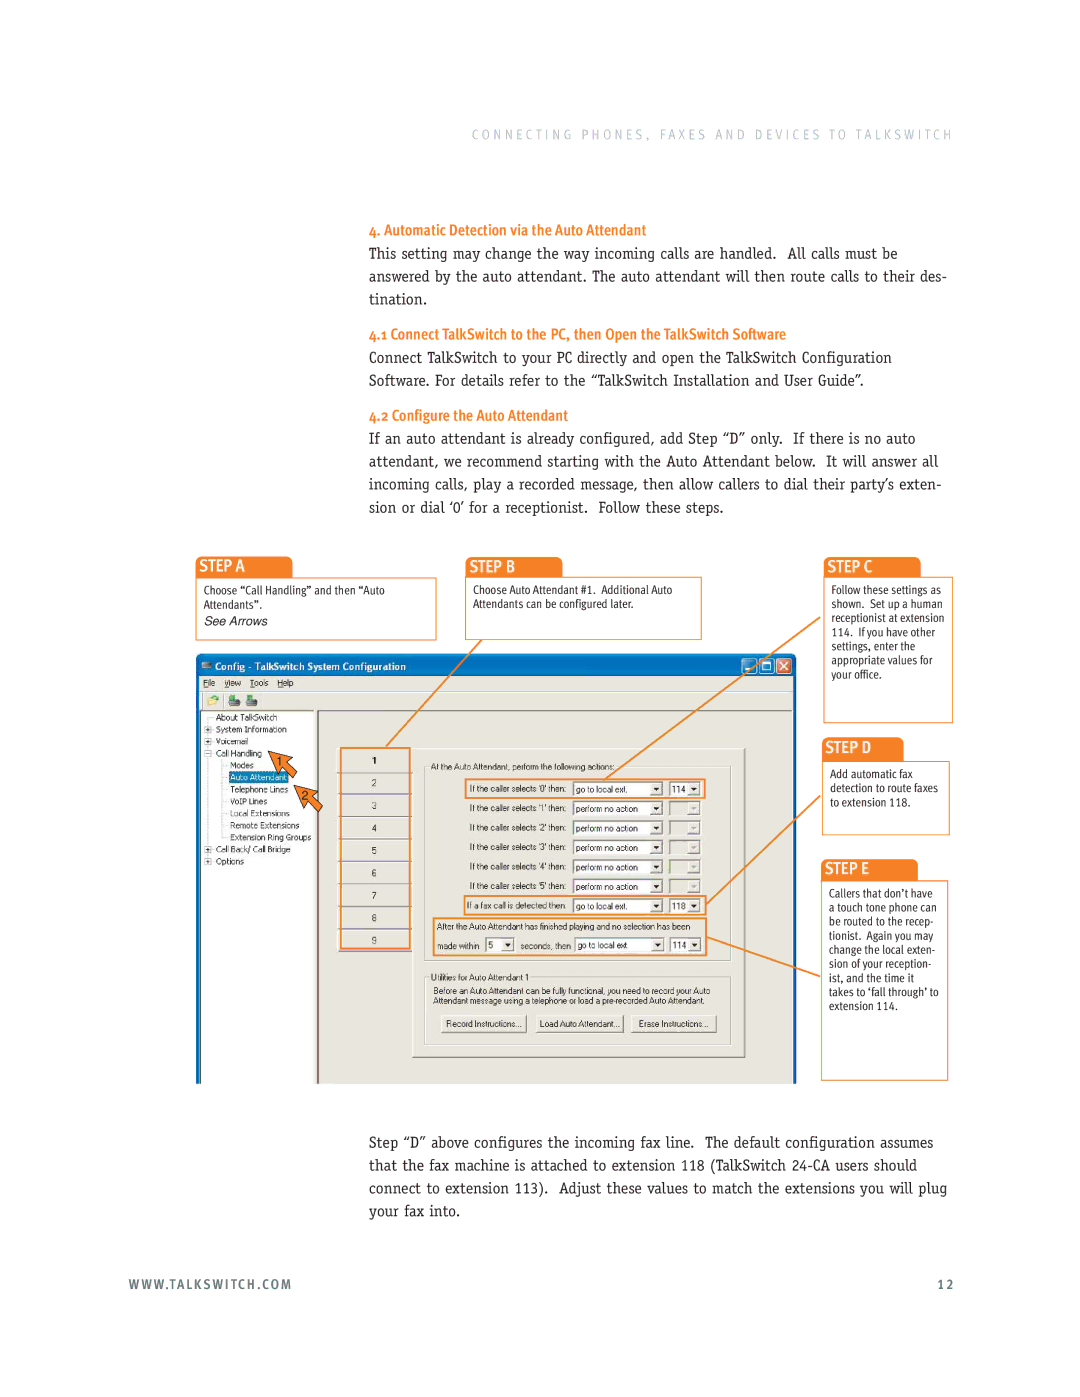
If an auto attendant is already configured, add Step “D” only. If there is no auto attendant, we recommend starting with the Auto Attendant below. It will answer all incoming calls, play a recorded message, then allow callers to dial their party’s exten- sion or dial ‘0’ for a receptionist. Follow these steps.
STEP A
Choose “Call Handling” and then “Auto Attendants”.
See Arrows
1
2
STEP B
Choose Auto Attendant #1. Additional Auto Attendants can be configured later.
STEP C
Follow these settings as shown. Set up a human receptionist at extension
114.If you have other settings, enter the appropriate values for your office.
STEP D
Add automatic fax detection to route faxes to extension 118.
STEP E
Callers that don’t have a touch tone phone can be routed to the recep- tionist. Again you may change the local exten- sion of your reception- ist, and the time it takes to ‘fall through’ to extension 114.
Step “D” above configures the incoming fax line. The default configuration assumes that the fax machine is attached to extension 118 (TalkSwitch
W W W.T A L K S W I T C H . C O M | 1 2 |
