Setting the cooking time
1.Select the desired oven function and cooking temperature.
2.Press the “Timer” as often as necessary, until the “cook time” ➔❘ symbol appears.
3.Set the desired cooking time by using the – or +, whilst the “timer arrow”  is flashing. After 5 seconds from the last time adjustment the “timer arrow”
  will disappear and your appliance is now programmed.
4.When the set time has elapsed, a signal will sound. To stop the signal, press “+” or “–”.
Setting the stop time
1.Select the desired oven function and cooking temperature.
2.Press the “Timer” as often as necessary, until the “end time” ➔❘ symbol appears flashing.
3.Set the desired switch-off time using the – or + whilst the “timer arrow”  is flashing. After 5 seconds from the last time adjustment the “timer arrow” ➔❘ will disappear and your appliance is now programmed.
4.When the set time has elapsed, a signal will sound. To stop the signal, press “+” or “–”.
Setting the delayed start cooking time
The “cook time” and “stop time” functions can be combined to switch the oven on and off at a specific time during the day.
1.Select the desired oven function and cooking temperature.
2.Press “Timer” as often as necessary, until the “cook time” ❘➔❘ symbol appears.
3.Set the desired cooking time by using – or + , whilst the “timer arrow”  is flashing.
4.Press “Timer” as often as necessary, until the “end time”
➔❘ symbol appears flashing
5.Set the desired switch-off time using the – or + whilst the “timer arrow”  is flashing. The “cook time” ❘➔❘ and
“end time” ➔❘ arrows are lit to confirm that the oven has been programmed.
On completion of cooking
When the set time has elapsed, a signal will sound for
1 minute, the oven will switch off and the remaining time indication “0.00” will appear on the display.
1. To stop the signal, press “+” or “–”.
Setting the minute minder
For setting a countdown period. When the period of time has elapsed, an audible signal is sounded.
NOTE: This feature has no effect on the oven operation.
1.Press “Timer” as often as necessary, until the “minute minder” symbol  appears flashing. Set the desired length of time using – or + whilst the “timer arrow”
  is flashing. After 5 seconds from the last time adjustment the “timer arrow”
 will disappear and the minute minder has been set. Once the set time has elapsed, a signal will sound for
1 minute. The time indication “0.00” and a flashing “minute minder” symbol  will appear on the display.
2.To stop the signal, press “+” or “–”.
Using FHU (Fast Heat Up) mode
To quickly and efficiently preheat your oven, it is recommended to select the “Fast Heat” cooking feature.
1.Ensure the appliance is on by pressing the “On / Off”.
The oven lights will light.
2.Select the desired oven function by pressing “Function”.
3.Set the cooking temperature by pressing the – or + to decrease or increase the temperature.
NOTE: The temperature can only be adjusted when the degrees symbol “°” is flashing.
The temperature setting changes in increments of 5°C.
4.Press the “Fast Heat”. The letters “FHU” will appear on the temperature display.
5.When the set temperature is reached the buzzer
will sound and the set temperature will be displayed. NOTE: “FHU” cannot be selected if the oven temperature is above the preset temperature.
Activating the child-proof lock
When the child lock is engaged, the oven cannot be switched on.
1.Switch off the appliance using the “On / Off”.
2.Press “Function” and – at the same time, hold until the word “SAFE” is displayed.
The child-proof lock is now engaged.
NOTE: When the child-proof lock function is active the time of day and minute minder can only be set.
Releasing the child-proof lock
1.Press “Function” and – at the same time, hold until the word “SAFE” is cleared from the display. The child-proof lock is now released and the oven is ready to use.
Beep on touch
The beep sound can be activated anytime when a symbol is pressed.
1.Ensure the oven is off by pressing “On / Off”.
2.Press “Function” and + simultaneously for 2 seconds, a single beep will sound to confirm the operation. Repeat the above procedure to reset the beep on touch mode. As default, the beep on touch mode is off.
Safety cut-out feature
The oven automatically switches itself off if the temperature is not adjusted or the appliance is left operating after a period of time. The oven switches itself off after:
•20 hours when set between 30°C and 120°C
•8.5 hours when set between 120°C and 200°C
•5.5 hours when set between 200°C and 250°C
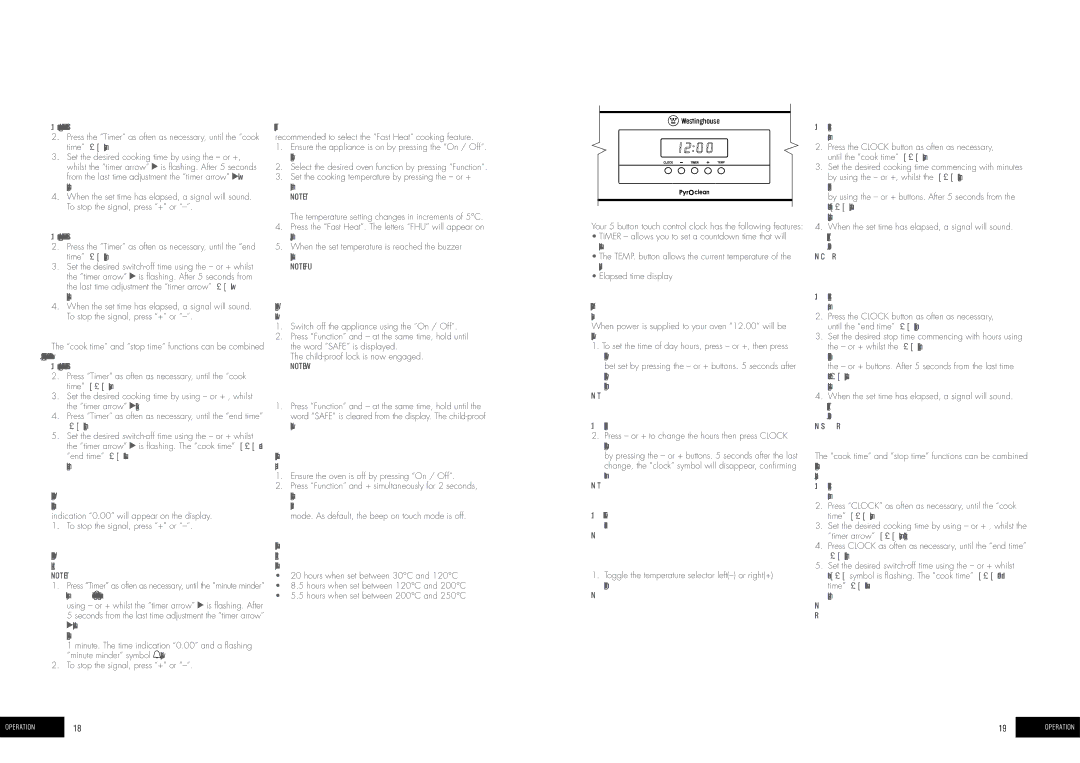
General features
Your 5 button touch control clock has the following features:
•TIMER – allows you to set a countdown time that will beep when the set time has elapsed.
•The TEMP. button allows the current temperature of the oven to be displayed.
•Elapsed time display
Setting the time of day
You must set the time of day before you can operate your appliance.
When power is supplied to your oven “12.00“ will be displayed on the clock and the display will flash.
1.To set the time of day hours, press – or +, then press
CLOCK and the seconds will begin to flash which can bet set by pressing the – or + buttons. 5 seconds after the last change, the clock display will stop flashing,
confirming that the time has been set. Note: The clock has a 24-hour display.
Change the time of day (Daylight saving)
1.Press CLOCK until the clock display begins to flash.
2.Press – or + to change the hours then press CLOCK and the minutes will begin to flash which can be set by pressing the – or + buttons. 5 seconds after the last change, the “clock” symbol will disappear, confirming
the time has been set.
Note: The clock has a 24-hour display.
Setting the oven function
1.Turn the oven function selector clockwise to select the desired oven function.
Note: each oven function has a default temperature which can then be adjusted as outlined below.
Changing the oven temperature
1.Toggle the temperature selector left(–) or right(+)
as required to set the desired cooking temperature.
Note: the temperature can be adjusted at any time throughout the cooking time.
Setting the cooking time
1.Select the desired oven function and cooking temperature.
2.Press the CLOCK button as often as necessary, until the “cook time” ❘➔❘ symbol appears.
3.Set the desired cooking time commencing with minutes by using the – or +, whilst the ❘➔❘ symbol is flashing, then press the CLOCK button again and set the hours by using the – or + buttons. After 5 seconds from the last time adjustment the ❘➔❘ symbol will disappear and your appliance is now programmed.
4.When the set time has elapsed, a signal will sound.
To stop the signal, press any button on the clock and then turn the oven function selector to OFF.
Note: Cooking time cannot be set for the Rapid Heat function.
Setting the stop time
1.Select the desired oven function and cooking temperature.
2.Press the CLOCK button as often as necessary, until the “end time” ➔❘ symbol appears flashing.
3.Set the desired stop time commencing with hours using the – or + whilst the ➔❘ symbol is flashing, then press the CLOCK button again and set the minutes by using the – or + buttons. After 5 seconds from the last time adjustment the ➔❘ symbol will disappear and your appliance is now programmed.
4.When the set time has elapsed, a signal will sound.
To stop the signal, press any button on the clock and then turn the oven function selector to OFF.
Note: Stop time cannot be set for the Rapid Heat function.
Setting the delayed start cooking time
The “cook time” and “stop time” functions can be combined to switch the oven on and off at a specific time during
the day.
1.Select the desired oven function and cooking temperature.
2.Press “CLOCK” as often as necessary, until the “cook time” ❘➔❘ symbol appears.
3.Set the desired cooking time by using – or + , whilst the “timer arrow” ❘➔❘ symbol is flashing.
4.Press CLOCK as often as necessary, until the “end time”
➔❘ symbol appears flashing
5.Set the desired switch-off time using the – or + whilst the ❘➔❘ symbol is flashing. The “cook time” ❘➔❘ and “end
time” ➔❘ arrows are lit to confirm that the oven has been programmed.
Note: Delayed start cooking time cannot be set for the Rapid Heat function.