All installations and services must be performed by qualified service personnel.
NOTICE: A U-tube manometer, measuring pressure in inches of water column, is recommended for all gas pressure measurements. However, an aneroid pressure gauge, in good working condition, capable of reading pressure changes of 0.05 in. W.G., or less, that was recently calibrated (within the last year), is a satisfactory alternate. These two (2) devices will be considered as equivalent and interchangeable. Either device is referred to below as a “pressure gauge”
NOTICE: This
1.Shut off the gas at the automatic gas control valve (turn gas control switch to the OFF position).
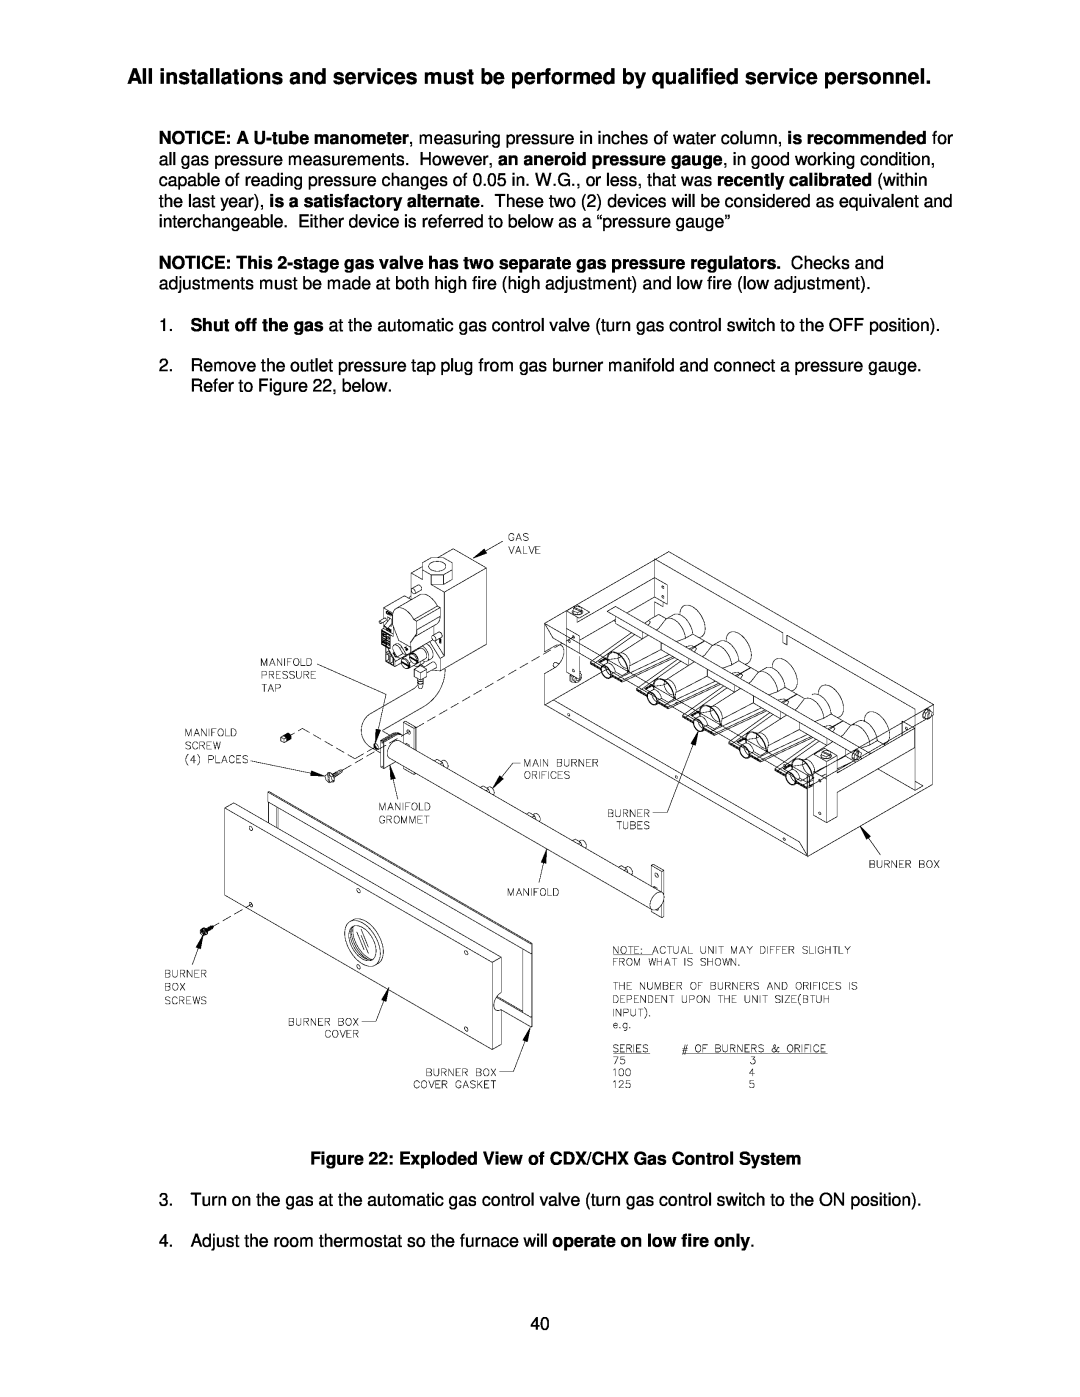
2.Remove the outlet pressure tap plug from gas burner manifold and connect a pressure gauge. Refer to Figure 22, below.
Figure 22: Exploded View of CDX/CHX Gas Control System
3.Turn on the gas at the automatic gas control valve (turn gas control switch to the ON position).
4.Adjust the room thermostat so the furnace will operate on low fire only.
40