HARDWARE BASICS
HARDWARE BASICS
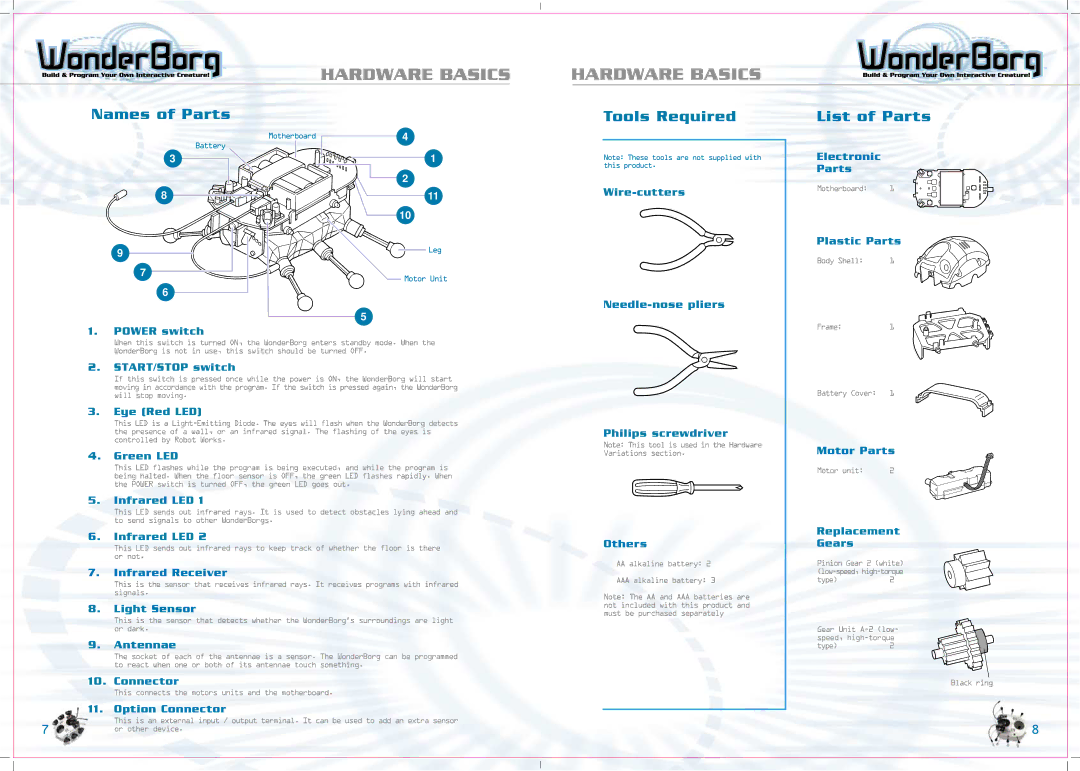
Names of Parts
Motherboard4
Battery
3 | 1 |
| 2 |
8 | 11 |
| 10 |
9 | Leg |
| |
7 | Motor Unit |
|
6
5
1.POWER switch
When this switch is turned ON, the WonderBorg enters standby mode. When the WonderBorg is not in use, this switch should be turned OFF.
2.START/STOP switch
If this switch is pressed once while the power is ON, the WonderBorg will start moving in accordance with the program. If the switch is pressed again, the WonderBorg will stop moving.
3.Eye (Red LED)
This LED is a
4.Green LED
This LED flashes while the program is being executed, and while the program is being halted. When the floor sensor is OFF, the green LED flashes rapidly. When the POWER switch is turned OFF, the green LED goes out.
5.Infrared LED 1
This LED sends out infrared rays. It is used to detect obstacles lying ahead and to send signals to other WonderBorgs.
6.Infrared LED 2
This LED sends out infrared rays to keep track of whether the floor is there or not.
7.Infrared Receiver
This is the sensor that receives infrared rays. It receives programs with infrared signals.
8.Light Sensor
This is the sensor that detects whether the WonderBorg’s surroundings are light or dark.
9.Antennae
The socket of each of the antennae is a sensor. The WonderBorg can be programmed to react when one or both of its antennae touch something.
Tools Required
Note: These tools are not supplied with this product.
Philips screwdriver
Note: This tool is used in the Hardware Variations section.
Others
AAalkaline battery: 2 AAA alkaline battery: 3
Note: The AA and AAA batteries are not included with this product and must be purchased separately
List of Parts
Electronic
Parts
Motherboard: 1
Plastic Parts
Body Shell: | 1 |
Frame: 1
Battery Cover: 1
Motor Parts
Motor unit: | 2 |
Replacement
Gears
Pinion Gear 2 (white)
type) 2
Gear Unit
type) 2
10. Connector
This connects the motors units and the motherboard.
11. Option Connector
This is an external input / output terminal. It can be used to add an extra sensor
7or other device.
Black ring
8