| 1. AV2 IN: By means of | |
| Plug the SCART Cable with satellite receiver or | |
| other equipment into the AV2 (DEC./EXT.) socket | |
| on the rear of the DVD | |
| After making this connection, select the source by | |
| pressing the INPUT SEL. button for the AV2 input | |
| sources. | |
| 2. By means of RF Cable | |
| After making this connection, you must preset the | |
| station received through the satellite tuner. | |
| RF output channel of the satellite receiver should | |
| be adjusted away from channel 60, which is used | |
onnectionsC | by the DVD | |
65. | ||
| ||
| Satellite Receiver or other | |
| Equipment | |
| Aerial Connector |
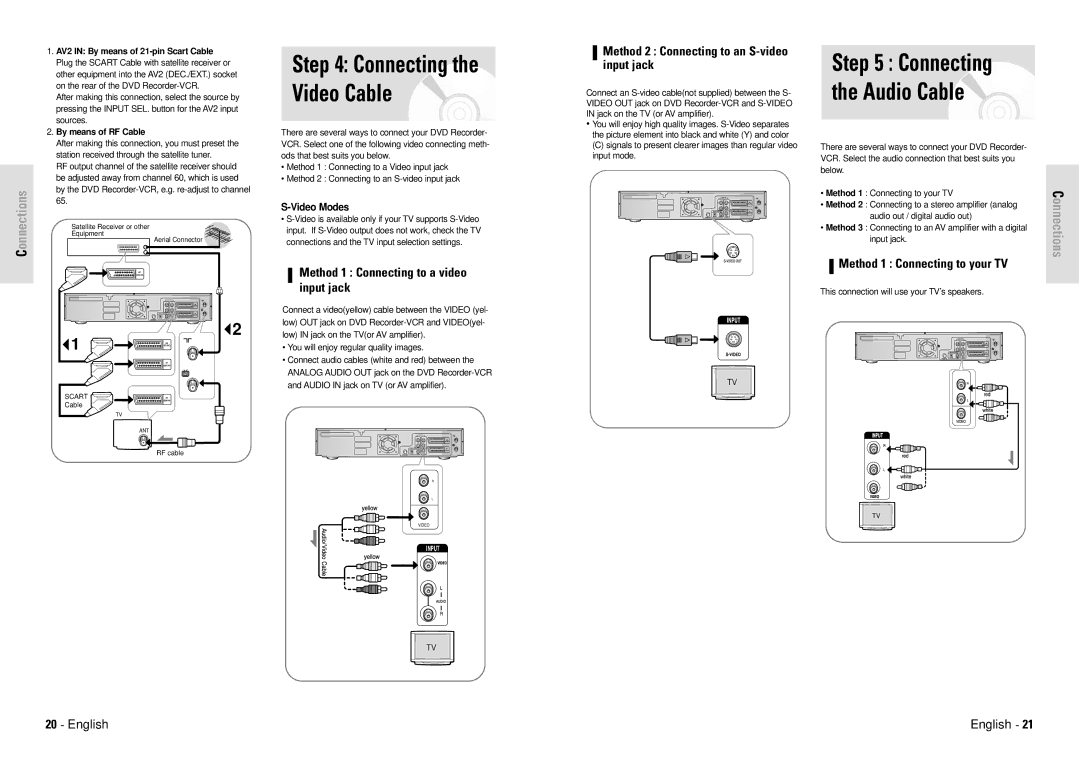
Step 4: Connecting the Video Cable
There are several ways to connect your DVD Recorder- VCR. Select one of the following video connecting meth- ods that best suits you below.
•Method 1 : Connecting to a Video input jack
•Method 2 : Connecting to an
S-Video Modes
•
Method 1 : Connecting to a video input jack
Method 2 : Connecting to an
Connect an
•You will enjoy high quality images.
(C) signals to present clearer images than regular video input mode.
Step 5 : Connecting the Audio Cable
There are several ways to connect your DVD Recorder- VCR. Select the audio connection that best suits you below.
•Method 1 : Connecting to your TV
•Method 2 : Connecting to a stereo amplifier (analog
audio out / digital audio out)
•Method 3 : Connecting to an AV amplifier with a digital input jack.
Method 1 : Connecting to your TV
This connection will use your TV’s speakers.
Connections
![]() 1
1 ![]()
![]()
![]()
![]()
![]()
![]()
![]()
![]()
SCART
Cable
TV
ANT
![]() 2
2
Connect a video(yellow) cable between the VIDEO (yel- low) OUT jack on DVD
•You will enjoy regular quality images.
•Connect audio cables (white and red) between the ANALOG AUDIO OUT jack on the DVD
RF cable
R
L
VIDEO
INPUT
L
AUDIO
R
20 - English | English - 21 |