
 Picture projection with the document imaging camera
CONTENTS | 56 |
CAUTION
Do not look into the arm light while it is lit.
Camera control panel
W.BALANCE OVERLAY | ARM LIGHT | 1 |
LOCK |
| |
CAMERA | CAMERA |
GAIN
Preparation
1Project a picture on the screen as explained in the step “Projection on the screen”. 28![]()
1 | ARM LIGHT | Press ARM LIGHT. |
| |
|
| |||
|
|
| ||
2 |
| The light turns on. |
|
|
| Set a document to be projected. |
| ||
|
|
| ||
|
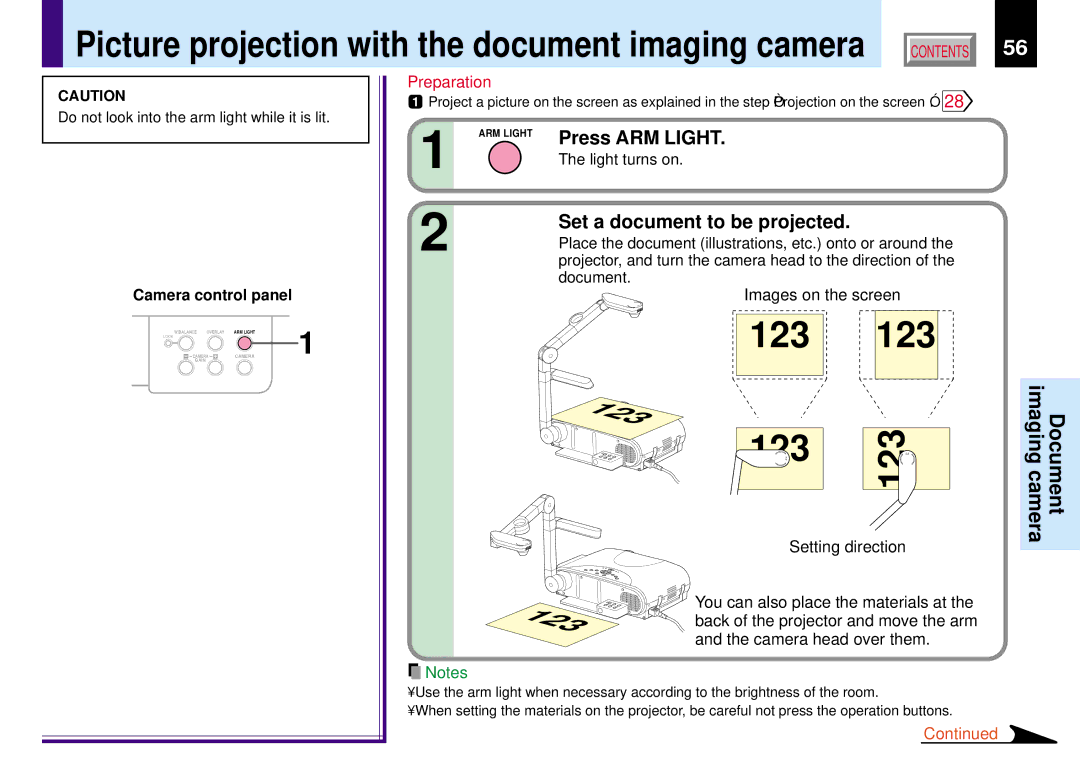
| Place the document (illustrations, etc.) onto or around the | ||
|
| projector, and turn the camera head to the direction of the | ||
|
| document. | Images on the screen | |
|
|
| ||
|
|
| 123 | 123 |
|
| 123 |
| 123 |
|
|
| 123 | |
|
|
|
| |
|
|
| Setting direction | |
| 123 | You can also place the materials at the | ||
| back of the projector and move the arm | |||
|
|
| ||
and the camera head over them.
![]() Notes
Notes
•Use the arm light when necessary according to the brightness of the room.
•When setting the materials on the projector, be careful not press the operation buttons.
Continued
