Installation
Single-Stage Installation
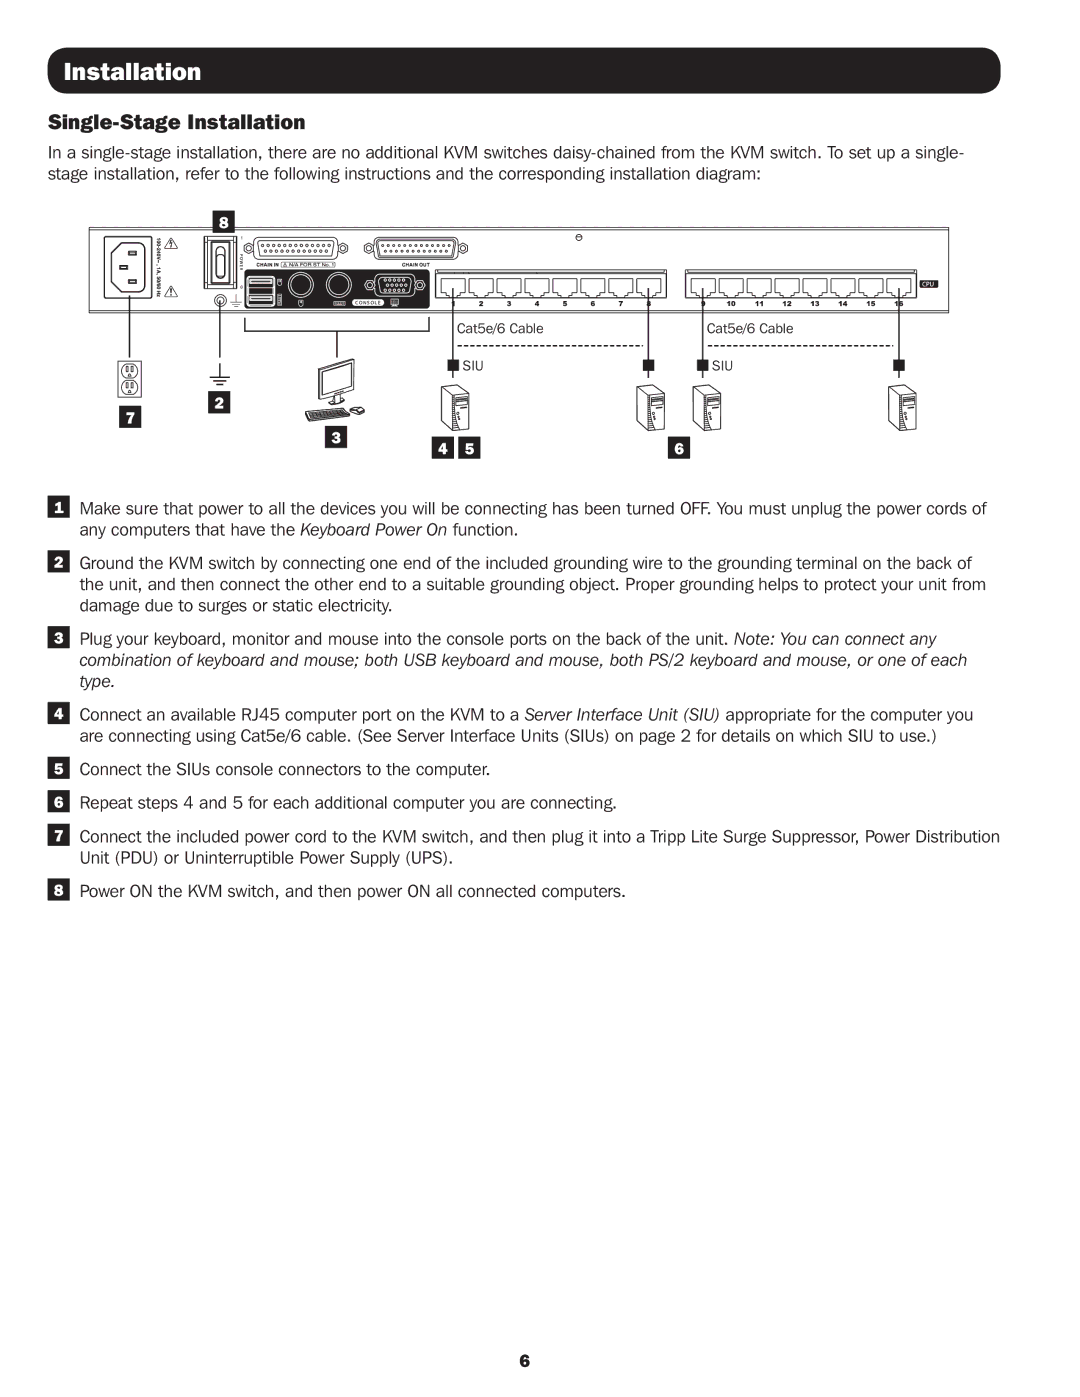
In a
8 |
|
|
|
|
| Cat5e/6 Cable | Cat5e/6 Cable |
|
| SIU | SIU |
2 |
|
|
|
7 |
|
|
|
3 | 4 | 5 | 6 |
|
1Make sure that power to all the devices you will be connecting has been turned OFF. You must unplug the power cords of any computers that have the Keyboard Power On function.
2Ground the KVM switch by connecting one end of the included grounding wire to the grounding terminal on the back of the unit, and then connect the other end to a suitable grounding object. Proper grounding helps to protect your unit from damage due to surges or static electricity.
3Plug your keyboard, monitor and mouse into the console ports on the back of the unit. Note: You can connect any combination of keyboard and mouse; both USB keyboard and mouse, both PS/2 keyboard and mouse, or one of each type.
4Connect an available RJ45 computer port on the KVM to a Server Interface Unit (SIU) appropriate for the computer you are connecting using Cat5e/6 cable. (See Server Interface Units (SIUs) on page 2 for details on which SIU to use.)
5Connect the SIUs console connectors to the computer.
6Repeat steps 4 and 5 for each additional computer you are connecting.
7Connect the included power cord to the KVM switch, and then plug it into a Tripp Lite Surge Suppressor, Power Distribution Unit (PDU) or Uninterruptible Power Supply (UPS).
8Power ON the KVM switch, and then power ON all connected computers.
6