Hardware Setup

Rack Mounting Safety Instructions

Before working on the rack, make sure that the stabilizers are secured to the rack, extended to the floor, and that the full weight of the rack rests on the floor. Install front and side stabilizers on a single rack or front stabilizers for joined multiple racks before working on the rack.

Always load the rack from the bottom up, and load the heaviest item in the rack first.

Make sure that the rack is level and stable before extending a device from the rack.

Use caution when pressing the device rail release latches and sliding a device into or out of a rack; the slide rails can pinch your fingers.

After a device is inserted into the rack, carefully extend the rail into a locking position, and then slide the device into the rack.

Do not overload the AC supply branch circuit that provides power to the rack. The total rack load should not exceed 80 percent of the branch circuit rating.

Make sure that all equipment used on the rack, including power strips and other electrical connectors, is properly grounded.

Ensure that proper airflow is provided to devices in the rack.

Ensure that the operating ambient temperature of the rack environment does not exceed the maximum ambient temperature specified for the equipment by the manufacturer

Do not step on or stand on any device when servicing other devices in a rack.

Stacking

The KVM switch can be placed on any appropriate level surface that can safely support its weight plus the weight of its attached cables. When placing the KVM switch on a desktop, remove the backing material from the rubber feet that came with this package and stick them onto the switch’s bottom panel at the corners.

Note: To ensure adequate ventilation, allow at least 5 cm on each side, and 13 cm at the back for power cord and cable clearance.

Rack Mounting

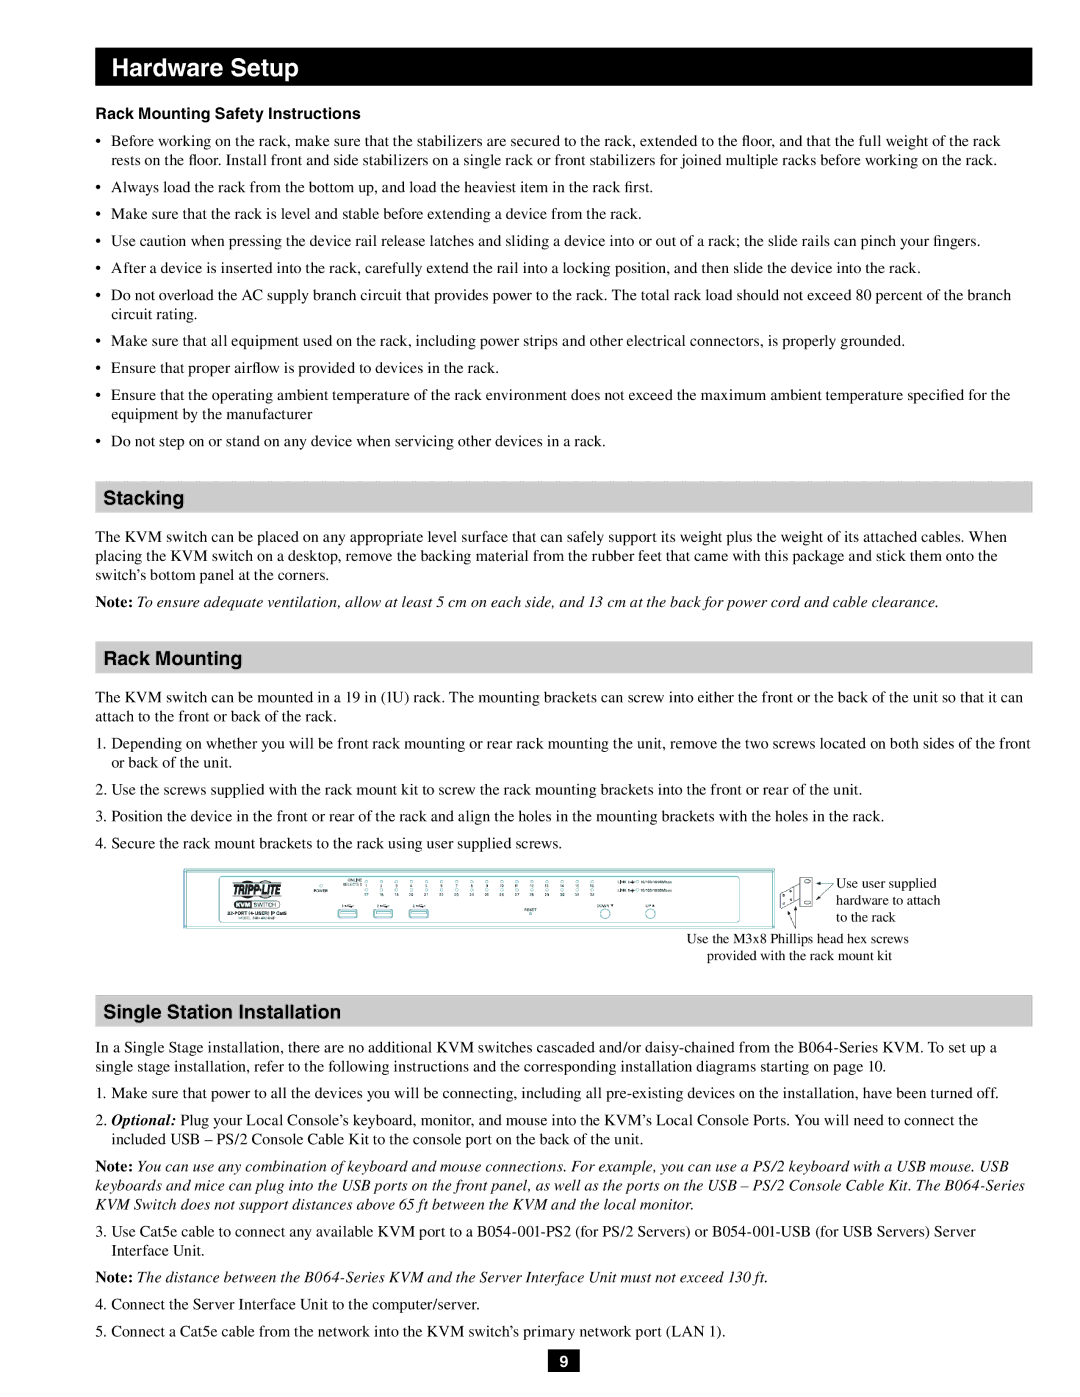
The KVM switch can be mounted in a 19 in (1U) rack. The mounting brackets can screw into either the front or the back of the unit so that it can attach to the front or back of the rack.

1.Depending on whether you will be front rack mounting or rear rack mounting the unit, remove the two screws located on both sides of the front or back of the unit.

2.Use the screws supplied with the rack mount kit to screw the rack mounting brackets into the front or rear of the unit.

3.Position the device in the front or rear of the rack and align the holes in the mounting brackets with the holes in the rack.

4.Secure the rack mount brackets to the rack using user supplied screws.

Use user supplied hardware to attach to the rack

Use the M3x8 Phillips head hex screws provided with the rack mount kit

Single Station Installation

In a Single Stage installation, there are no additional KVM switches cascaded and/or daisy-chained from the B064-Series KVM. To set up a single stage installation, refer to the following instructions and the corresponding installation diagrams starting on page 10.

1.Make sure that power to all the devices you will be connecting, including all pre-existing devices on the installation, have been turned off.

2.Optional: Plug your Local Console’s keyboard, monitor, and mouse into the KVM’s Local Console Ports. You will need to connect the included USB – PS/2 Console Cable Kit to the console port on the back of the unit.

Note: You can use any combination of keyboard and mouse connections. For example, you can use a PS/2 keyboard with a USB mouse. USB keyboards and mice can plug into the USB ports on the front panel, as well as the ports on the USB – PS/2 Console Cable Kit. The B064-Series KVM Switch does not support distances above 65 ft between the KVM and the local monitor.

3.Use Cat5e cable to connect any available KVM port to a B054-001-PS2 (for PS/2 Servers) or B054-001-USB (for USB Servers) Server Interface Unit.

Note: The distance between the B064-Series KVM and the Server Interface Unit must not exceed 130 ft.

4.Connect the Server Interface Unit to the computer/server.

5.Connect a Cat5e cable from the network into the KVM switch’s primary network port (LAN 1).

9

Page 9
Image 9
Tripp Lite B064-032-02-IP, B064-016-02-IP Stacking, Single Station Installation, Rack Mounting Safety Instructions

B064-032-02-IP, B064-016-02-IP, B064-032-04-IP specifications

Tripp Lite is renowned for its high-quality connectivity solutions, and their line of IP-based KVM switches, including models B064-032-04-IP, B064-016-02-IP, and B064-032-02-IP, showcases exceptional features designed for professional environments. These devices are specifically engineered to facilitate seamless control and management of multiple servers or computers through a single console.

The Tripp Lite B064-032-04-IP provides comprehensive KVM switching capabilities, supporting up to 32 servers over IP. This model is perfect for large data centers or IT environments where remote access to multiple systems is necessary. It features a user-friendly web interface that simplifies management, allowing administrators to switch between and control connected systems with ease. Additionally, it includes robust security measures, such as HTTPS and SSH protocols, ensuring that unauthorized access is prevented.

On a smaller scale, the B064-016-02-IP and B064-032-02-IP models cater to different user needs. The B064-016-02-IP manages up to 16 servers and offers similar IP-based access, making it ideal for medium-sized businesses. It includes a built-in Cat5e/6 KVM switch that allows users to control multiple computers using a single keyboard, mouse, and monitor, significantly reducing the clutter of cables.

The B064-032-02-IP strikes a balance between the two, supporting 32 devices while maintaining a streamlined design. This model is particularly appealing for small to midsize organizations that require flexibility to grow without unnecessary complexity.

All three models are compatible with various operating systems and provide multiple connectivity options, including VGA and HDMI, to cater to diverse setups. They also support high-definition video resolutions, ensuring that users experience clear, crisp visuals.

In terms of reliability, these KVM switches are crafted using advanced components and adhere to stringent quality standards, enabling them to perform efficiently in demanding environments. With features like hot-plugging capability, users can add or remove servers without shutting down, ensuring minimal disruption to operations.

Collectively, the Tripp Lite B064 models offer a powerful and flexible solution for managing computers and servers in various settings, combining technology, security, and ease of use to meet the needs of modern IT infrastructures.