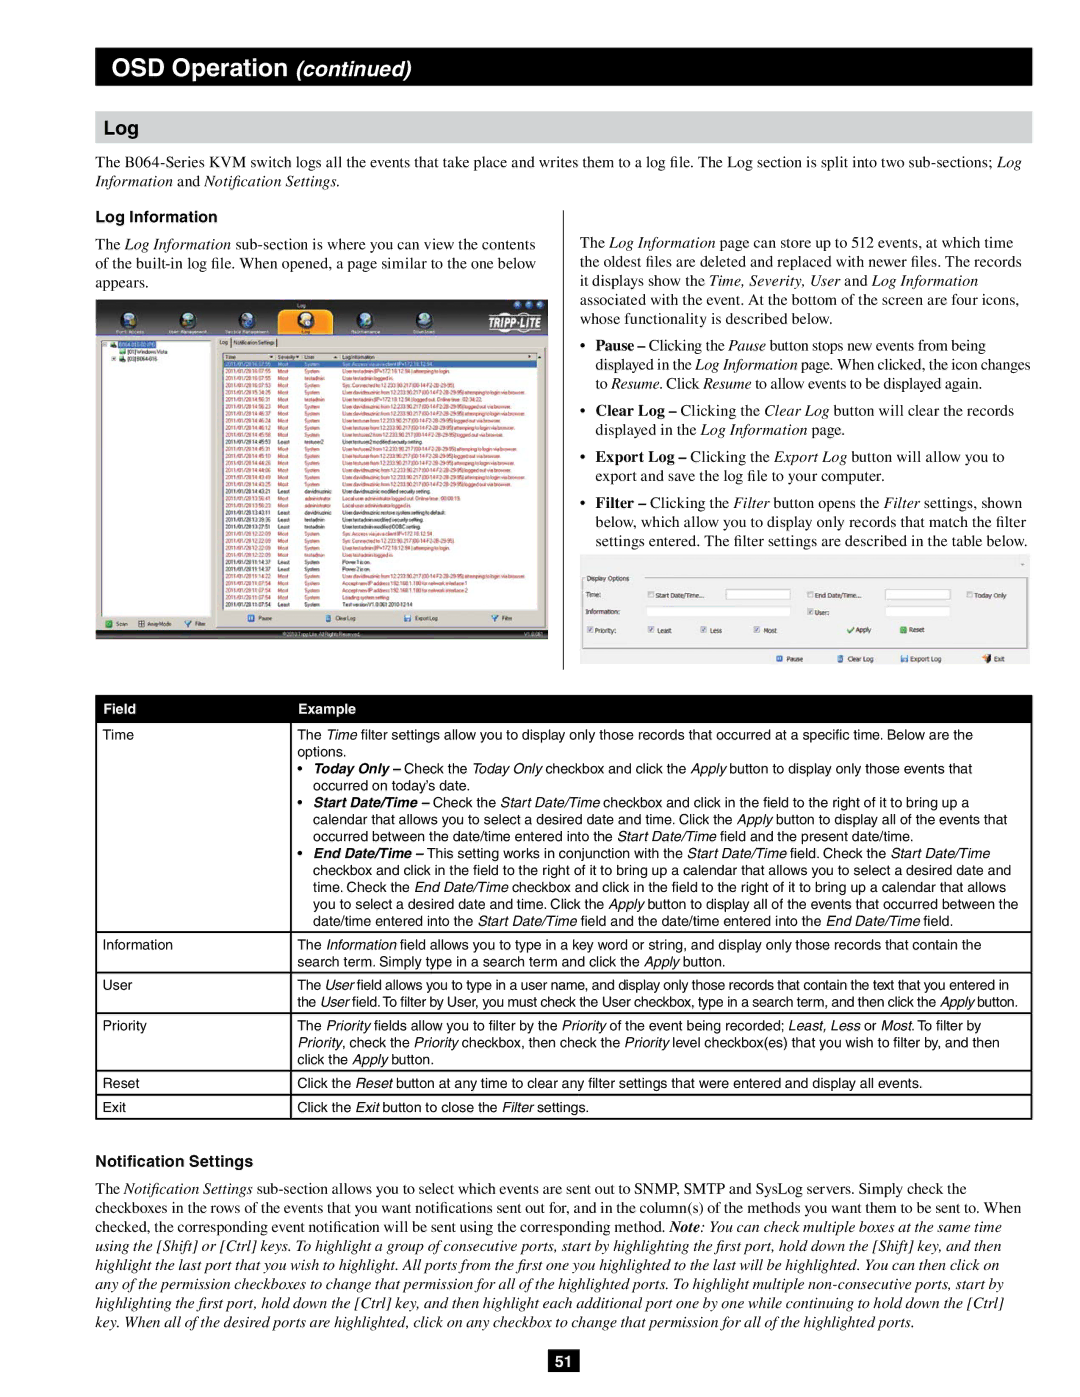
B064-016-02-IPG, B064-032-02-IPG, B064-016-04-IPG, B064-032-04-IPG specifications
The Tripp Lite B064-032-04-IPG is a highly efficient and versatile KVM switch that offers seamless control over multiple computers or servers from a single console. This device is engineered for professionals and IT administrators who require robust management of servers or machines located in different physical locations, particularly in demanding environments like data centers or server rooms.One of the standout features of the B064-032-04-IPG is its ability to facilitate access to up to 32 computers using a single set of keyboard, video monitor, and mouse. This not only streamlines workflows but also reduces clutter, as users no longer need multiple sets of peripherals for each machine. The switch supports both USB and PS/2 connection types, making it compatible with a wide range of devices.
The B064-032-04-IPG leverages advanced technology to offer a responsive and high-resolution video output, supporting resolutions up to 1920 x 1200. This ensures that users can easily view and interact with multiple systems without sacrificing visual quality. Additionally, the switch features a built-in web interface that allows administrators to configure settings with ease, enabling effective management in remote or local scenarios.
Security is a top priority with the B064-032-04-IPG, which supports user authentication and multi-level password protection. This guarantees that only authorized personnel can access sensitive systems, bolstering the overall security posture of the network. Furthermore, the switch includes features for firmware updates, ensuring that it stays current with the latest security protocols and enhancements.
Another key characteristic of this KVM switch is its support for hot-swappable functionality, which allows users to add or remove servers without needing to power down the entire system. This greatly enhances operational efficiency and minimizes downtime during maintenance or upgrades.
Built with a sturdy and reliable design, the Tripp Lite B064-032-04-IPG is suitable for various environments, including those that require ruggedness and durability. Its compact form factor makes installation straightforward, and its fanless design ensures silent operation, which is ideal for noise-sensitive areas.
In conclusion, the Tripp Lite B064-032-04-IPG is a powerful KVM switch that combines multiple advanced features, technologies, and characteristics, making it an excellent choice for large-scale server management. With its ease of use, security features, and high performance, it provides a seamless solution for IT professionals looking to optimize their hardware management in complex environments.