CONSOLE
1.Attach the wires from the handlebar and handlebar support tube to the corresponding console outlets. Thread the wires into the handlebar. Be careful not to damage the wires when attaching the console.
2.Slide the meter on the top of the handlebar support tube and attach it with three locking screws through the plastic sleeve.
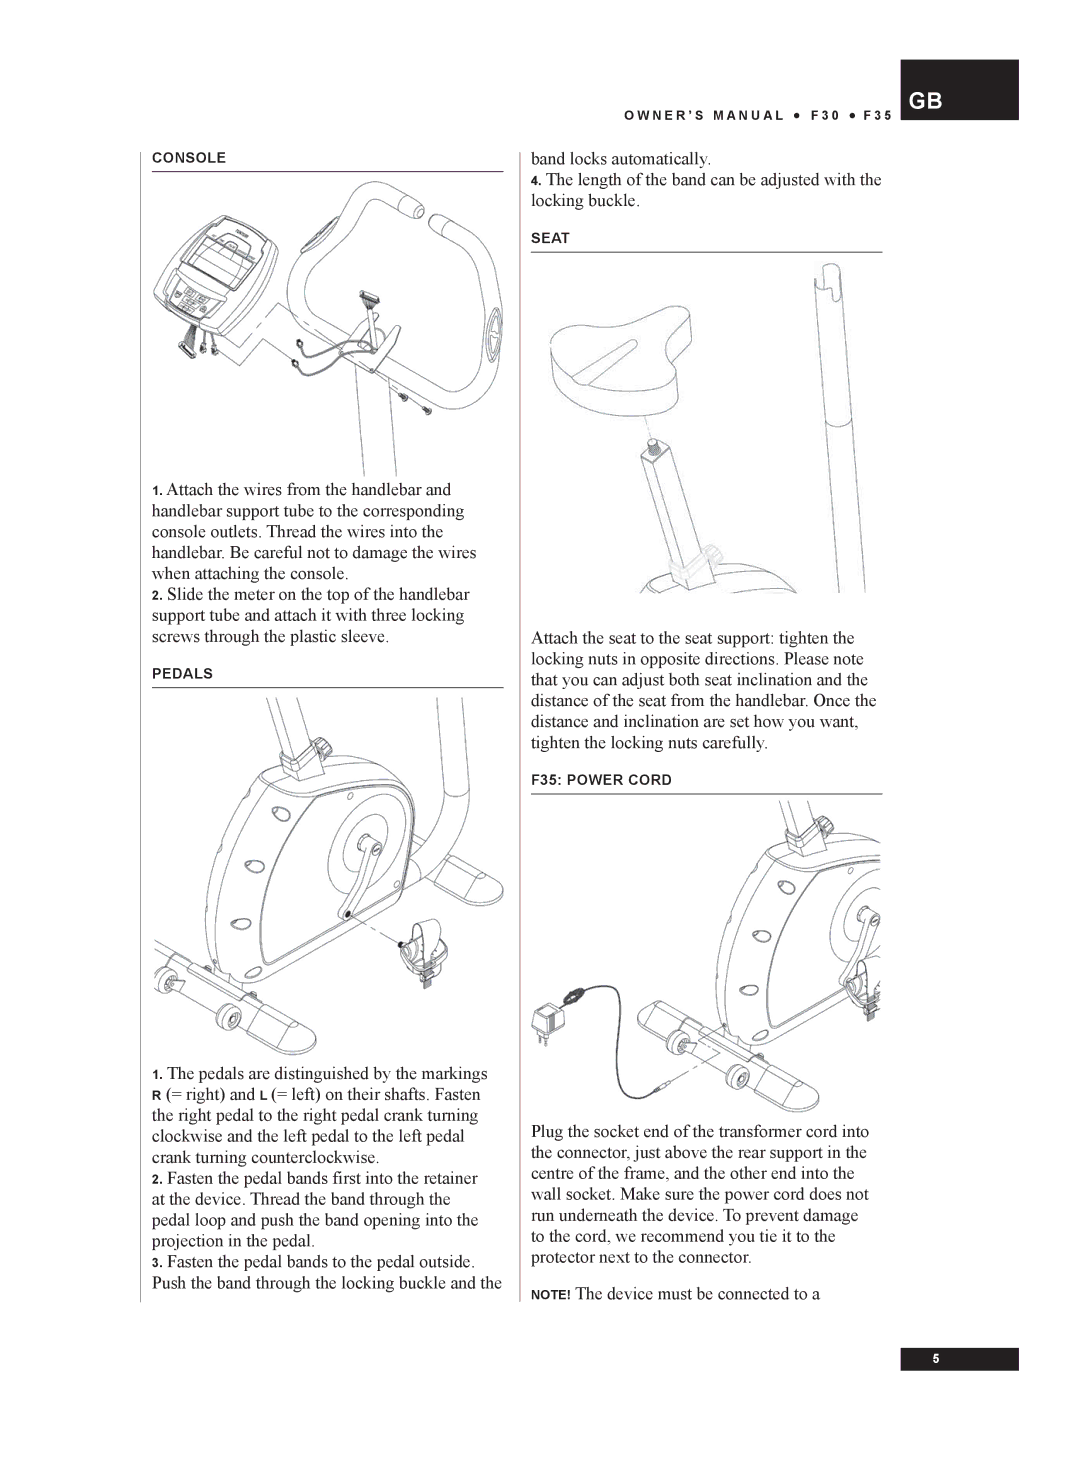
PEDALS
1.The pedals are distinguished by the markings R (= right) and L (= left) on their shafts. Fasten the right pedal to the right pedal crank turning clockwise and the left pedal to the left pedal crank turning counterclockwise.
2.Fasten the pedal bands first into the retainer at the device. Thread the band through the pedal loop and push the band opening into the projection in the pedal.
3.Fasten the pedal bands to the pedal outside. Push the band through the locking buckle and the
O W N E R ’ S M A N U A L • F 3 0 • F 3 5
band locks automatically.
4.The length of the band can be adjusted with the locking buckle.
SEAT
Attach the seat to the seat support: tighten the locking nuts in opposite directions. Please note that you can adjust both seat inclination and the distance of the seat from the handlebar. Once the distance and inclination are set how you want, tighten the locking nuts carefully.
F35: POWER CORD
Plug the socket end of the transformer cord into the connector, just above the rear support in the centre of the frame, and the other end into the wall socket. Make sure the power cord does not run underneath the device. To prevent damage to the cord, we recommend you tie it to the protector next to the connector.
NOTE! The device must be connected to a
GB
5