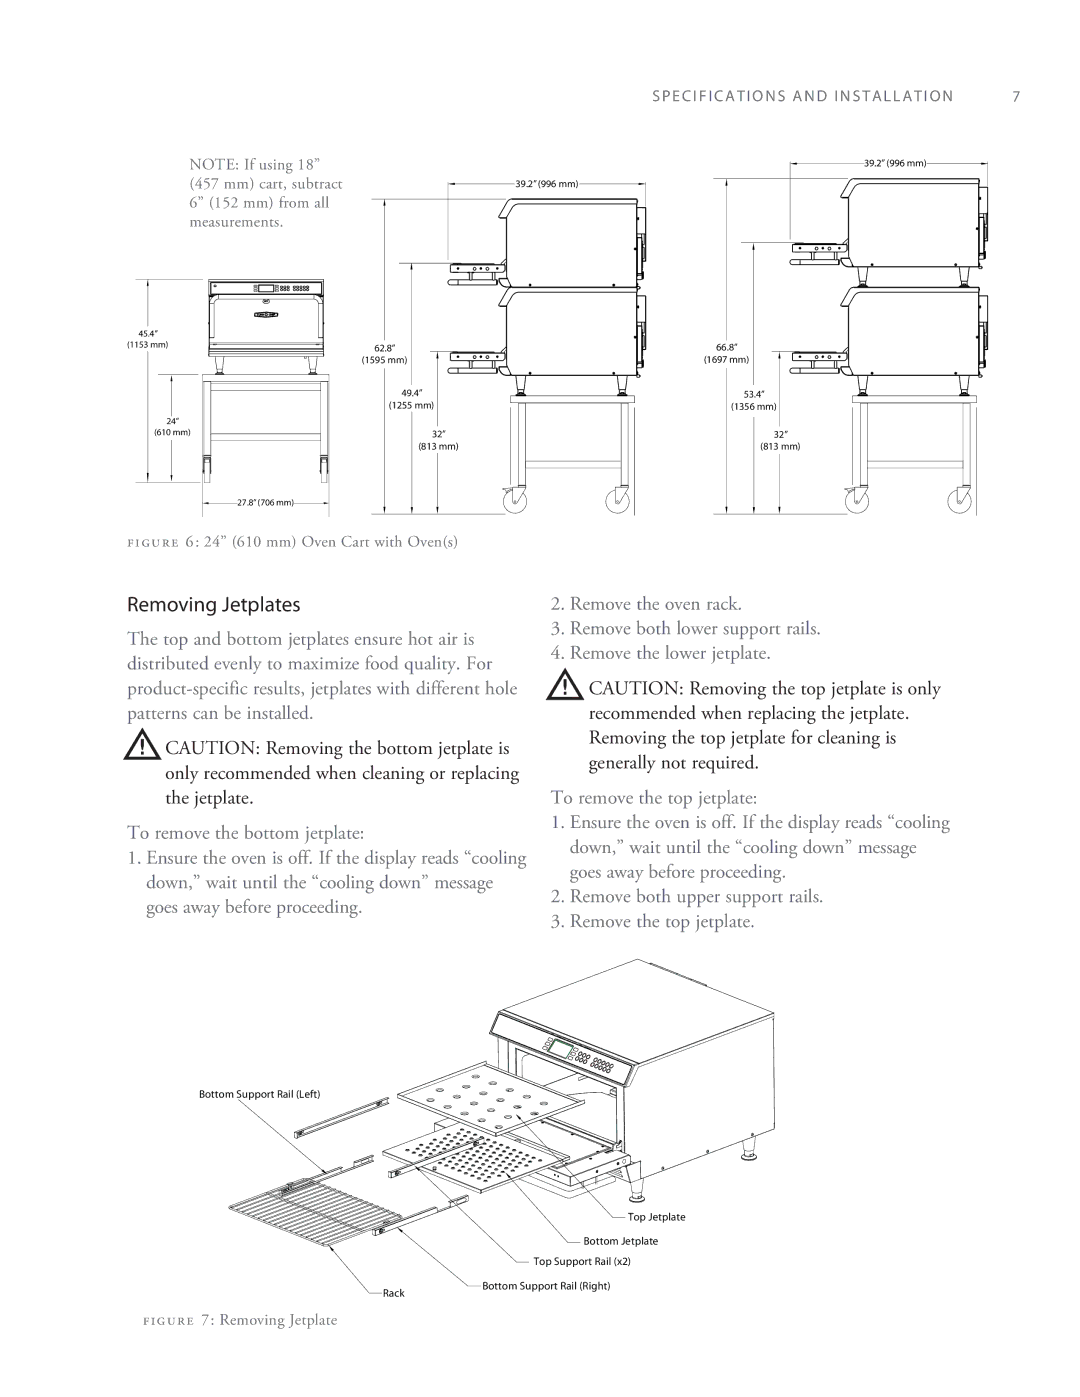
NOTE: If using 18” (457 mm) cart, subtract 6” (152 mm) from all measurements.
45.4” (1153 mm)
24” (610 mm)
27.8” (706 mm)
S P E C I F I C A T I O N S A N D I N S T A L L A T I O N | 7 | |||
|
| 39.2” (996 mm) |
|
|
|
|
|
| |
39.2” (996 mm)
62.8” | 66.8” |
(1595 mm) | (1697 mm) |
49.4” | 53.4” |
(1255 mm) | (1356 mm) |
32” | 32” |
(813 mm) | (813 mm) |
figure 6: 24” (610 mm) Oven Cart with Oven(s)
Removing Jetplates
The top and bottom jetplates ensure hot air is distributed evenly to maximize food quality. For
![]() CAUTION: Removing the bottom jetplate is only recommended when cleaning or replacing the jetplate.
CAUTION: Removing the bottom jetplate is only recommended when cleaning or replacing the jetplate.
To remove the bottom jetplate:
1.Ensure the oven is off. If the display reads “cooling down,” wait until the “cooling down” message goes away before proceeding.
2.Remove the oven rack.
3.Remove both lower support rails.
4.Remove the lower jetplate.
![]() CAUTION: Removing the top jetplate is only recommended when replacing the jetplate. Removing the top jetplate for cleaning is generally not required.
CAUTION: Removing the top jetplate is only recommended when replacing the jetplate. Removing the top jetplate for cleaning is generally not required.
To remove the top jetplate:
1.Ensure the oven is off. If the display reads “cooling down,” wait until the “cooling down” message goes away before proceeding.
2.Remove both upper support rails.
3.Remove the top jetplate.
Bottom Support Rail (Left)
Top Jetplate
Bottom Jetplate
Top Support Rail (x2)
Rack | Bottom Support Rail (Right) |
|
