4 THEORY OF OPERATION, SPECIFICATIONS, AND INSTALLATION
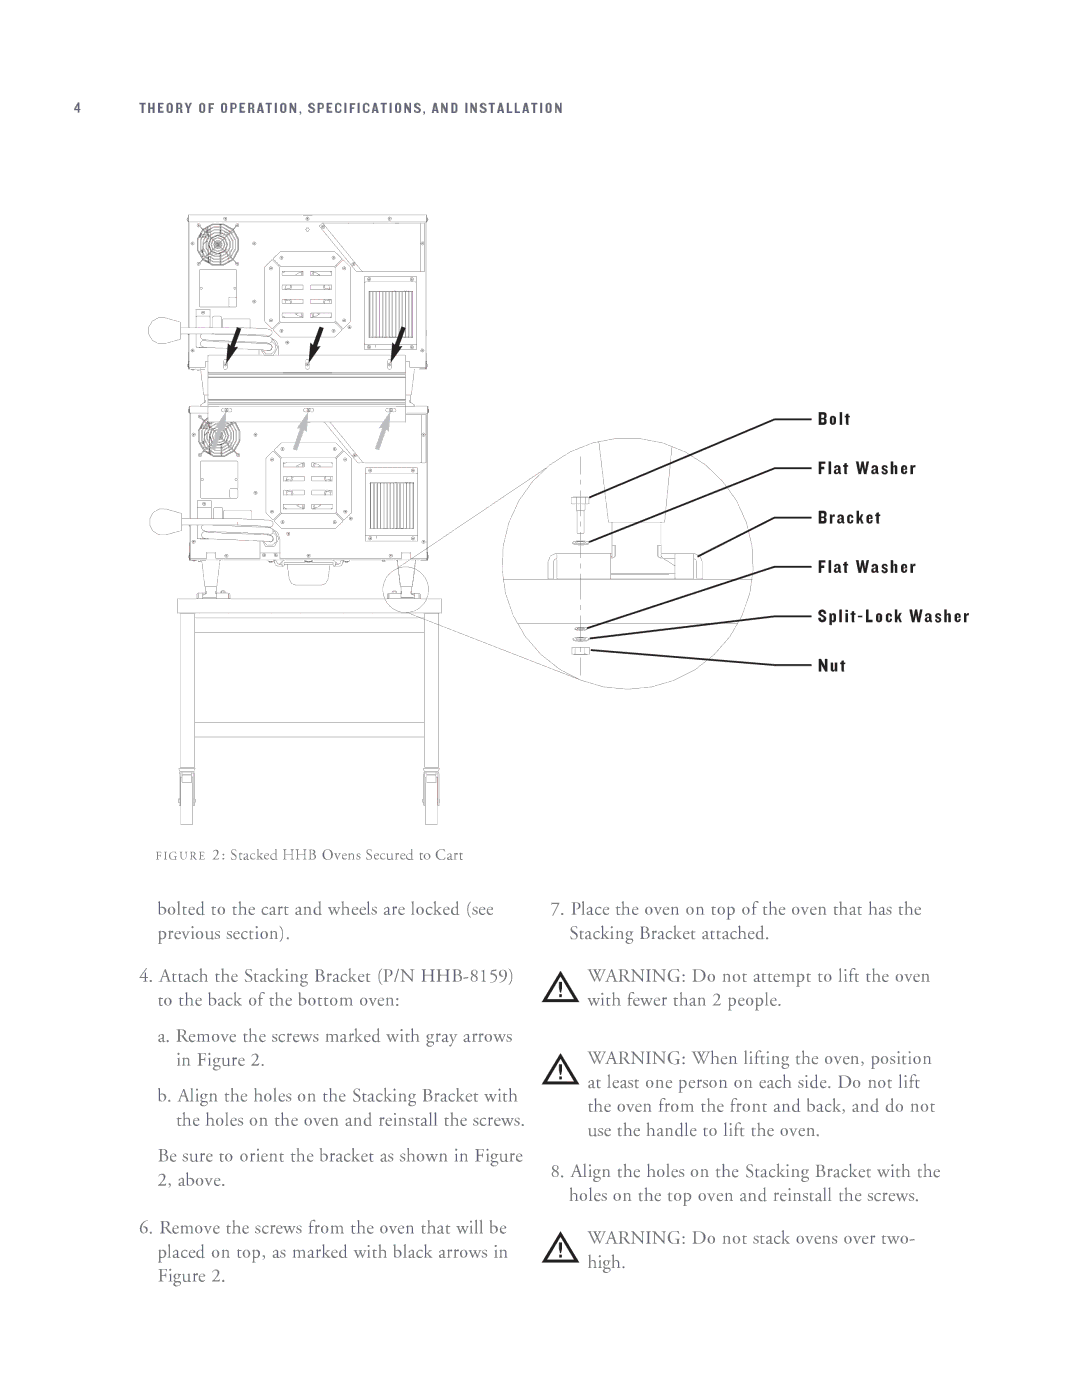
B o l t
Flat Washer
Bracket
Flat Washer
Split - Lock Washer
Nut
F I G U R E 2: Stacked HHB Ovens Secured to Cart
bolted to the cart and wheels are locked (see previous section).
4.Attach the Stacking Bracket (P/N
a.Remove the screws marked with gray arrows in Figure 2.
b.Align the holes on the Stacking Bracket with the holes on the oven and reinstall the screws.
Be sure to orient the bracket as shown in Figure 2, above.
6.Remove the screws from the oven that will be placed on top, as marked with black arrows in Figure 2.
7.Place the oven on top of the oven that has the Stacking Bracket attached.
WARNING: Do not attempt to lift the oven with fewer than 2 people.
WARNING: When lifting the oven, position at least one person on each side. Do not lift the oven from the front and back, and do not use the handle to lift the oven.
8.Align the holes on the Stacking Bracket with the holes on the top oven and reinstall the screws.
WARNING: Do not stack ovens over two- high.
