R
Setting the Stud Welding Pistol
4.3Setting the spring pressure
The pressure with which the stud is pressed onto the workpiece during the welding process is referred to as spring pressure.
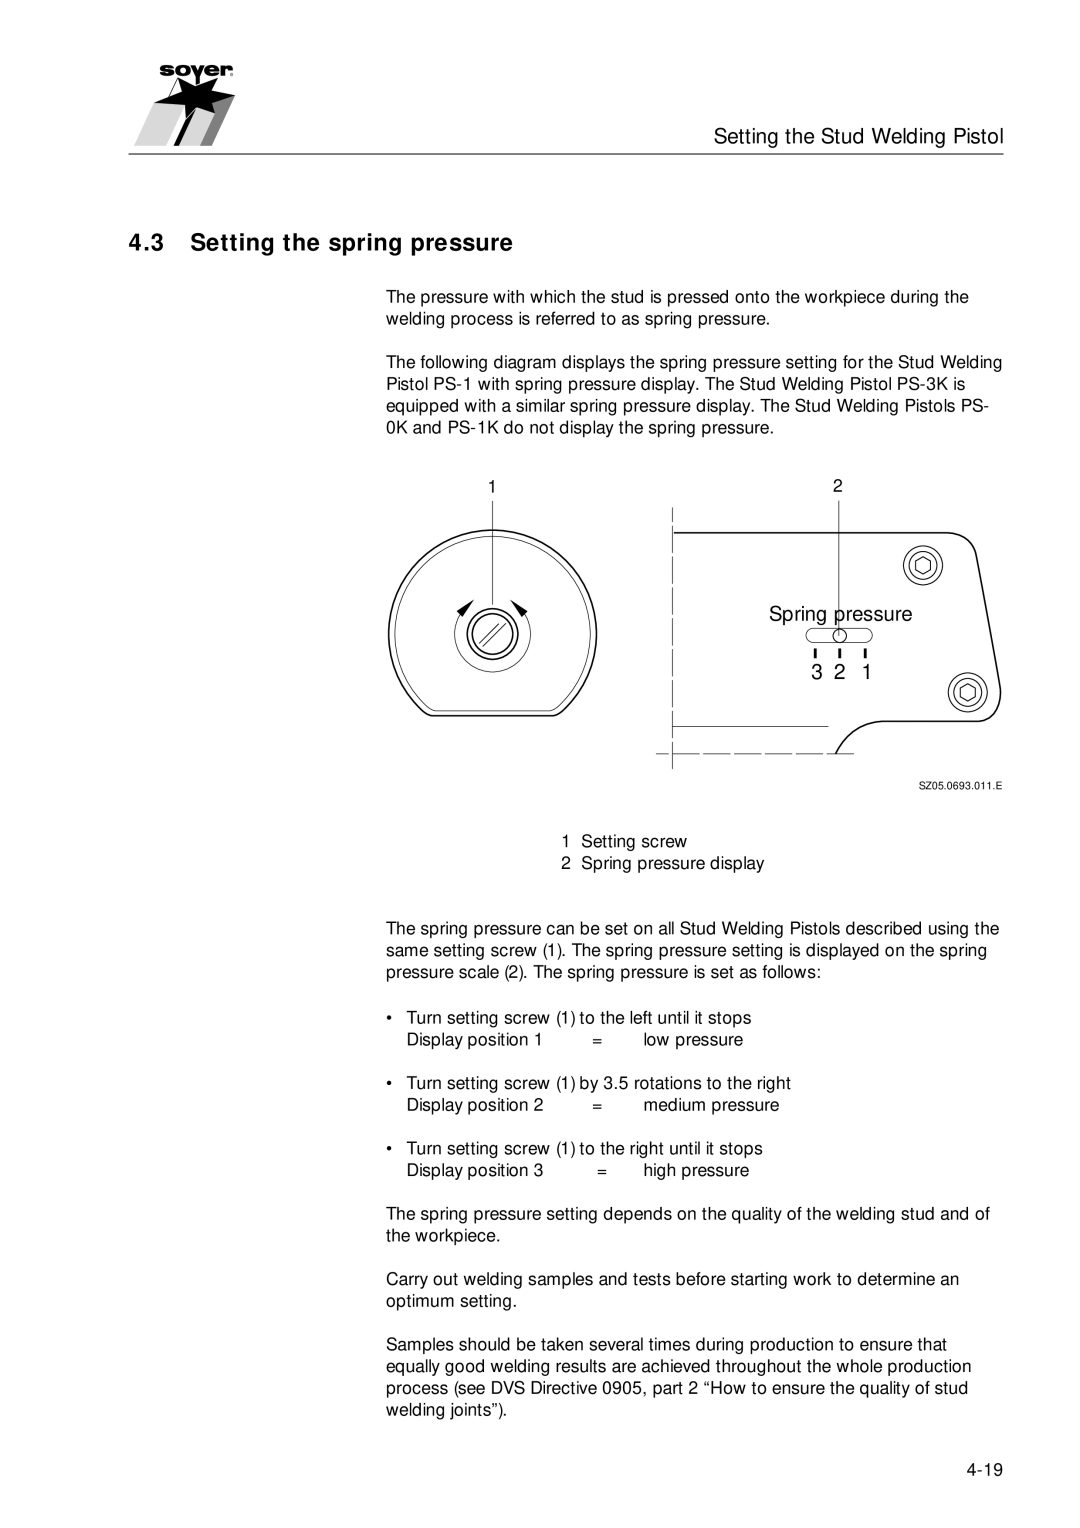
The following diagram displays the spring pressure setting for the Stud Welding Pistol
1 | 2 |
Spring pressure
3 2 1
SZ05.0693.011.E
1 Setting screw
2 Spring pressure display
The spring pressure can be set on all Stud Welding Pistols described using the same setting screw (1). The spring pressure setting is displayed on the spring pressure scale (2). The spring pressure is set as follows:
•Turn setting screw (1) to the left until it stops
Display position 1 | = | low pressure |
•Turn setting screw (1) by 3.5 rotations to the right
Display position 2 | = | medium pressure |
•Turn setting screw (1) to the right until it stops
Display position 3 | = | high pressure |
The spring pressure setting depends on the quality of the welding stud and of the workpiece.
Carry out welding samples and tests before starting work to determine an optimum setting.
Samples should be taken several times during production to ensure that equally good welding results are achieved throughout the whole production process (see DVS Directive 0905, part 2 “How to ensure the quality of stud welding joints”).