R
Setting the Stud Welder Pistol
4.2Installing the stud holder in the Stud Welding Pistol
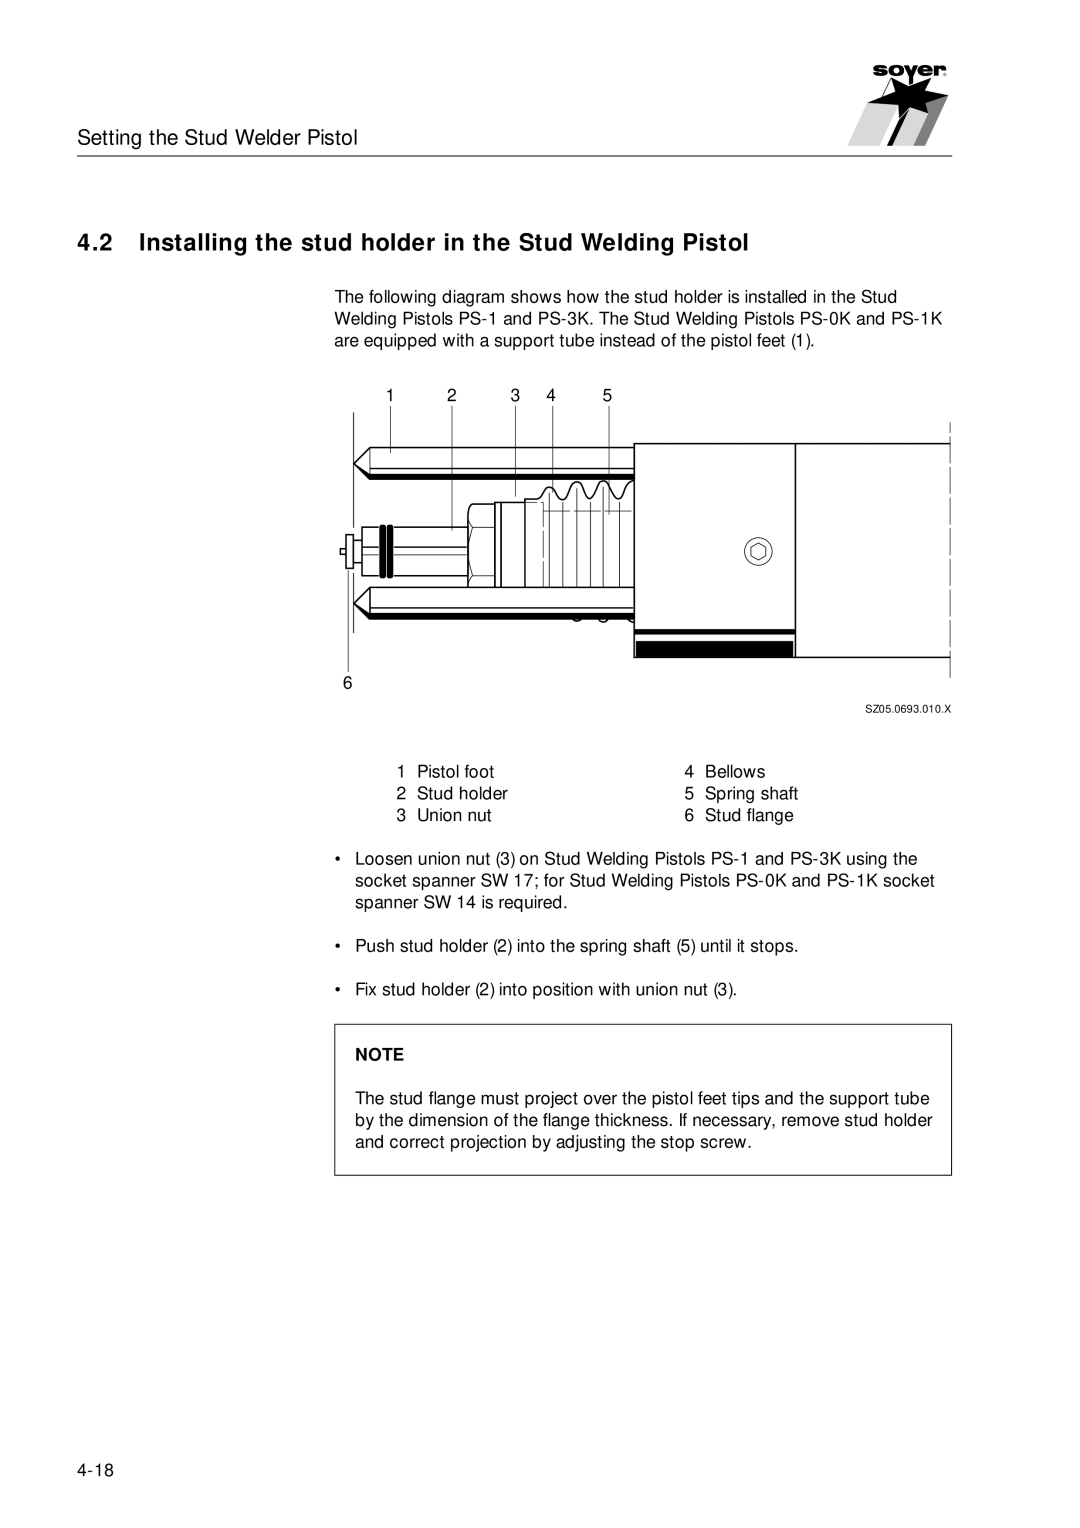
The following diagram shows how the stud holder is installed in the Stud Welding Pistols
1 2 3 4 5
6
SZ05.0693.010.X
1 | Pistol foot | 4 | Bellows |
2 | Stud holder | 5 | Spring shaft |
3 | Union nut | 6 | Stud flange |
•Loosen union nut (3) on Stud Welding Pistols
•Push stud holder (2) into the spring shaft (5) until it stops.
•Fix stud holder (2) into position with union nut (3).
NOTE
The stud flange must project over the pistol feet tips and the support tube by the dimension of the flange thickness. If necessary, remove stud holder and correct projection by adjusting the stop screw.