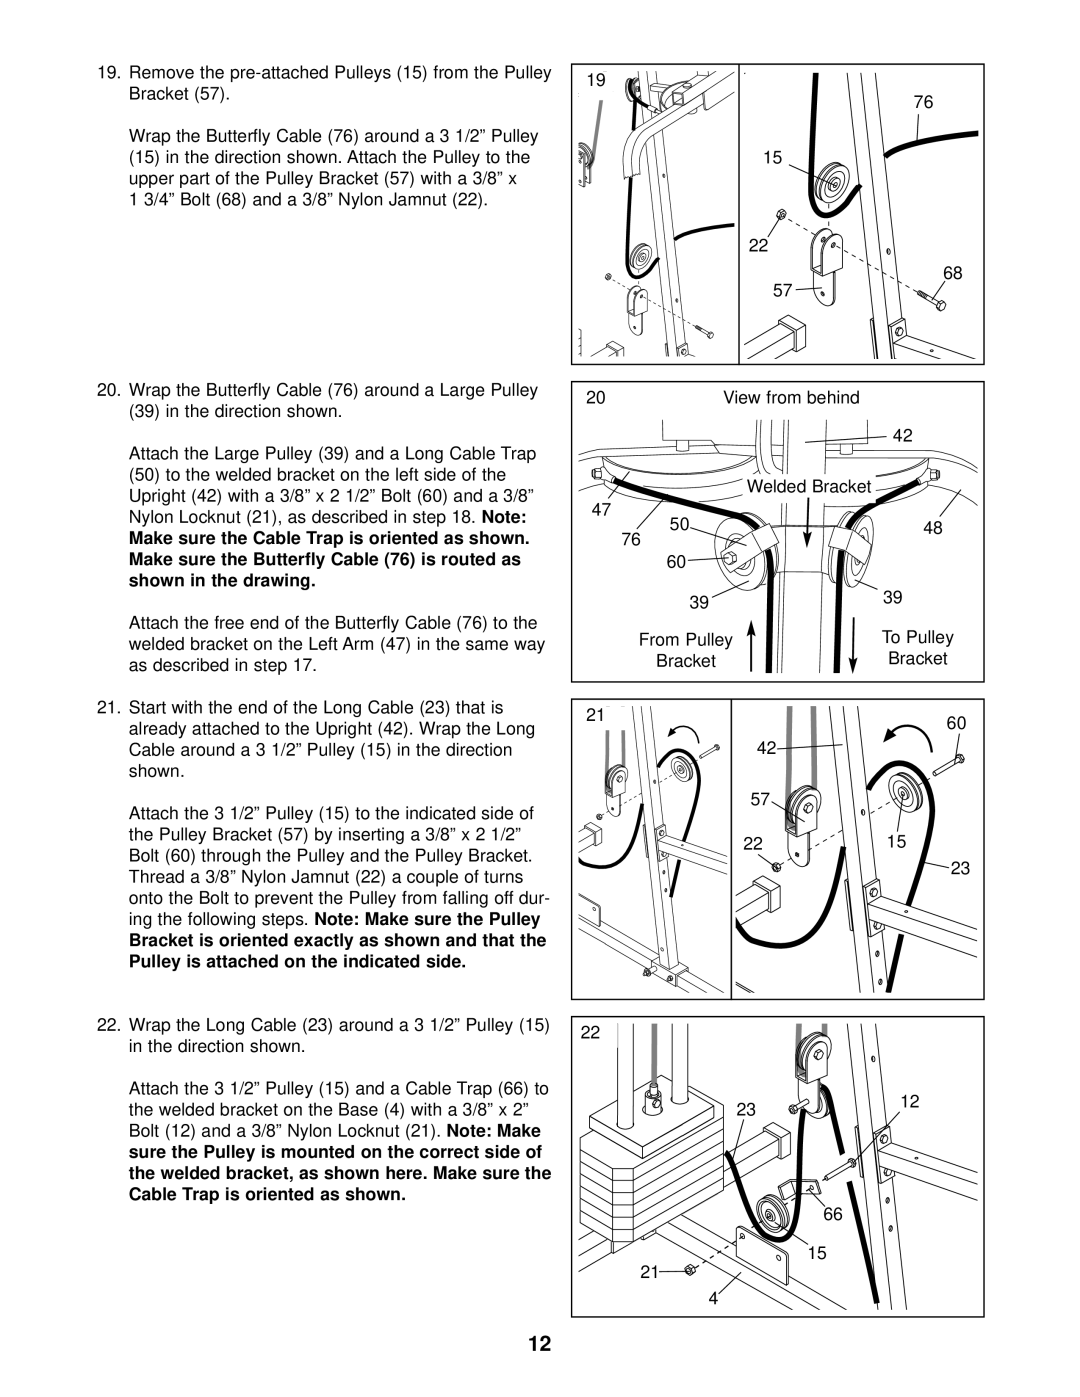
19.Remove the
Wrap the Butterfly Cable (76) around a 3 1/2” Pulley
(15)in the direction shown. Attach the Pulley to the upper part of the Pulley Bracket (57) with a 3/8” x 1 3/4” Bolt (68) and a 3/8” Nylon Jamnut (22).
20.Wrap the Butterfly Cable (76) around a Large Pulley
(39)in the direction shown.
Attach the Large Pulley (39) and a Long Cable Trap
(50) to the welded bracket on the left side of the
Upright (42) with a 3/8” x 2 1/2” Bolt (60) and a 3/8”
Nylon Locknut (21), as described in step 18.Note:
Make sure the Cable Trap is oriented as shown. Make sure the Butterfly Cable (76) is routed as shown in the drawing.
Attach the free end of the Butterfly Cable (76) to the welded bracket on the Left Arm (47) in the same way as described in step 17.
21.Start with the end of the Long Cable (23) that is already attached to the Upright (42). Wrap the Long Cable around a 3 1/2” Pulley (15) in the direction shown.
Attach the 3 1/2” Pulley (15) to the indicated side of the Pulley Bracket (57) by inserting a 3/8” x 2 1/2” Bolt (60) through the Pulley and the Pulley Bracket. Thread a 3/8” Nylon Jamnut (22) a couple of turns
onto the Bolt to prevent the Pulley from falling off dur-
ing the following steps. Note: Make sure the Pulley
Bracket is oriented exactly as shown and that the Pulley is attached on the indicated side.
22.Wrap the Long Cable (23) around a 3 1/2” Pulley (15) in the direction shown.
Attach the 3 1/2” Pulley (15) and a Cable Trap (66) to the welded bracket on the Base (4) with a 3/8” x 2”
Bolt (12) and a 3/8” Nylon Locknut (21). Note: Make sure the Pulley is mounted on the correct side of
the welded bracket, as shown here. Make sure the Cable Trap is oriented as shown.
12
19 |
|
| 76 |
| 15 |
| 22 |
| 68 |
| 57 |
20 | View from behind |
| 42 |
Welded Bracket |
|
47 |
|
50 | 48 |
76 |
|
60 |
|
39 | 39 |
| |
From Pulley | To Pulley |
Bracket | Bracket |
21 | 60 |
| |
42 |
|
57 |
|
22 | 15 |
| 23 |
22 |
|
23 | 12 |
| |
66 |
|
15 |
|
21 |
|
4 |
|