16.Press a 1 3/4Ó Square Inner Cap (48) into the lower end of the Left Arm (6). Wet the lower end of the Left Arm with soapy water. Slide a 10Ó Pad (45) onto the Left Arm.
Repeat this step with the Right Arm (5).
Note: The remaining parts from the parts bag labeled ÒARM ASSEMBLYÓ will be used in assembly step 55.
Cable Assembly
17.Locate and open the parts bags labeled ÒCABLE ASSEMBLYÓ and ÒPULLEYS.Ó
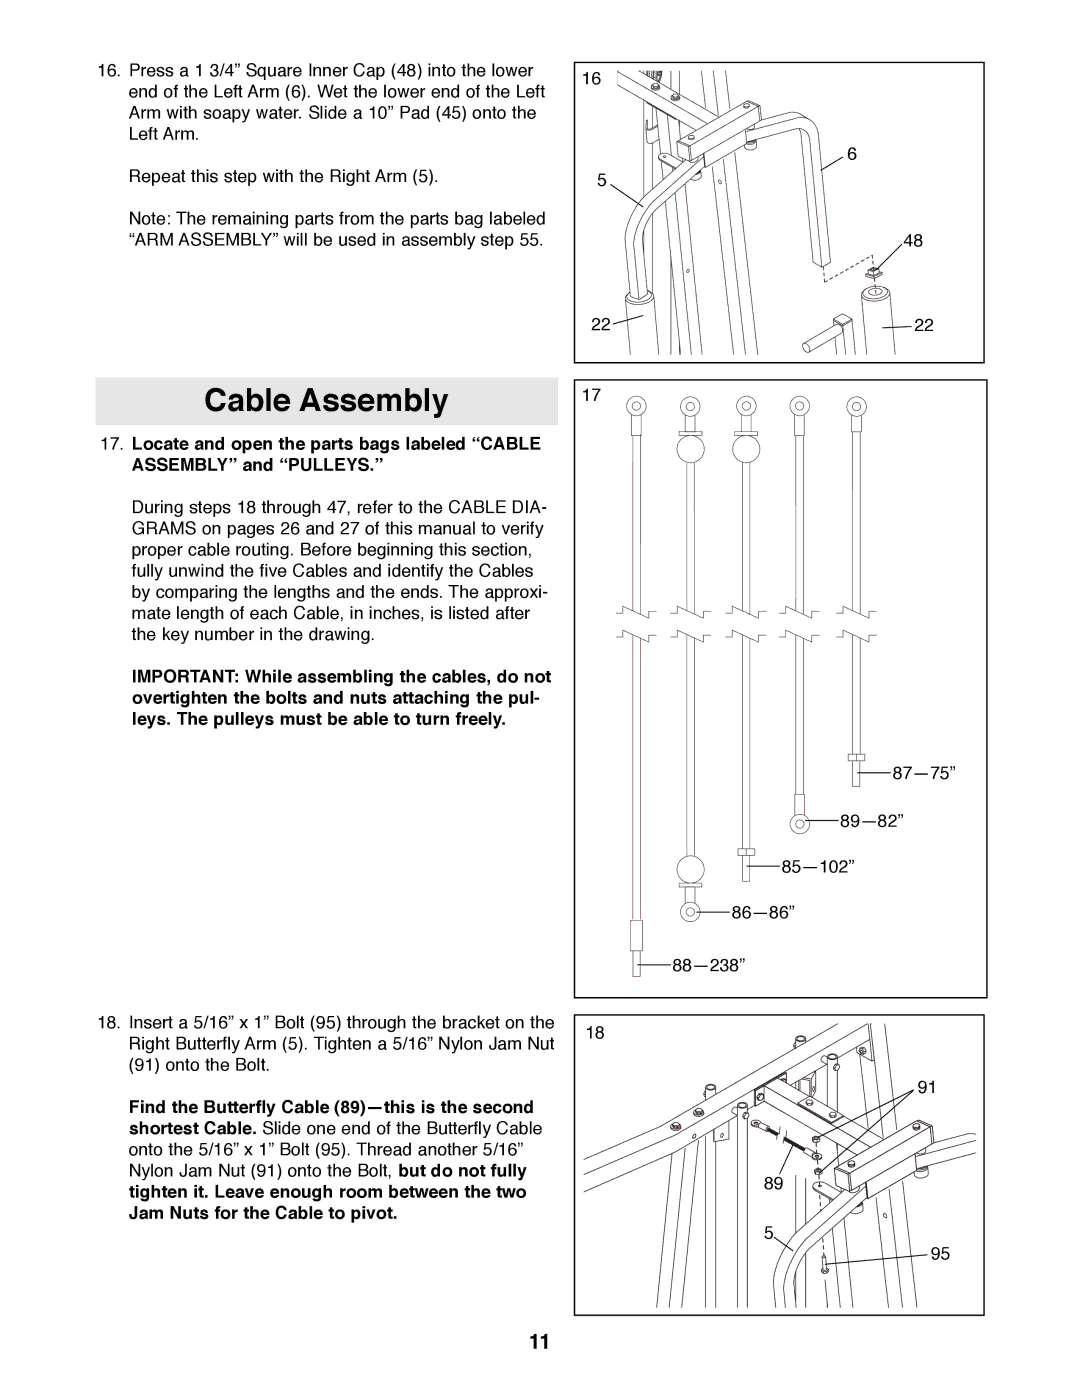
During steps 18 through 47, refer to the CABLE DIA- GRAMS on pages 26 and 27 of this manual to verify proper cable routing. Before beginning this section, fully unwind the five Cables and identify the Cables by comparing the lengths and the ends. The approxi- mate length of each Cable, in inches, is listed after the key number in the drawing.
IMPORTANT: While assembling the cables, do not overtighten the bolts and nuts attaching the pul- leys. The pulleys must be able to turn freely.
16
6
5
48
22 | 22 |
17
87Ñ75Ó
89Ñ82Ó
85Ñ102Ó
86Ñ86Ó
88Ñ238Ó
18.Insert a 5/16Ó x 1Ó Bolt (95) through the bracket on the Right Butterfly Arm (5). Tighten a 5/16Ó Nylon Jam Nut (91) onto the Bolt.
Find the Butterfly Cable (89)Ñthis is the second shortest Cable. Slide one end of the Butterfly Cable onto the 5/16Ó x 1Ó Bolt (95). Thread another 5/16Ó Nylon Jam Nut (91) onto the Bolt, but do not fully tighten it. Leave enough room between the two Jam Nuts for the Cable to pivot.
18 |
91 |
89 |
5 |
95 |
11