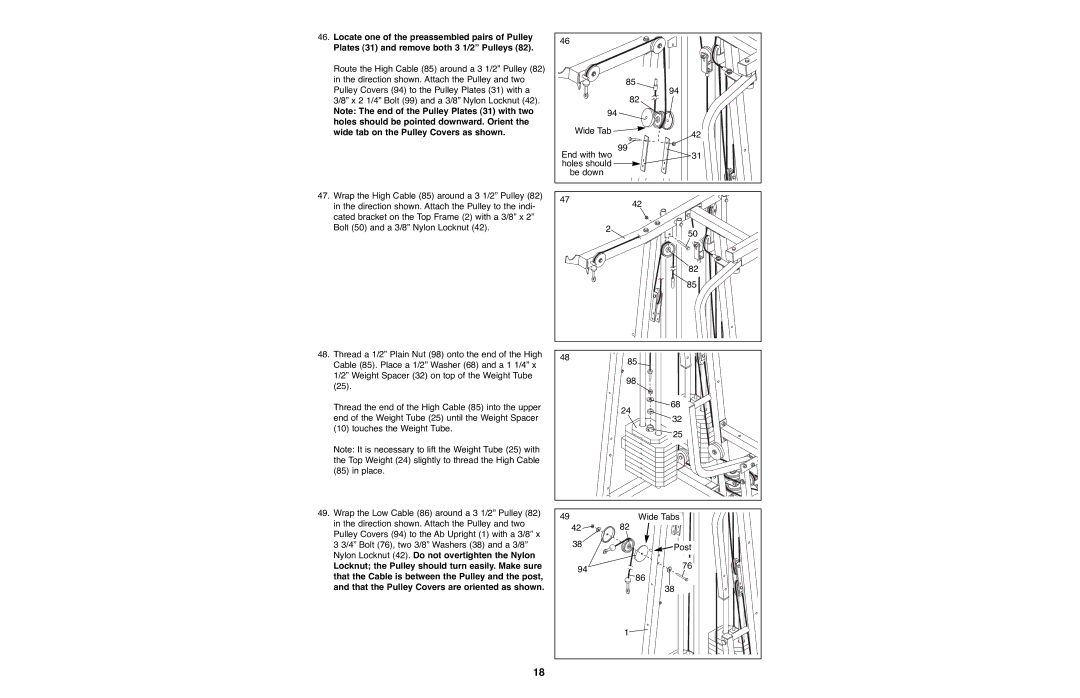
46.Locate one of the preassembled pairs of Pulley Plates (31) and remove both 3 1/2Ó Pulleys (82).
Route the High Cable (85) around a 3 1/2Ó Pulley (82) in the direction shown. Attach the Pulley and two Pulley Covers (94) to the Pulley Plates (31) with a 3/8Ó x 2 1/4Ó Bolt (99) and a 3/8Ó Nylon Locknut (42).
Note: The end of the Pulley Plates (31) with two holes should be pointed downward. Orient the wide tab on the Pulley Covers as shown.
47.Wrap the High Cable (85) around a 3 1/2Ó Pulley (82) in the direction shown. Attach the Pulley to the indi- cated bracket on the Top Frame (2) with a 3/8Ó x 2Ó Bolt (50) and a 3/8Ó Nylon Locknut (42).
48.Thread a 1/2Ó Plain Nut (98) onto the end of the High Cable (85). Place a 1/2Ó Washer (68) and a 1 1/4Ó x 1/2Ó Weight Spacer (32) on top of the Weight Tube (25).
Thread the end of the High Cable (85) into the upper end of the Weight Tube (25) until the Weight Spacer (10) touches the Weight Tube.
Note: It is necessary to lift the Weight Tube (25) with the Top Weight (24) slightly to thread the High Cable
(85)in place.
49.Wrap the Low Cable (86) around a 3 1/2Ó Pulley (82) in the direction shown. Attach the Pulley and two Pulley Covers (94) to the Ab Upright (1) with a 3/8Ó x 3 3/4Ó Bolt (76), two 3/8Ó Washers (38) and a 3/8Ó Nylon Locknut (42). Do not overtighten the Nylon
Locknut; the Pulley should turn easily. Make sure that the Cable is between the Pulley and the post, and that the Pulley Covers are oriented as shown.
46 |
| |
| 85 | |
| 94 | |
| 82 | |
94 |
| |
Wide Tab | 42 | |
| ||
End with two | 99 | |
31 | ||
holes should |
| |
be down |
| |
47 | 42 | |
| ||
2 | 50 | |
| ||
| 82 | |
| 85 | |
48 | 85 | |
| ||
| 98 | |
| 68 | |
| 24 | |
| 32 | |
| 25 | |
49 | Wide Tabs | |
42 | 82 | |
38 | Post | |
| ||
94 | 76 | |
86 | ||
| ||
| 38 | |
| 1 |
18