THROUGH-THE-WALL INSTALLATION (without ductwork)
Mounting Bracket Installation
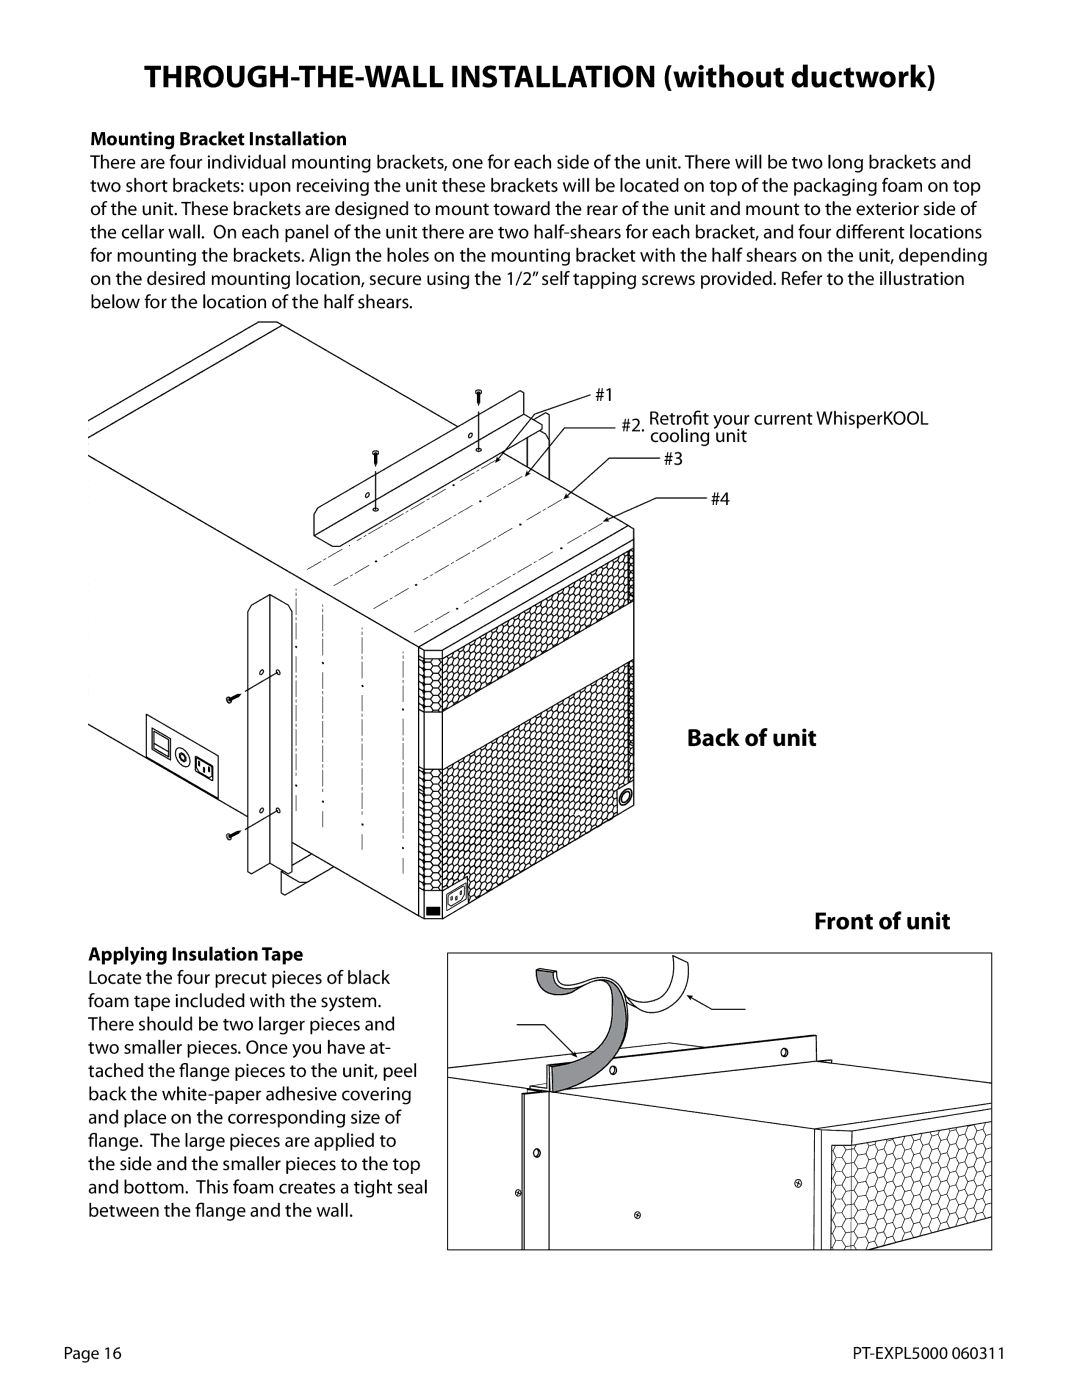
There are four individual mounting brackets, one for each side of the unit. There will be two long brackets and two short brackets: upon receiving the unit these brackets will be located on top of the packaging foam on top of the unit. These brackets are designed to mount toward the rear of the unit and mount to the exterior side of the cellar wall. On each panel of the unit there are two
#1
#2. Retrofit your current WhisperKOOL cooling unit
#3
#4
Back of unit
Front of unit
Applying Insulation Tape
Locate the four precut pieces of black foam tape included with the system. There should be two larger pieces and two smaller pieces. Once you have at- tached the flange pieces to the unit, peel back the
Page 16 |
|
