Machine Set-up
The saw delivered to you has been adjusted at the factory. A number of test pieces have been cut using the saw to verify the accuracy of cutting.
Therefore, the only
If ordered with the coolant kit, the kit is typically installed at the Wilton factory. However, if the kit is ordered separately by you, it must be installed by a
Uncrating and spotting the saw
Spot the saw where it makes the most sense for the operations you will probably be doing. If you are going to be doing
Remove the saw from the shipping skid and discard any
Note the lock plate on the arm of the saw which is secured under the bump rubber. This lock plate must be removed before the saw arm can be raised. You may discard the lock plate and cap screw used to hold it in place. Be sure, however, to replace the nut on the bottom of the horizontal stop.
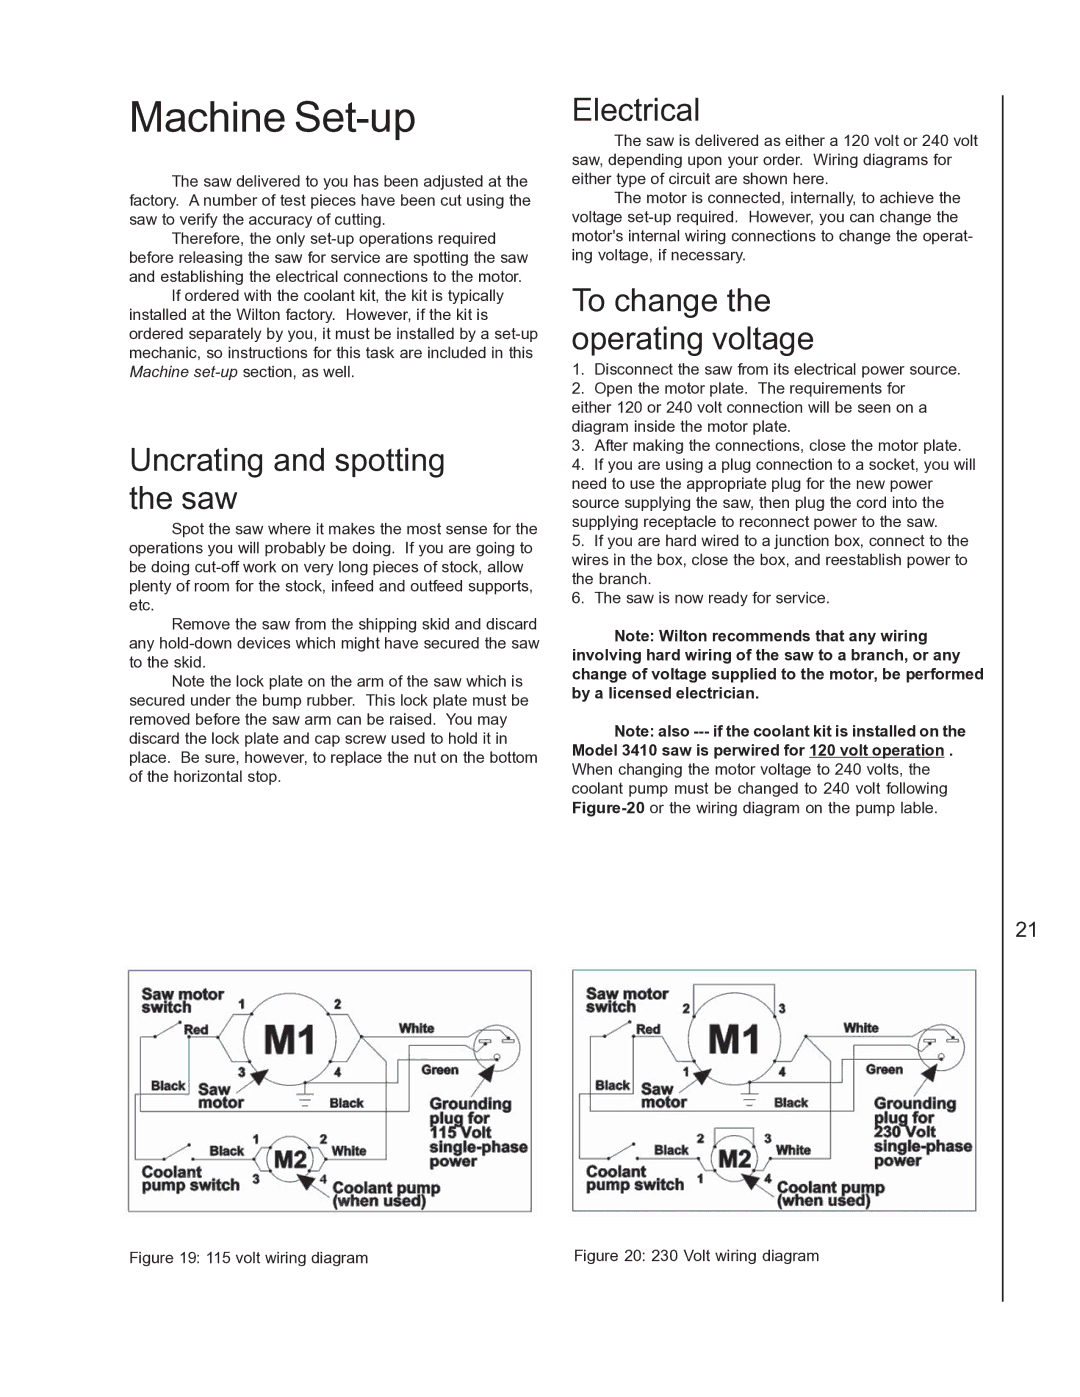
Figure 19: 115 volt wiring diagram
Electrical
The saw is delivered as either a 120 volt or 240 volt saw, depending upon your order. Wiring diagrams for either type of circuit are shown here.
The motor is connected, internally, to achieve the voltage
To change the operating voltage
1.Disconnect the saw from its electrical power source.
2.Open the motor plate. The requirements for
either 120 or 240 volt connection will be seen on a diagram inside the motor plate.
3.After making the connections, close the motor plate.
4.If you are using a plug connection to a socket, you will need to use the appropriate plug for the new power source supplying the saw, then plug the cord into the supplying receptacle to reconnect power to the saw.
5.If you are hard wired to a junction box, connect to the wires in the box, close the box, and reestablish power to the branch.
6.The saw is now ready for service.
Note: Wilton recommends that any wiring involving hard wiring of the saw to a branch, or any change of voltage supplied to the motor, be performed by a licensed electrician.
Note: also
Figure 20: 230 Volt wiring diagram
21