14
Maintenance
Replacing blades
1.Disconnect the saw from its electrical power source to prevent accidental
2.Raise the saw arm to its full vertical position and lock it in place using the quick shut off valve on the hydraulic control cylinder.
3.Lift the safety cover in the lower portion of the blade guard door by sliding it upward. There is no need to remove it completely from its slot.
4.Remove the two screws with plastic knobs which hold the blade guard door closed and swing the door open to expose the drive and idler wheels, and the blade.
5.Turn the blade tension handle counterclockwise until the blade hangs loose in the saw arm.
6.Use leather gloves to prevent cuts and scratches and use protective eyewear which meets ANSI Specification Z87.1. and pull the blade off of the drive wheels and out of the blade guides. Store the blade carefully before proceeding.
7.Slide the new blade into the blade guides
Note: it is possible to install the blade backwards. The teeth on the blade should be pointing downward, toward the motor, at the time the blade is installed.
8.Push the blade so it is seated against the shoulders of the wheels. When it is seated against the shoulders...
9....turn the blade tension wheel clockwise to increase tension on the blade. Don't
10.When you are satisfied that the saw is tensioned correctly, reconnect the saw to its electrical power source.
11.Check the tracking of the blade according to instructions in the section on Adjusting blade tracking, below.
12.Close the wheel guard door and secure it using the two plastic knobbed screws.
13.Slide the safety cover downward in its slot until it is fully closed.
14.The new blade is installed and ready for the Blade
Adjusting blade tracking
If the blade is fully tensioned, release tension slightly before attempting to adjust the saw blade tracking. A badly worn or bent blade will be extremely difficult to track properly
To adjust blade tracking:
1.Loosen the sliding plate draw block bolt slightly so the adjustment set screw will be able to move the draw block.
2.Turn the coolant pump switch OFF, if coolant is used.
3.Turn the saw ON.
4.Insert a 4mm hex wrench in the socket head track adjustment set screw.
5.Turn the track adjustment set screw so the blade starts to move away from the shoulder
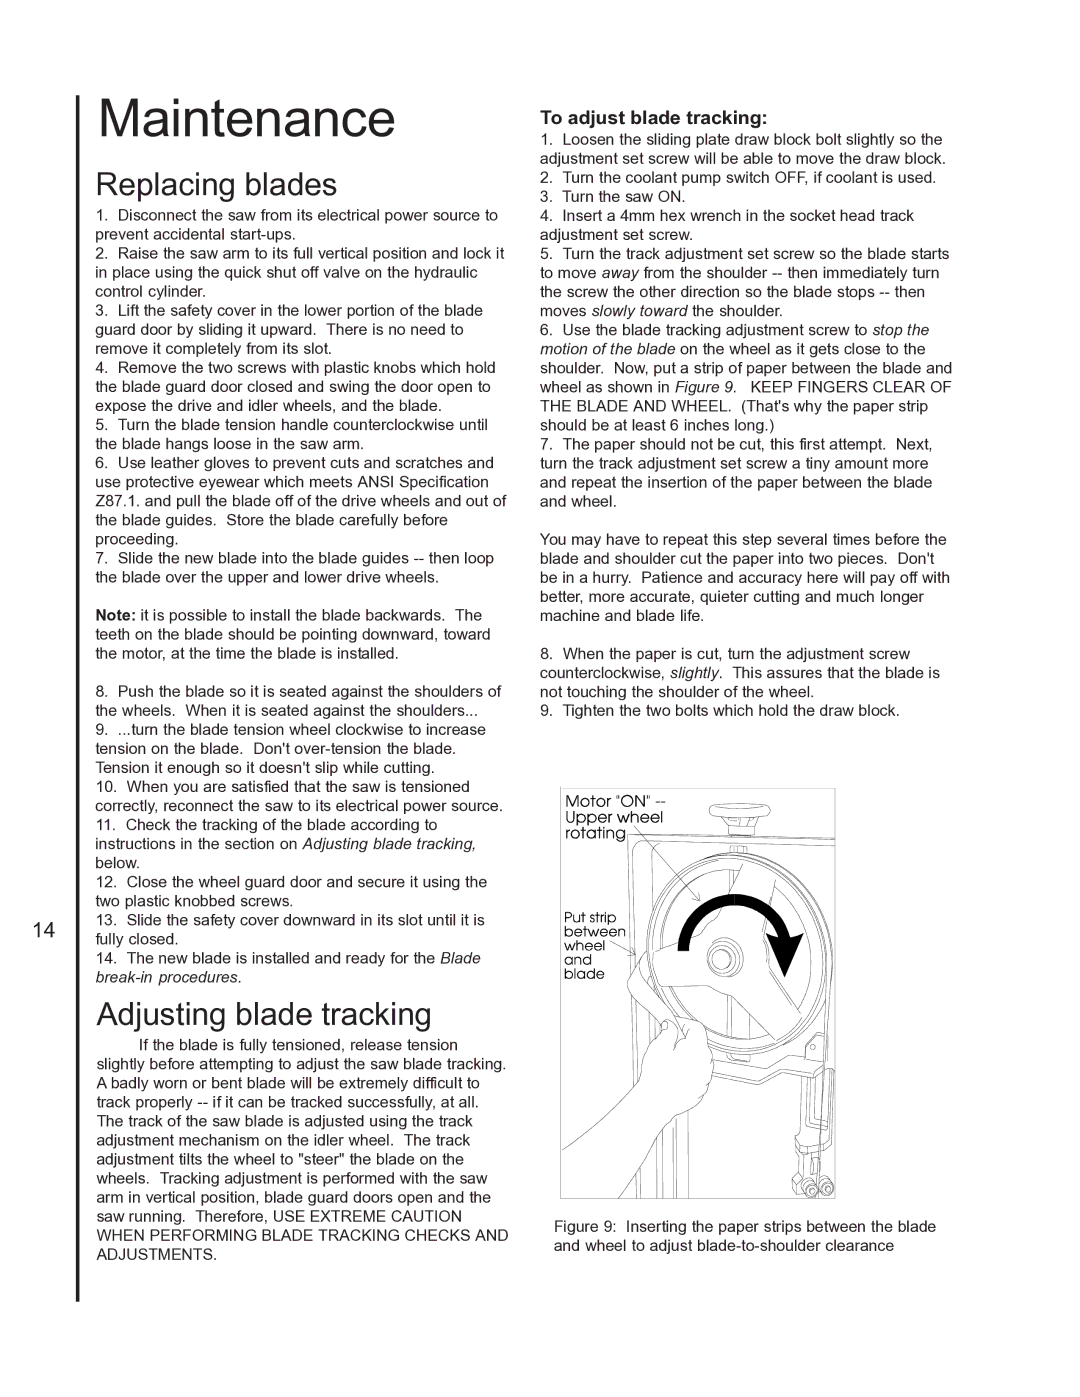
6.Use the blade tracking adjustment screw to stop the motion of the blade on the wheel as it gets close to the shoulder. Now, put a strip of paper between the blade and wheel as shown in Figure 9. KEEP FINGERS CLEAR OF THE BLADE AND WHEEL. (That's why the paper strip should be at least 6 inches long.)
7.The paper should not be cut, this first attempt. Next, turn the track adjustment set screw a tiny amount more and repeat the insertion of the paper between the blade and wheel.
You may have to repeat this step several times before the blade and shoulder cut the paper into two pieces. Don't be in a hurry. Patience and accuracy here will pay off with better, more accurate, quieter cutting and much longer machine and blade life.
8.When the paper is cut, turn the adjustment screw counterclockwise, slightly. This assures that the blade is not touching the shoulder of the wheel.
9.Tighten the two bolts which hold the draw block.