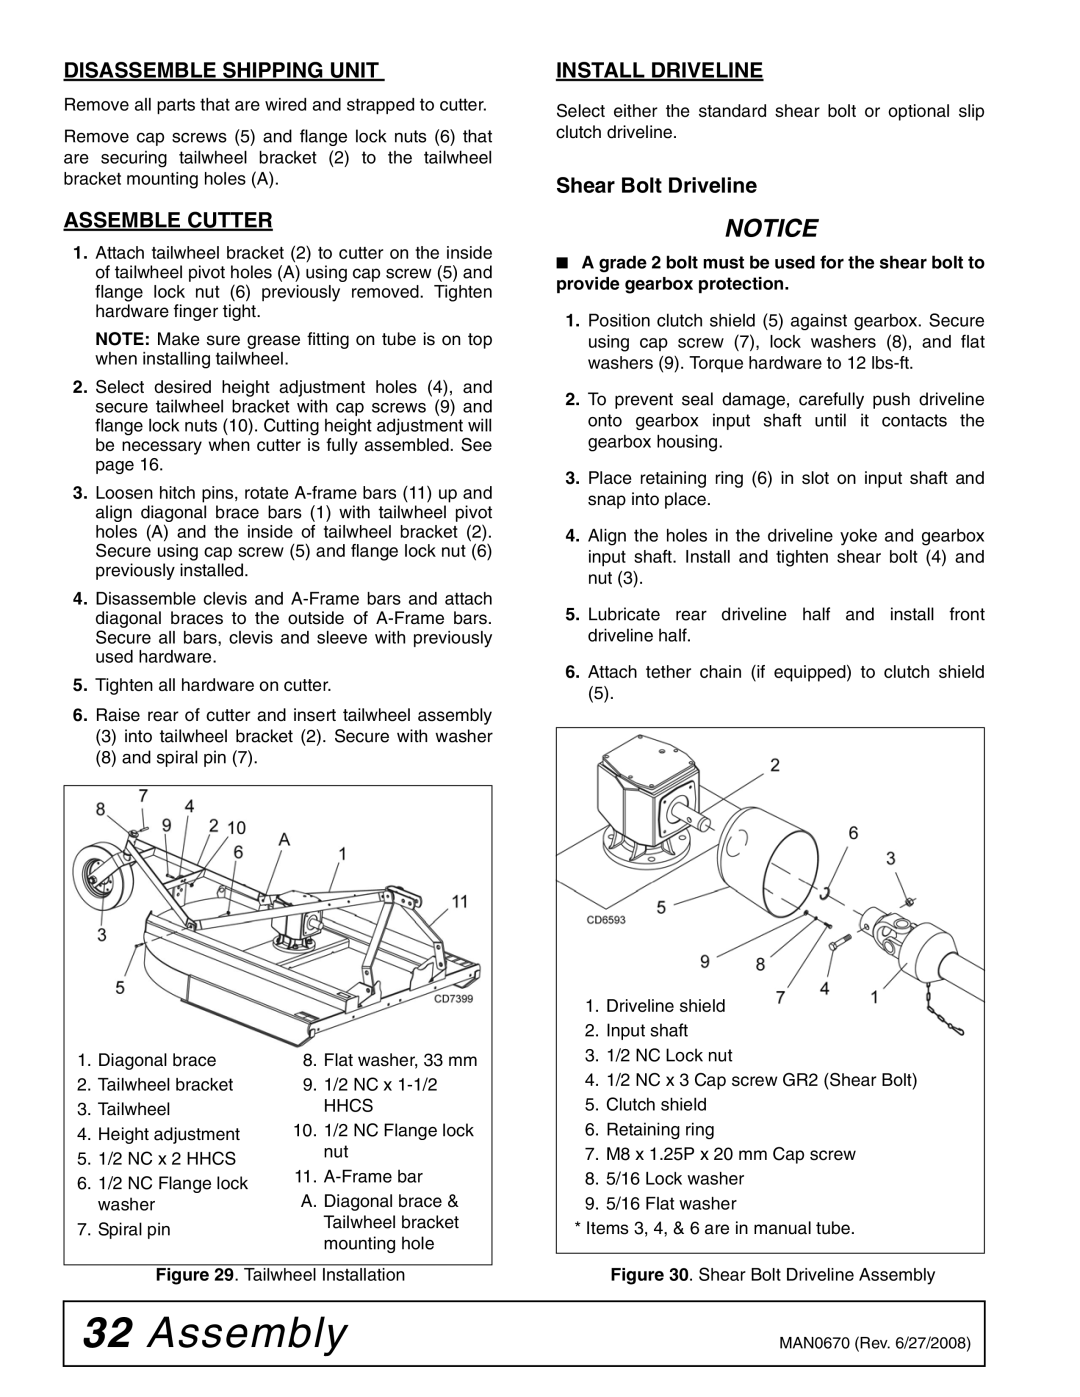
HC60, HC72, HC48, HC54 specifications
Woods Equipment Company is a renowned manufacturer of high-quality agricultural and landscape equipment, and their line of hydraulic cutters is no exception. The Woods HC series, which includes the HC48, HC54, HC60, and HC72 models, is designed for efficiency and versatility in various applications, making them ideal for landscapers, farmers, and contractors.One of the main features of Woods HC series cutters is their robust construction. These machines are built with high-strength materials, ensuring durability and longevity even in tough working conditions. The frames are designed to withstand significant stresses while providing stability during operation.
A standout characteristic of the HC series is its cutting capabilities. Each model is equipped with heavy-duty blades that are engineered to handle tough vegetation, including small trees, thick brush, and dense undergrowth. The cutting width increases with each model, ranging from 48 inches in the HC48 to 72 inches in the HC72, providing options for various land clearing tasks.
Another notable feature is the hydraulic drive system. This technology allows for smooth operation and precise control of cutting speed, improving overall efficiency. The hydraulic system is designed for optimal performance, ensuring that users can tackle even the most challenging jobs with ease.
The HC series also incorporates a user-friendly design. The implements are easy to attach and detach from tractors, facilitating quick transitions between different tasks. Woods has addressed safety concerns by integrating protective shielding around the cutting area, which minimizes the risk of debris being thrown during operation.
For ease of maintenance, the HC series models come with easily accessible service points, allowing operators to perform routine checks and maintenance without hassle. This feature contributes to the longevity of the equipment, ensuring that owners maximize their investment.
Compatibility is another essential advantage of the Woods HC series. Designed to work seamlessly with a variety of tractors, these cutters allow for flexibility across different tractor brands and models, making them a versatile choice for operators with mixed equipment lines.
In summary, Woods Equipment HC48, HC54, HC60, and HC72 hydraulic cutters stand out for their robust construction, cutting efficiency, hydraulic drive, user-friendly features, and compatibility with various tractors. These models are perfect for anyone looking to maintain their land effectively, making challenging cutting tasks accessible and manageable. Overall, the HC series is a reliable investment for professional land management needs.

