INSTRUCTION SHEET
Model W1718
Spiral Cutterhead Planer
INTRODUCTION
The Model W1718 is the same planer as the Model W1683 with the upgrade of the spiral cutterhead.
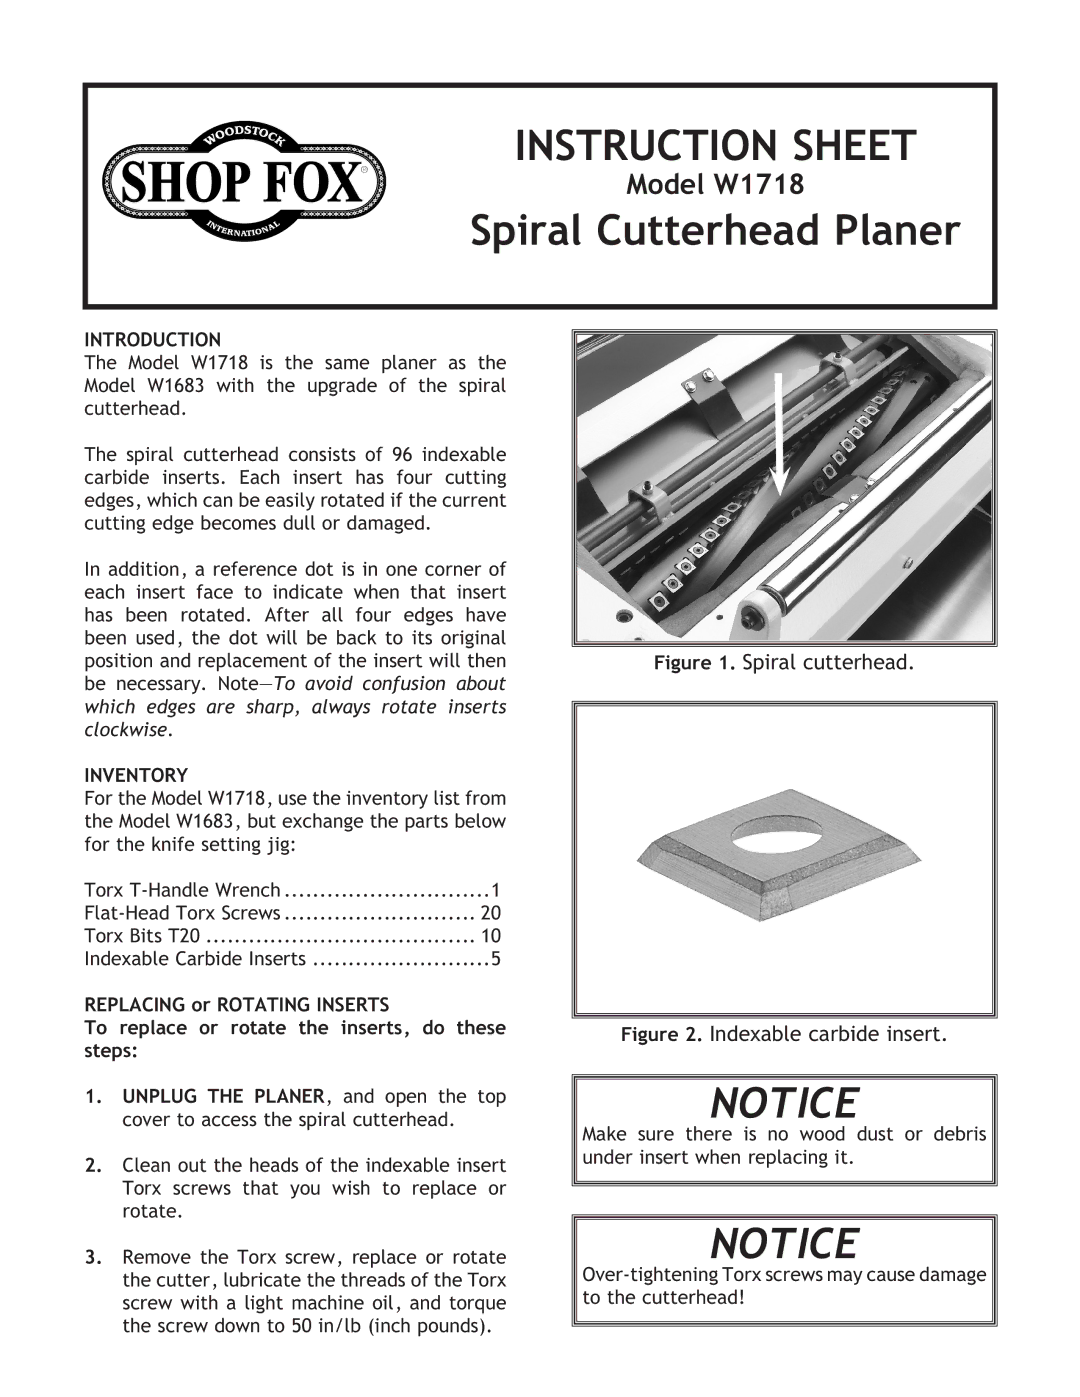
The spiral cutterhead consists of 96 indexable carbide inserts. Each insert has four cutting edges, which can be easily rotated if the current cutting edge becomes dull or damaged.
In addition, a reference dot is in one corner of each insert face to indicate when that insert has been rotated. After all four edges have been used, the dot will be back to its original position and replacement of the insert will then be necessary.
INVENTORY
For the Model W1718, use the inventory list from the Model W1683, but exchange the parts below for the knife setting jig:
Torx | 1 |
20 | |
Torx Bits T20 | 10 |
Indexable Carbide Inserts | 5 |
REPLACING or ROTATING INSERTS
To replace or rotate the inserts, do these steps:
Figure 1. Spiral cutterhead.
Figure 2. Indexable carbide insert.
1.UNPLUG THE PLANER, and open the top cover to access the spiral cutterhead.
2.Clean out the heads of the indexable insert Torx screws that you wish to replace or rotate.
3.Remove the Torx screw, replace or rotate the cutter, lubricate the threads of the Torx screw with a light machine oil, and torque the screw down to 50 in/lb (inch pounds).
NOTICE Make sure there is no wood dust or debris under insert when replacing it.
NOTICE