The power should not be connected to the planer at this time! If it is, serious injury may occur.
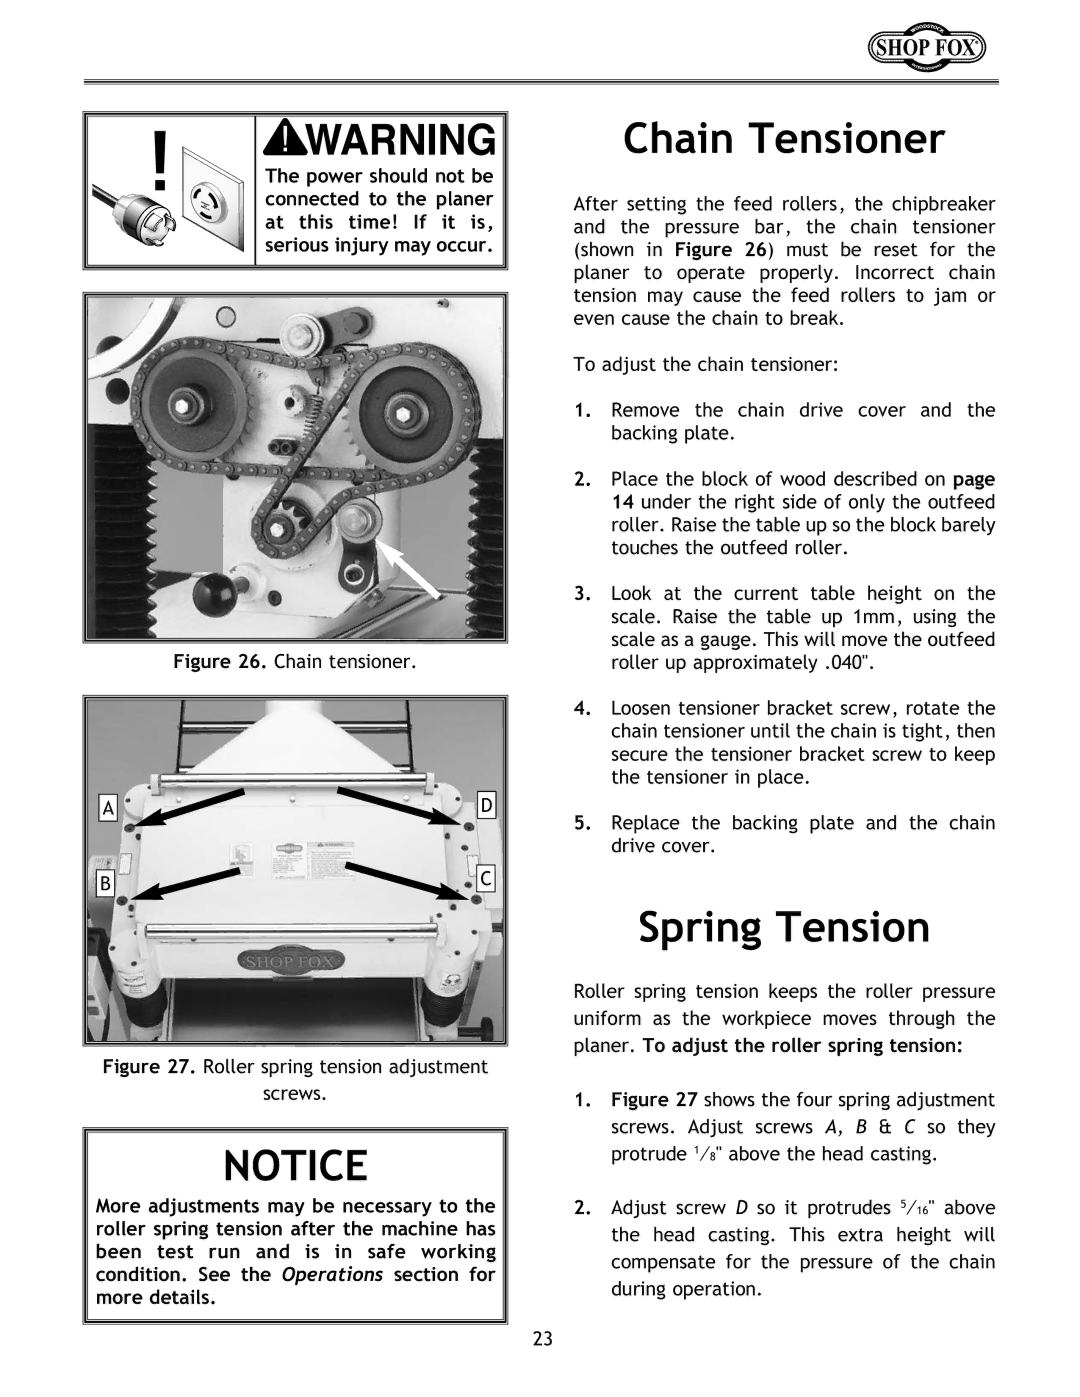
Figure 26. Chain tensioner.
A | D |
B | C |
Figure 27. Roller spring tension adjustment
screws.
NOTICE
More adjustments may be necessary to the roller spring tension after the machine has
been test run and is in safe working condition. See the Operations section for
more details.
Chain Tensioner
After setting the feed rollers, the chipbreaker and the pressure bar, the chain tensioner (shown in Figure 26) must be reset for the planer to operate properly. Incorrect chain tension may cause the feed rollers to jam or even cause the chain to break.
To adjust the chain tensioner:
1.Remove the chain drive cover and the backing plate.
2.Place the block of wood described on page 14 under the right side of only the outfeed roller. Raise the table up so the block barely touches the outfeed roller.
3.Look at the current table height on the scale. Raise the table up 1mm, using the scale as a gauge. This will move the outfeed roller up approximately .040".
4.Loosen tensioner bracket screw, rotate the chain tensioner until the chain is tight, then secure the tensioner bracket screw to keep the tensioner in place.
5.Replace the backing plate and the chain drive cover.
Spring Tension
Roller spring tension keeps the roller pressure uniform as the workpiece moves through the
planer. To adjust the roller spring tension:
1.Figure 27 shows the four spring adjustment screws. Adjust screws A, B & C so they protrude 1⁄8" above the head casting.
2.Adjust screw D so it protrudes 5⁄16" above the head casting. This extra height will compensate for the pressure of the chain during operation.
23