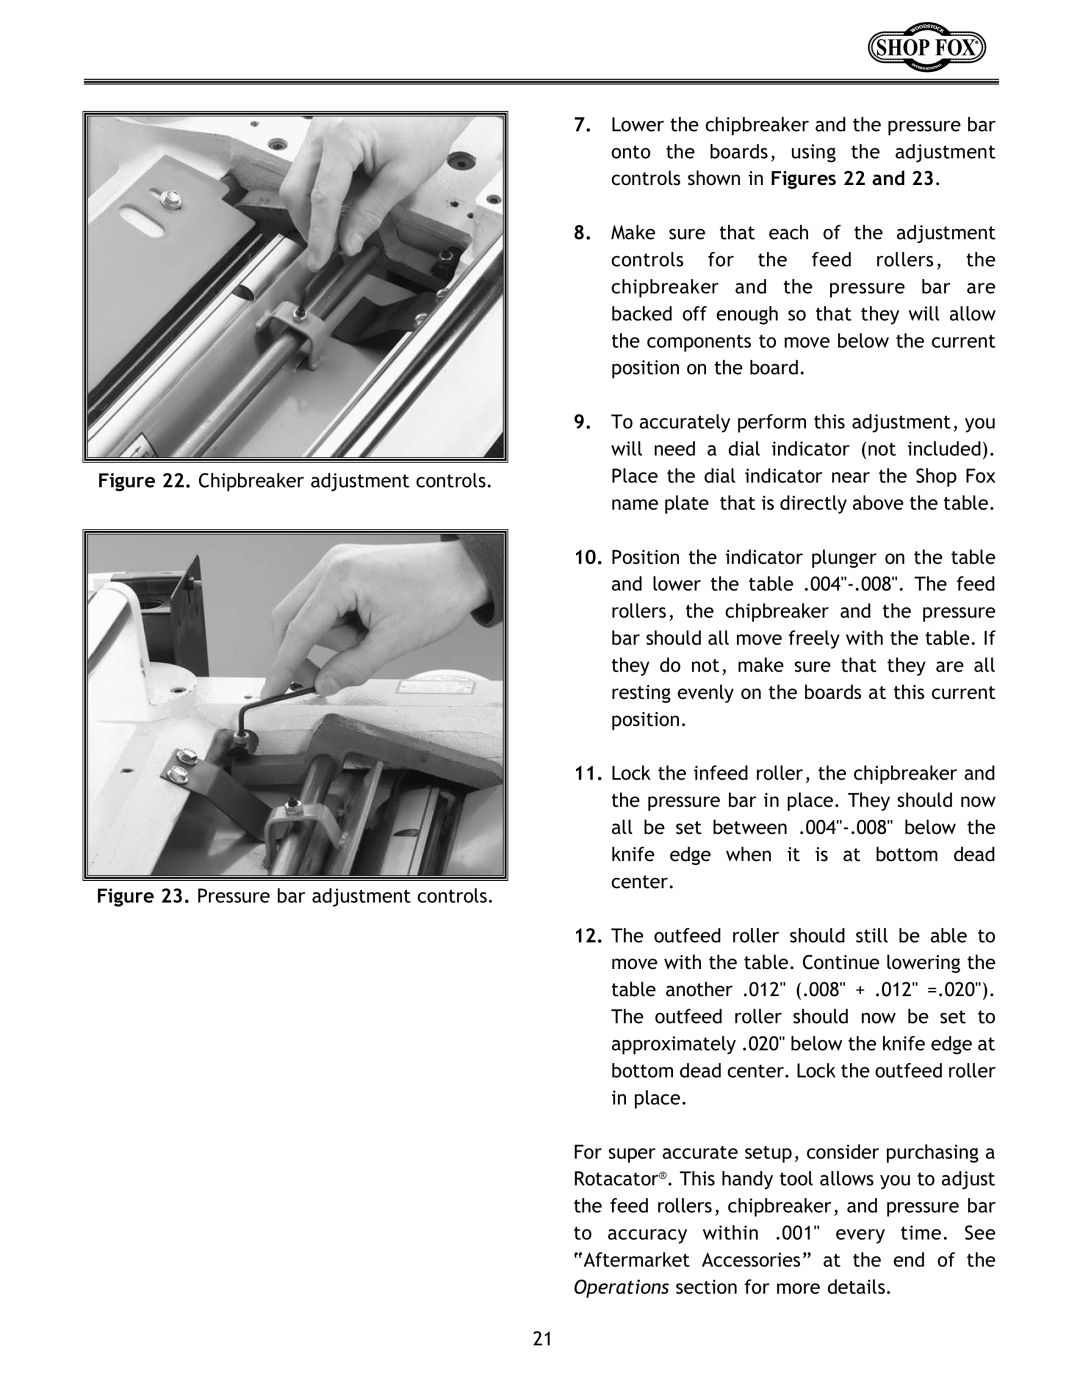
Figure 22. Chipbreaker adjustment controls.
Figure 23. Pressure bar adjustment controls.
7.Lower the chipbreaker and the pressure bar onto the boards, using the adjustment controls shown in Figures 22 and 23.
8.Make sure that each of the adjustment controls for the feed rollers, the chipbreaker and the pressure bar are backed off enough so that they will allow the components to move below the current position on the board.
9.To accurately perform this adjustment, you will need a dial indicator (not included). Place the dial indicator near the Shop Fox name plate that is directly above the table.
10.Position the indicator plunger on the table and lower the
11.Lock the infeed roller, the chipbreaker and the pressure bar in place. They should now all be set
12.The outfeed roller should still be able to move with the table. Continue lowering the table another .012" (.008" + .012" =.020"). The outfeed roller should now be set to approximately .020" below the knife edge at bottom dead center. Lock the outfeed roller in place.
For super accurate setup, consider purchasing a Rotacator®. This handy tool allows you to adjust the feed rollers, chipbreaker, and pressure bar to accuracy within .001" every time. See “Aftermarket Accessories” at the end of the Operations section for more details.
21