I N S T A L L I N G P R I N T H E A D S
Black Print Head
1
Carriage
Print Head
Latch
Lift up
1
Inkjets
Avoid contact
2 3
4
Color
Print Head
2
3
4
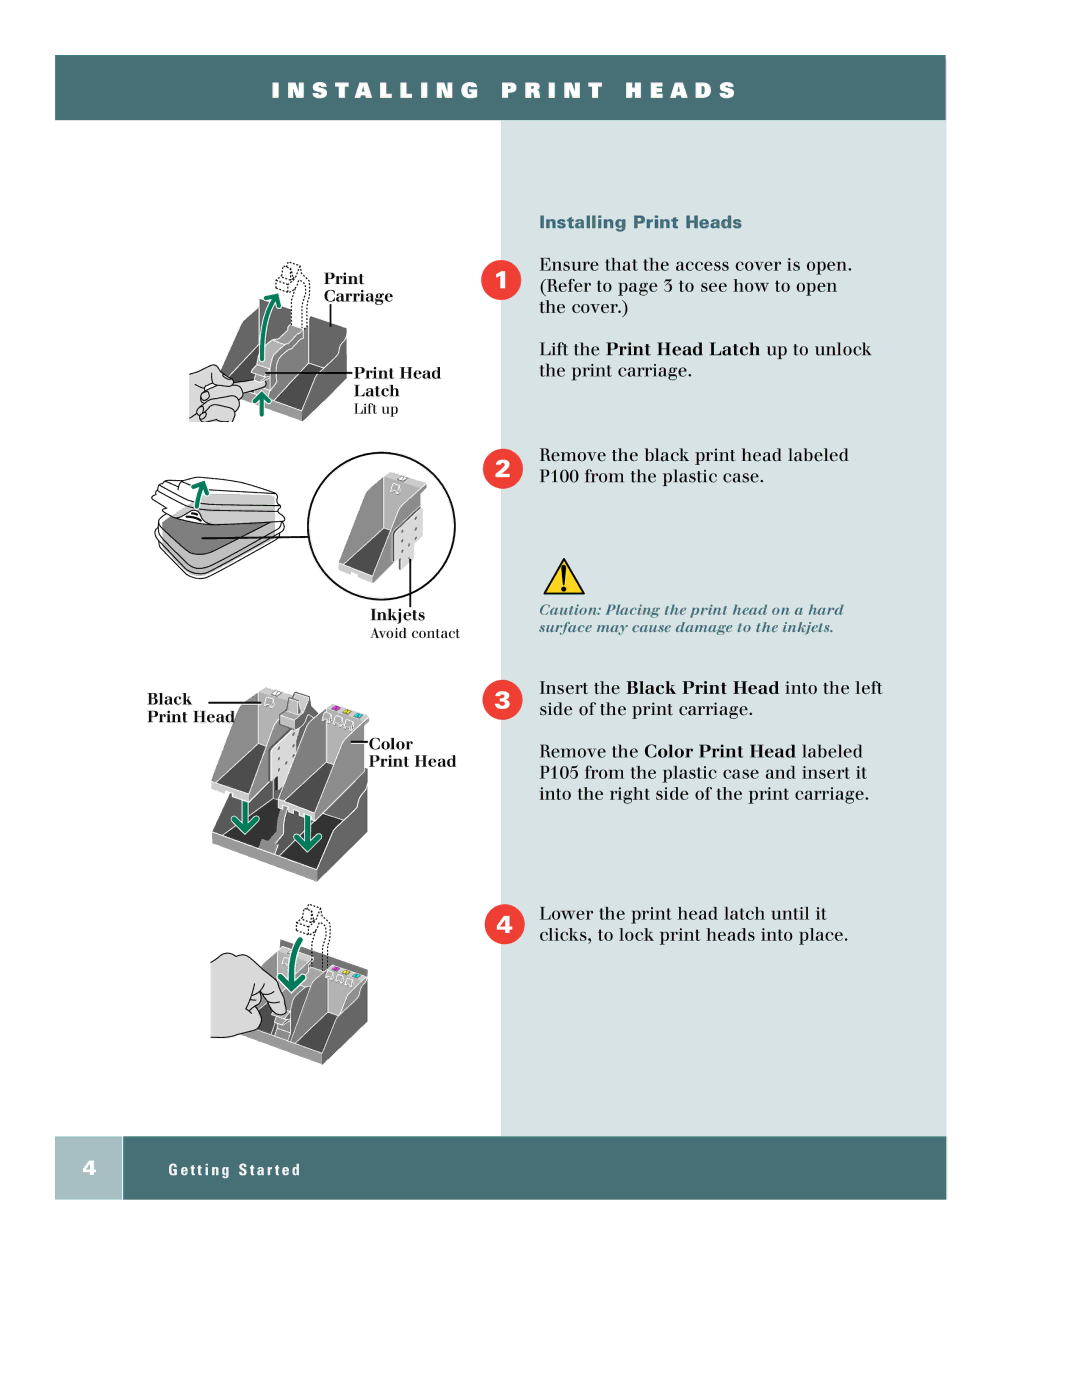
Installing Print Heads
Ensure that the access cover is open.
1 (Refer to page 3 to see how to open the cover.)
Lift the Print Head Latch up to unlock the print carriage.
2 | Remove the black print head labeled |
P100 from the plastic case. |
Caution: Placing the print head on a hard surface may cause damage to the inkjets.
3 | Insert the Black Print Head into the left |
side of the print carriage. |
Remove the Color Print Head labeled P105 from the plastic case and insert it into the right side of the print carriage.
4 | Lower the print head latch until it |
| clicks, to lock print heads into place. |
4